Controls
Controls can be placed on the GraphWorX64design surface to perform a variety of functions.
- GraphWorX64 Viewer
- TrendWorX64 Viewer
- AlarmWorX64 Viewer
- GridWorX Viewer
- EarthWorX Viewer
- PushPin
- SmartPin
- Smart Tile
- Scale Control
- Pipe Control
- Camera Control
- Pivot Control
- Asset Navigator
- Fault Viewer
- Table
- Schedule Control
- Recipe Navigator
- Recipe Grid
- Web Browser
- Data Explorer
- Security Indicator
- Security Login
- Data Diagram
- Heatmap
- Sankey Diagram
- ReportWorX64 Viewer
- ReportWorX64 Navigator
- BridgeWorX64 Viewer
- BridgeWorX64 Navigator
Controls use an embedded window contained within your GraphWorX64 display. Embedded windows in a display can be moved within the window, and they can be re-sized, but they have no independent existence outside the GraphWorX display to which they are added. When you close the GraphWorX display, the control is closed. If you move the embedded window or control within the display, the display behaves as if it is a viewport and will crop any area of the control that is moved outside the display window.
To add GENESIS64 controls to the design surface, you can use both the Toolbox, and the Controls tab group on the Controls ribbon. The Toolbox is often docked at the left side of the GraphWorX configuration window, and can be either shown or hidden by enabling or disabling the Toolbox check box in the Show/Hide tab group on the View ribbon. The Toolbox can be pinned as a tab to a side of the display, or it can float freely when you unpin it from its docked state. In the figure below the toolbox is shown in its docked condition.
ToAdd a Controlto a Display:
-
Click the Toolbox to open it to view, or click the Controls ribbon.
The Controls Ribbon

-
Click the control you want to add to the design surface. Then move the mouse to the design surface; the cursor changes to a plus sign with the view type icon on it.
-
Click the design surface to place a default-sized viewer on the work surface. Or, if you are using the Toolbox, click and drag the control to the work surface.
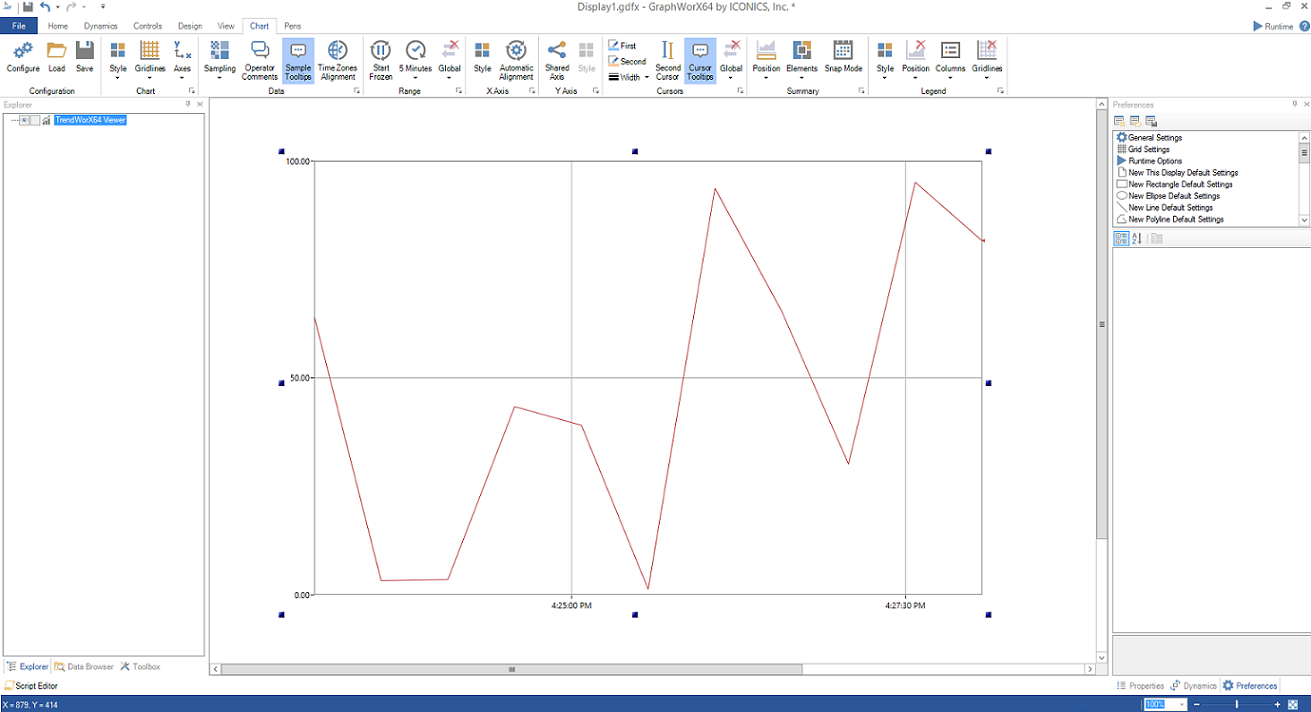
The viewer appears selected within the GraphWorX64 window, as shown for the TrendWorX64 Viewer shown below.
A TrendWorX64 Viewer at the Default Size

Notice that when you insert a control and make it active, a ribbon for that control is added to the top of the work area. The TrendWorX64, AlarmWorX64, GridWorX64, and EarthWorX controls each have their own unique ribbon for working inside them. If you add a GraphWorX64 Viewer, you can use the GraphWorX64 ribbons to work inside it.
In the illustration above, you can see the ribbon updated to work with the TrendWorX64 Viewer control. It is on that ribbon that you can access the viewer's features. For example, for TrendWorX, if you were to click the Configure button, you would open up the TrendWorX64 configurator so that the complete range of trending tools would be available to you to alter pens, change the display, set data sources, and so forth.
-
Create the content that will appear inside the control.
See Also: