Useful Tips for Working in GraphWorX64
GraphWorX64’s development environment offers a large variety of features and tools at your fingertips. This topic provides helpful hints for using GraphWorX64 and its many features and tools.
|
|
Note: This topic does not list everything that is available to you in GraphWorX64. If you are looking for a comprehensive list of all of features, go to the Contents tab (located on the left side of your GraphWorX64 online help) and expand the GraphWorX64 folder. In this folder, you can explore all of the features of GraphWorX64. |
Tutorials and Examples
The ICONICS GenDemo has several industry examples that show you ways to put GraphWorX64 to work for you. These demos are stored in the GenDemo library as GraphWorX64 files. You can open them in GraphWorX64 to look at their configurations. The GenDemo also has a number of 2D and 3D Industry Case Studies. The GenDemo also comes with a Learning Center where you can learn more about features in GraphWorX64. The Learning Center is interactive and lets you explore each feature and even provides examples.
Easy Orientation in a Display
The Object Explorer is the GraphWorX64 tree control that lists all of the objects currently defined on the GraphWorX64 display. This includes all of the objects and groups that are visible and editable, as well as those that are hidden. The Object Explorer lists objects in a hierarchical outline; this removes the need for you to drill down through several levels to get an object that is in a group or symbol. You can also reorganize objects by dragging and dropping them inside the Explorer tree. For more details, refer to the Object Explorer topic.
To make the Object Explorer more useful, follow these guidelines:
- Give objects a name; don't just rely on the default names given to them by GraphWorX64. Giving them meaningful names will help you use the Object Explorer to quickly find what you are looking for. It is even more helpful to name Groups descriptively so you can quickly identify the group's contents.
- Use objects' Descriptionand Title properties to help explain what the display is about. This information will be visible from Windows Explorer, too, letting you understand what’s inside it without opening it.
Cursor Color
Sometimes it may be difficult to see a line and/or shaped cursor when a particular GraphWorX display has a dark background. This can be resolved via a built-in feature of Microsoft Windows. Go to Control Panel > Mouse Properties > Pointers Tab > Scheme > Windows Inverted (system scheme). This will cause the color of the mouse pointer to change based on the color that is behind it, so that it always contrasts with the background.
Show Only What You Need
GraphWorX64 has three application modes you can choose from: Basic, Standard, and Advanced. These modes determine the properties you are exposed to while working in GraphWorX64. You can work in the mode that best suits your needs, preferences, comfort level, and knowledge of GraphWorX64. For more information, refer to the Application Modes topic. (Application modes are sometimes referred to as configuration modes.)
You can also limit what appears on the GraphWorX64 canvas, and quickly go to certain areas of a display, by creating views. This is especially helpful if the display you are creating or working in is especially large or detailed. Note that you can create views for your own use while configuring a display, but these same views can also be tailored to the needs of users who will be running the display. For more information, refer to the topics called Creating 2D Views for Runtime Users and Animating 3D Views at Runtime.
Models and Symbols
These tips will help you add and store objects for use in your displays:
- GraphWorX64 lets you create your own 2D models by using shapes and 3D models by using primitives. By manipulating them and grouping them you can create complex objects for your displays. For more information, start by referring to the Shapes and Primitives in 3D topics.
- The Scale control lets you quickly create rules, gauges, and dials.
- The 2D Pipe control and the 3D Pipe primitive help you to quickly construct pipes and tunnels and pathways that other objects can follow.
- You can store models that you create in the Symbol Library so that you can reuse them in any display. However, you will notice that the Symbol Library is already stocked with useful, reusable symbols, full of gauges and other objects you may find useful for your industry. To learn more about the Symbol Library, refer to the Symbol Library topic.
- You can also import3D models from files that were created using tools other than GraphWorX64. For more information, refer to the Importing 3D Models, Clipart, and GraphWorX Art topic.
- Furthermore, you can convert 2D GraphWorX32 displays for use with GraphWorX64; for more information, refer to the Converting GraphWorX32 Displays to GraphWorX64 topic.
Customizing Your Workspace
You can customize the GraphWorX64 workspace by following these tips:
- You can choose which GraphWorX64 tools you want to show or hide; refer to the Show/Hide on the View Ribbon topic for details.
- Double-clicking on a ribbon tab (such as, Home, Dynamics, and so on) expands and collapses the ribbon. For more information, refer to the topics called 2D Ribbons in GraphWorX and 3D Viewport Ribbons.
- You can add your most commonly-used ribbon commands to and move the Quick Access Toolbar.
- Features of the GraphWorX64 work area can be moved to where you want them. The Object Explorer, Symbol Library, Toolbox, Script Editor, Properties tab, Dynamics tab, and Preferences tab can float inside the GraphWorX64 work area, docked to specific locations, or minimized:
-
-
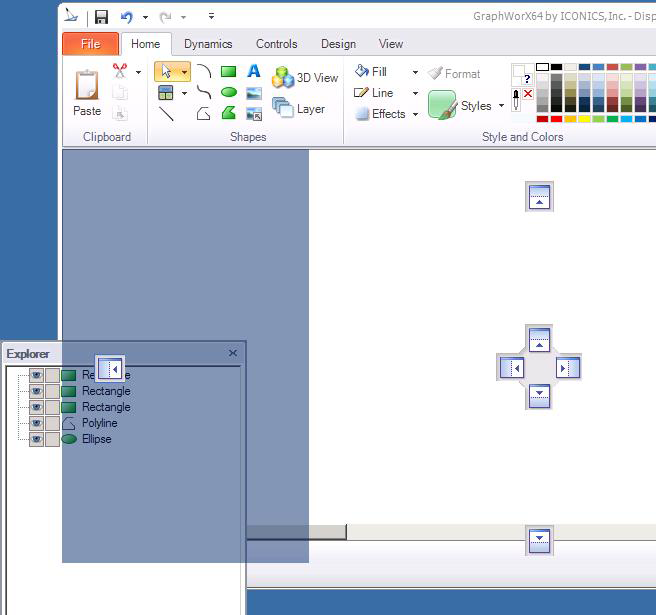
Docked. A docked feature occupies a static spot in the work area. To move the feature and dock it a new spot, click the feature's title bar and move it to any of the arrow icons of the Diamond Dock feature.
 Click here to see a docking example.
 -
Free floating. Click the title bar and drag it off its docked position to make it free floating. Double-click on the feature's title bar to return it to its last docked position.
-
Minimized to a tab. Click the push pin icon in the feature's title bar to minimize the feature to a tab. Click the tab to view the feature expanded, or click again on the push pin to make the feature stay maximized.
-
Shortcuts
If you like to take shortcuts, here are some topics that you may find helpful:
Advanced Tools
GraphWorX64 provides tools for more advanced users, too.
- Use the Controls ribbon to add a viewer to your GraphWorX64 display. Viewers let you insert TrendWorX64 trends, AlarmWorX64 alarms, and even other GraphWorX64 displays into a display. After adding the viewer to the display, you can insert a saved file or create the trend, alarm, or display directly in the viewer. For more information, refer to the Viewers topic.
- EarthWorX interactive maps are always created directly in an EarthWorX viewer in the GraphWorX display where they reside. The interactive map is the only object allowed in the GraphWorX64 file. For help getting started with this feature, refer to the EarthWorX Features topic.
- Insert a 3D viewport so you can create a three-dimensional aspect to your display. For more information, refer to the 3D Viewport Overview topic.
- To prevent 3D objects from colliding during runtime, you can use the Collision Detector.
- To simplify models and objects so that they load and render more quickly, use Polygon Reduction.
- The Script Editor helps you write scripts for use in displays. Refer to the Scripting Basics topic to get started with this tool.
- The Find and Replace feature lets you find objects in a display. It also lets you find elements of objects and replace them among multiple objects.
- The Update Shared Objects feature requires that you assign a uniform ShareKeyword property to identical objects.
- The Publishing Wizard lets you publish displays to a web server. Refer to the Publishing Wizard topic to get started.
See also:
Introduction to GraphWorX64 3D