Object Explorer
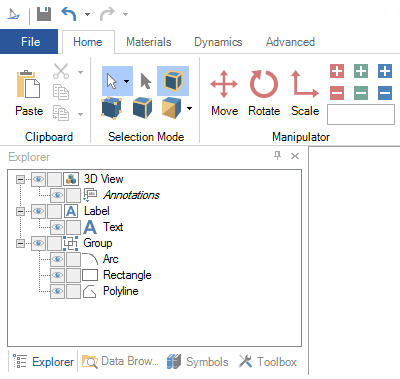
The Object Explorer (or simply the Explorer) is a tree control that lists all of the objects currently defined in your GraphWorX64 display; it is shown below. It shows all of the objects and groups that are not only visible or editable, but are defined as hidden or locked. The Explorer can also tell you whether an object is selected or active, if an object has a dynamic action associated with it, whether a name has been assigned to the object, and the top to bottom order (Z-order) of objects that appear on your screen. This topic tells you how to open the object Explorer, move the Explorer around on your work surface, and manipulate objects in the Explorer.
The Object Explorer in GraphWorX64
Opening the Object Explorer
To open the object Explorer on your GraphWorX64 work surface:
-
Click the GraphWorX64 2D View ribbon.
-
In the Show/Hide section, put a check mark in the Explorer check box to bring the Explorer into view.
The Explorer appears in the position it was last in before you closed it. You may have to click on the Explorer tab to put it on top of the Symbols library or the Toolbox.
Repositioning the Explorer
To move the Explorer to a different spot on your GraphWorX64 work surface:
-
Double click the Explorer title bar to dock the pane to the right.
-
Or click and drag the Explorer title bar into the position you desire.
The Explorer uses a feature from Windows called the Diamond Dock. When you ![]() move the Explorer around, a set of symbols appear that help you position the pane as a tab or panel. If you move the cursor into one of the arrows of the Diamond Dock you get a preview of the position the pane will assume. Release the mouse button to complete the action.
move the Explorer around, a set of symbols appear that help you position the pane as a tab or panel. If you move the cursor into one of the arrows of the Diamond Dock you get a preview of the position the pane will assume. Release the mouse button to complete the action.

Manipulating Objects in the Explorer
To manipulate object in the object Explorer:
-
Click the object name to select and edit the name as well as the object in the design window. An object with an assigned name will have bold text.
-
Click an object to select it, or on a group to make it active. Selected objects have blue highlighting while active objects have grey highlighting.
-
Move an object up or down in the hierarchy, changing its front to back assignment (Z-order).
-
Click an object's Show/Hide property to make it visible or invisible; as indicated by the Eye icon
 .
. -
Click an object's Lock/Unlock property to allow edits or not to allow the object to be edited; as indicated by the Lock icon
 .
.
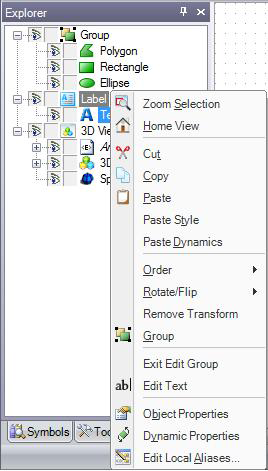
The objects shown in the object Explorer are synchronized with the objects that you see in the design window. As you select an object in either location the selection changes in the second location. Right-clicking an object on the drawing surface or in the Explorer pops up a menu of actions you can take on that object; if an object in the display is difficult to click on (for example, because it covered by other objects or hidden), ![]() right-clicking it in the Explorer gives you easy access to those options.
right-clicking it in the Explorer gives you easy access to those options.
Each new display that is created has a two dimensional drawing surface defined by default. To add a three dimensional (3D) surface to a drawing you would click the 3D View button in the Shapes section of the 2D Home ribbon, and drag a 3D viewport on the surface. When the 3D viewport is active, a set of 3D primitives becomes available to you to allow you to create 3D drawings. There is a restriction that prevents the use of 2D objects in a 3D viewport, and vice versa. The Explorer enforces this restriction by preventing you from moving an object from 2D to 3D or the other way around. You see a ![]() cursor with a slash
cursor with a slash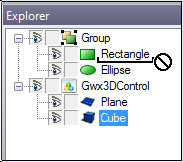 in it indicating that the operation is disallowed.
See also: