Adding a Network Interface Board
The system configuration when using Mitsubishi Electric FA allows for configuring a network interface board within the Workbench.
To add a network interface board:
-
Open Workbench and in Project Explorer, expand your project > Data Connectivity, right-click Mitsubishi Electric FA, and select Add Network Interface Board.
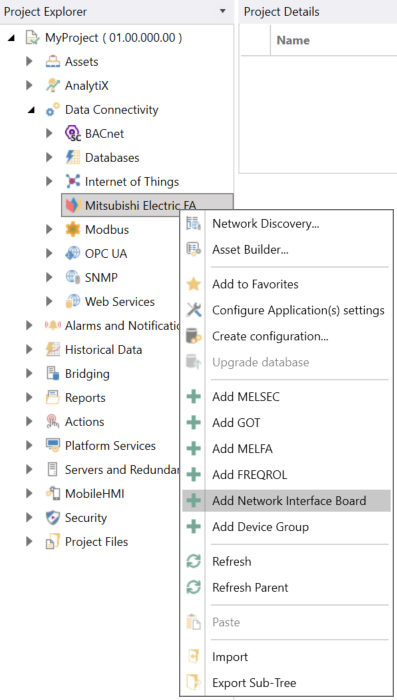
-OR-
Select the Mitsubishi Electric FA node in Project Explorer, and then click the Add Network Interface Board button in the Edit section of the Home ribbon.

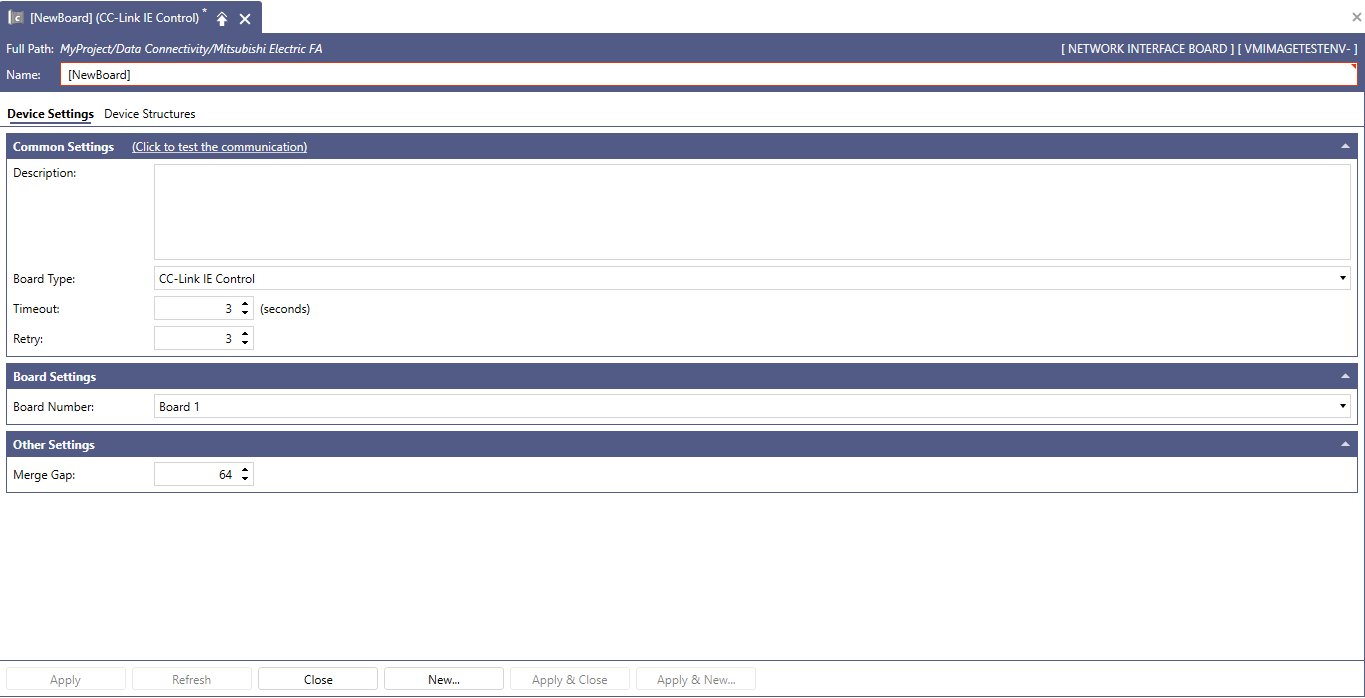
This opens the Network Interface Board properties dialog in the central panel of Workbench.
-
In the Name text entry field, enter a name for the network interface board.
-
In the Common Settings section, set up the following:
- (Click to test the communication): Click this link to connect to the actual device for a test.
- Description: Enter a description of the network interface board in the text entry field.
- Board Type: Use the drop-down list to select a board type. The selectable boards are as follows: CC-Link IE Control, CC-Link IE Field, CC-Link IE TSN.
- Timeout: Enter a timeout in seconds to cease communication attempts upon error. Use the text entry field or the up/down arrow buttons.
- Retry: Enter a number of communication retries. Use the text entry field or the up/down arrow buttons.
-
In Board Settings in Board Number, use the drop-down list to select from Board 1 to Board 4.
- In the Other Settings section in Merge Gap, enter the value that indicates the number of non-contiguous registers that can be batch read in a single communication between Mitsubishi Electric FA Point Manager and network interface board devices. This value should be set larger than the number of I/O address points between the tags. If the value is too small, multiple communications will be required to read the data. This setting is usually left at the default value of 64. Please refer to Merge Gap Details for more information.
- If necessary, configure the structures on the Device Structures tab, and then click Apply to save your changes to the configuration, and Close to return to Workbench. For more details, refer to How to Add a Structure to Your Device.
See Also:
Network Interface Board System Configuration