Testing REST API Calls with Postman
Web API provides most of its function through REST APIs that integrate with third-party services. Detailed information on each REST API is accessible via the Swagger interface. Learn more
You can use the Postman test utility to call these REST APIs and test the connection.
Postman is not a product of Mitsubishi Electric Iconics Digital Solutions. Updates to Postman may change these steps. If you cannot find a setting described here, see the Postman documentation.
To test REST APIs with Postman, you need to complete the following prerequisites.
-
Install Postman. Learn more
-
Start the GENESIS Web API Service. Learn more
Optional prerequisites:
-
Start the GENESIS Simulator Point Manager (for using simulated data).
-
Set up Internet Information Services (IIS) to run as a reverse proxy.
-
Configure self-signed or real certificates on IIS.
To test a Web API with Postman:
-
Connect to Swagger and verify that you can access the Web API documentation. Learn more
-
Open Postman, and then click
 in the header, expand File, and select Settings .
 -
Configure the following settings. When finished, close the dialog.
-
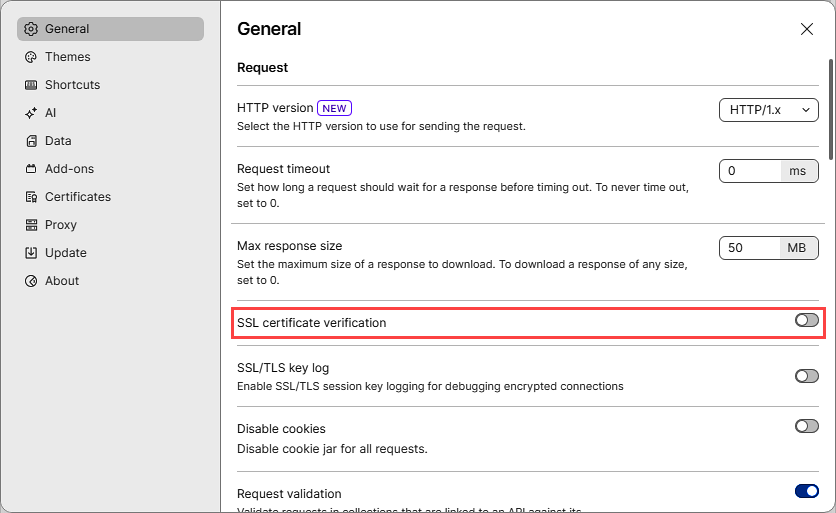
In General settings in the Request section, disable SSL certificate verification if you are using the default self-signed certificate.
-
In the Headers section, enable Send Postman Token header and Automatically follow redirects .
-
In the menu on the left, select Proxy , and verify that the proxy settings are appropriate for your server. In most cases, you should enable Use system proxy .
-
-
Import the REST APIs from Swagger.
-
In the Postman application header, click
, expand File, and select Import. The import dialog opens.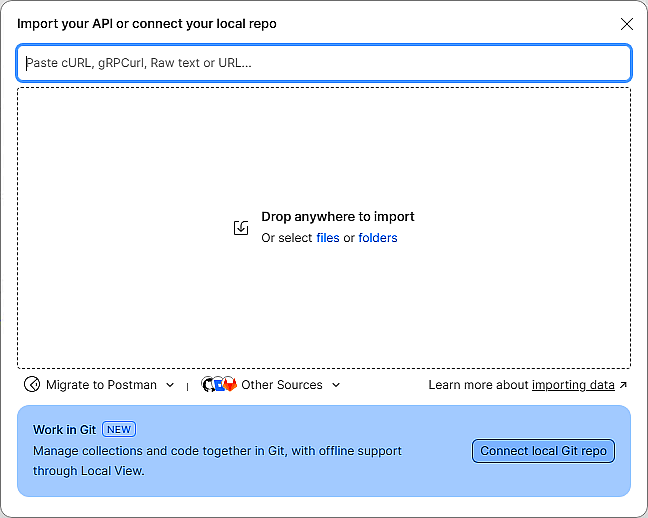
-
In the text box, enter the following URL:
https://<your host name>/fwxapi/swagger/v1/swagger.json-
For HTTPS to work, you need either a self-signed certificate or a certificate from a verified certificate authority.
-
When using certificates, you need to use the exact host name or IP address provided by the certificate, not localhost.
-
-
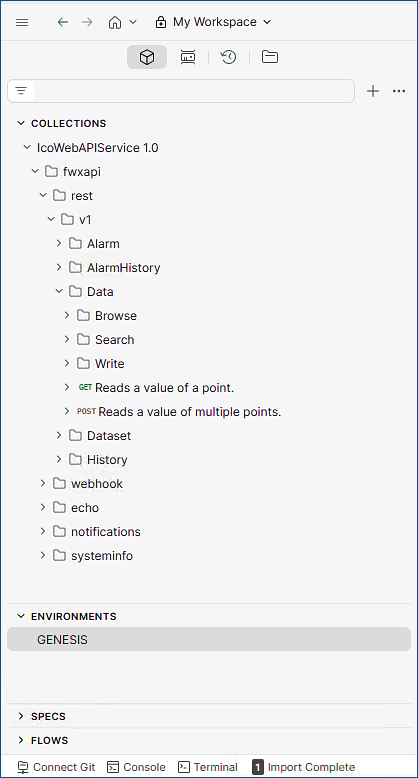
In the next dialog, keep the default settings and click Import. After completing the import, Postman creates a collection with all imported REST APIs, displayed as a tree structure in the left panel.
-
-
In the left panel, expand Environments and select GENESIS, and in the main panel, set the baseUrl variable to https://<hostname>. This is the default base URL that will be used across all REST APIs.

-
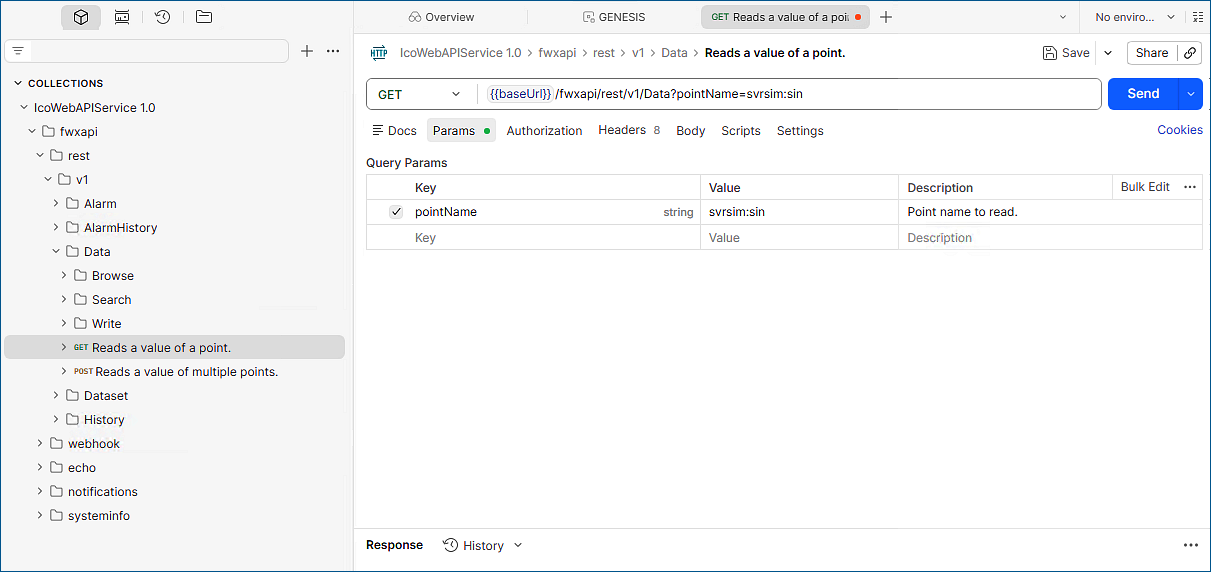
In the left panel, expand Collections > IcoWeb APIService 1.0 > fwxapi > rest > v1 > Data, and double-click GET Reads a value of a point.
-
In the main panel, do the following:
-
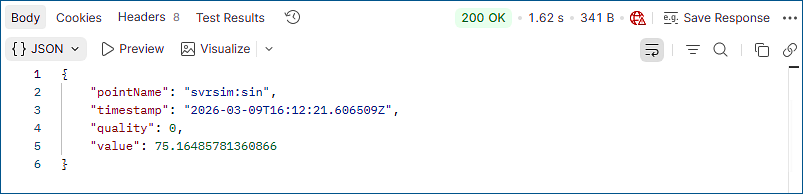
In the text field, set the pointName parameter. In the example image, the point name is svrsim:sin, which means that the REST API reads a sine signal from the Server Simulator (query parameter svrsim:sin).
-
Go to the Authorization tab and in the Configure New Token section, set the following values:
Token Parameter
Value
Token name
Any identifying name; for example, Web API Token
Grant Type
Authorization Code (with PKCE)
Callback url
http://localhost
Auth url
https://<your hostname>/fwxserverweb/security/connect/authorize
Access Token url
https://<your hostname>/fwxserverweb/security/connect/token
Client ID
in_house_client
Code Challenge Method
SHA-256
Scope
fwxserver
Client Authentication
Send as Basic Auth Header
-
Click Get New Access Token , and then sign in with your administrator account defined in GENESIS Security. If the authentication is successful, Postman displays the token details.
-
Click Use Token.
Do not share the access token text. It can be used to authenticate with your administrator credentials.
-
Go to the Settings tab and set the following:
-
In HTTP version, select HTTP/1.x.
-
Enable Automatically follow redirects.
-
Enable Encode URL automatically.
-
-
-
Click Send and in the bottom section, verify that the response data show the HTTP status of: 200 OK.