Installing GENESIS
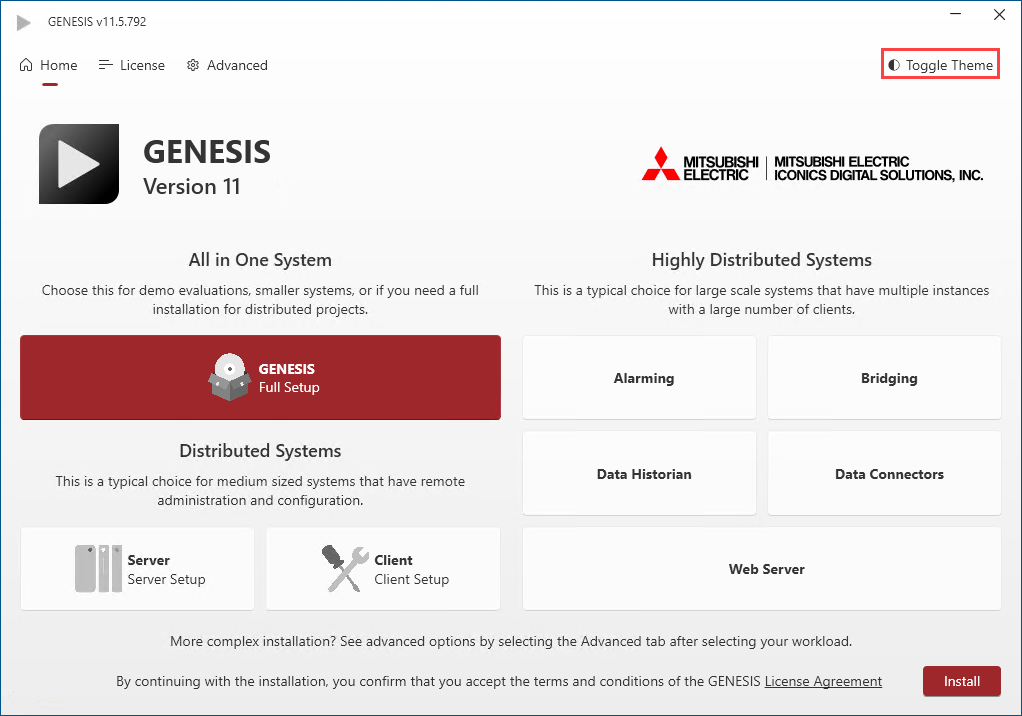
After you perform the required preparatory tasks and obtain the necessary access credentials, you are ready to install GENESIS version 11. This topic describes the installation using the standard GENESIS installer.
To install GENESIS:
- Log in to Windows as a local administrator.
-
Start the GENESIS installer. Do one of the following based on your installation package.
- Open the installation file and double-click GENESIS_Setup.exe.
- Insert the installation DVD and wait for the installation process to automatically start.
-
(Optional) On the Home screen at the top right, toggle your preferred theme; light or dark.
-
Select the desired installation setup (workload). The components associated with that setup are automatically selected on the Advanced tab. You can add or remove components in the next step.
-
GENESIS: Installs the complete set of available GENESIS components.
- Server: Installs all server-side components, such as Alarm Server or Data Historian.
- Client: Installs only Workbench and GraphWorX.
- Highly Distributed Systems: Offers a selection of specialized installation types with preselected components that are needed for the specific setup. Available setups are Alarming, Bridging, Data Connectors, Data Historian, and Web Server.
-
-
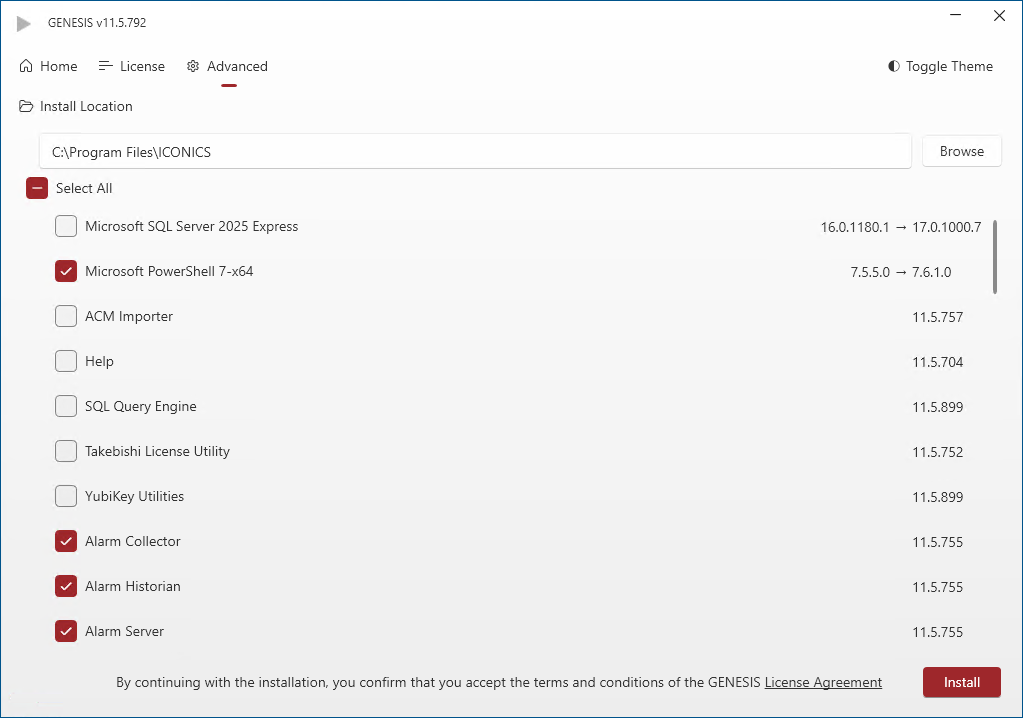
(Optional) Customize the installation settings on the Advanced tab.
-
-
In the Install Location field, click Browse and navigate to the folder where you want to install GENESIS.
The default location is C:\Program Files\ICONICS.
-
In the Components section, select the checkbox next to each additional component or third party application that you want to install, such as the local Help or Microsoft SQL Server, and clear the checkbox next to each component that you do not want to install. To view a brief description of a component, hover over the component's name. This is an advanced option, so we recommend using it with caution.
The components that are required for the selected type of installation are grayed out, and the checkboxes are inactive.
-
- On the License tab, review the license agreement, and then click Install.
-
When the installation completes, click Launch to start the initial system configuration (recommended).
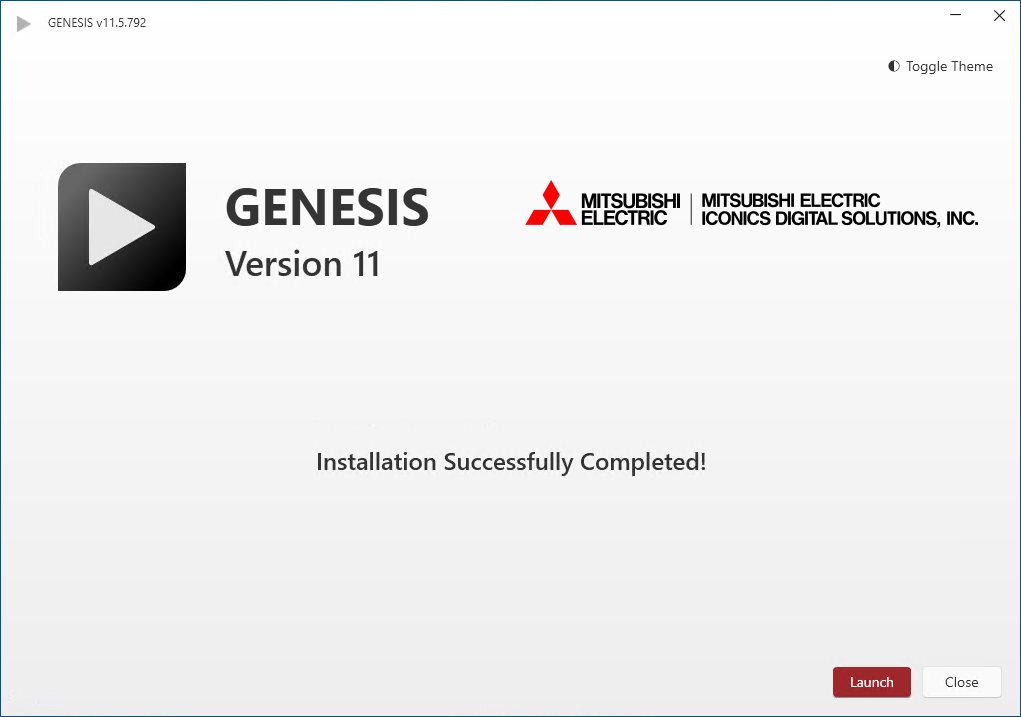
The Launch button triggers various actions depending on the type of installation:
-
If any server components are installed, the Configure System utility opens to set up the SQL Server connection, the project database, and server configurations. Learn more
If you are reinstalling version 11 and have kept the databases, no configuration is required; Workbench opens in demo mode. Continue with activating the license. If you want to make any configuration changes, open the Configure System utility from the Windows search box. - After installing the Client setup, Workbench opens in demo mode. Continue with activating the license.
- After installing GraphWorX only, the FrameWorX Location Utility opens to set up the connection to the FrameWorX server. Learn more
-