Creating a Workflow Configuration
A workflow configuration is the element that holds Connected Field Service workflows and the settings they share: which alarms the workflows can see, how execution is scheduled across nodes, how many threads the engine uses, and where transaction history is logged and archived. You create the configuration first, and then add workflows to it. Learn more
A project can hold more than one workflow configuration, but only the active one runs. The alarm subscription defined here determines which alarms are accessible to the workflows inside the configuration; each individual workflow then filters that stream further. Learn more
To create a workflow configuration:
-
Open Workbench. In Project Explorer, expand your project > Alarms and Notifications > Connected Field Service, right-click Workflows, and select Add Alarm Configuration.
The Workflows menu offers more than one kind of configuration. Alarm Configuration is the one that subscribes to the Alarm Server.
-
In the new configuration dialog, enter a name for the configuration.
-
On the Configuration Settings tab, select Active Configuration. Only one configuration can be active, so this deactivates any other configuration in the project. Leave the remaining settings on this tab at their defaults, including Temporary Directory, which the installation already points at a folder configured for Connected Field Service.
The browse button
 beside Temporary Directory offers only the folders that File Configuration grants the Connected Field Service permission because that permission is what gives the Connected Field Service account write access to a folder. To use a folder of your own, add it to the File Configuration first. Learn more
 -
On the Alarms Subscriptions tab, select the entry in Alarm Sources. A new configuration already subscribes to every alarm on the local alarm server, with a standard set of fields.
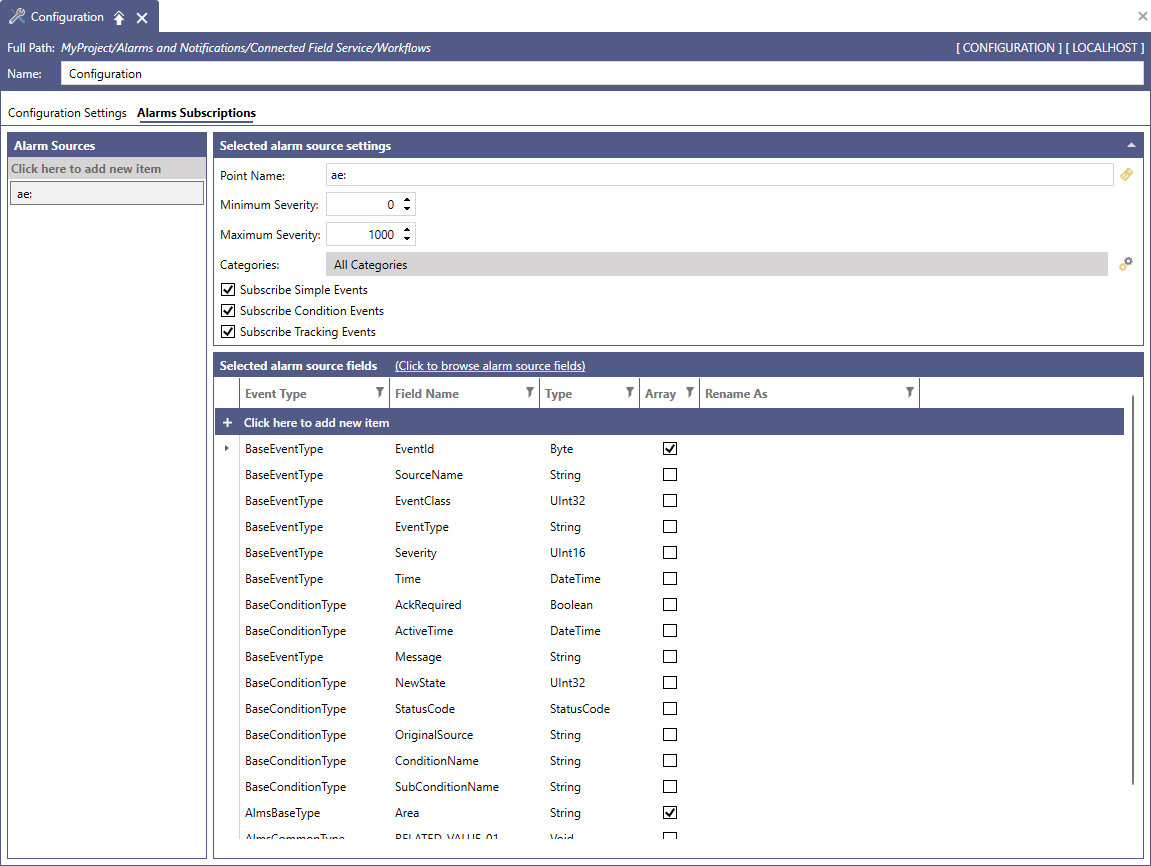
To subscribe to alarms from a second source, such as another alarm server or Fault Detection, select Click here to add new item and configure the new entry the same way.
-
(Optional) Under Selected alarm source settings, narrow which alarms reach the configuration:
-
Point Name—
ae:subscribes to every alarm on the local alarm server. Browse to an alarm area instead to scope the configuration to one part of the plant, which is the usual way to keep a large project manageable. -
Minimum Severity and Maximum Severity—The default band of 0 to 1000 accepts everything. Raising Minimum Severity is the cheapest way to stop low-priority alarms from dispatching anybody.
-
Categories—Defaults to All Categories. Restrict it when only certain alarm categories should reach the workflows.
-
-
(Optional) Under Selected alarm source fields, adjust the alarm fields the templates in this configuration can read. The default set covers most notification workflows, including Message, OriginalSource, Area, Severity, and NewState.
-
Click Apply, and then close the configuration. The new configuration appears in Project Explorer under Workflows.
What's Next?