Adding a Folder to File Configuration
Add a folder to File Configuration when a component needs to reach files that are stored outside of the project, such as a folder of files to import or a folder that receives report output. Once the folder is configured, any component you grant access to can browse it. Learn more
Adding a folder changes the permissions of that folder on disk, so you need administrator privileges to complete this procedure.
To add a folder to File Configuration:
-
Open Workbench.
-
On the Project ribbon, in the Project Tools section, click File Configuration.
-
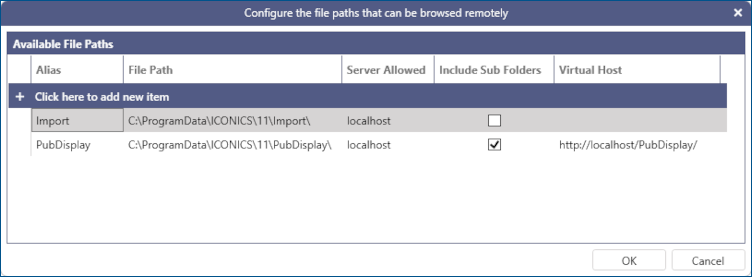
In the list of file paths, select Click here to add new item.
-
Enter an Alias that identifies the folder, and then enter the File Path of the folder or use the browse button to select it.
-
Enter the Server Allowed that can access the folder, or enter an asterisk (*) to allow any server.
-
Select Include Sub Folders to make the folders beneath the folder available as well.
-
Under Permissions, select each component that is allowed to use the folder—Bridging or Connected Field Service.
Selecting a component grants its service account write permission to the folder. Select only the components that need it. Learn more
-
Click OK. A message asks you to confirm the permissions that GENESIS grants to the folder.
-
Confirm the message to apply the permissions.