Managing Extensions in Assets
Assets integrates with other GENESIS components, such as Alarm Server and Data Historian, using Alarm Server/Data Historian extensions. Once these extensions are enabled, you can add an alarm or historical data to an equipment class or an individual equipment instance. For more details, see the links in the What's Next? section.
To enable the Assets extensions for Alarm Server and Data Historian:
-
Install Alarm Server/Data Historian on the same machine as the Assets server. If not included in the installation workload, you can add Alarm Server/Data Historian on the Advanced tab of the installer. Learn more
-
If the Alarm Server/Data Historian integration is not in the same database as Assets (typically, IcoUnifiedConfig), do the following to add it:
-
Open Workbench and on the Project ribbon, click Configure.
-
In the configuration dialog, select the desired database and click Next.
-
On the next page, select the checkbox in the Install/Overwrite column for Alarm Server Asset Integration and/or Data Historian Asset Integration and click Install.
For Alarm Server Asset Integration, you can also select to install sample data.
-
-
Enable Alarm Server/Data Historian Asset integration in the component settings:
-
On the Home tab in Workbench, select Configure Application(s) settings .
-
In Available Applications , locate Alarm Server Asset Integration and/or Data Historian Asset Integration, and verify that the checkbox is selected (the component is enabled).
-
In the Catalog column, verify that the integration component is stored in the same database (catalog) as Assets. If you made any changes, click Apply & Close.
-
-
Enable the Assets extension in the Alarm Server/Data Historian configuration in Workbench:
-
To enable the Alarm Server extension:
-
In Project Explorer, expand your project > Alarms and Notifications > Alarm Server > Product configuration > Installed extensions.
-
In the Enabled column, select the checkbox for Alarm Server - Assets extension, and then click Apply.
-
-
To enable the Data Historian extension:
-
In Project Explorer, expand your project > Historical Data > Data Historian > Product configuration > Installed extensions.
-
In the Enabled column, select the checkbox for Data Historian - Assets extension, and then click Apply.
-
-
-
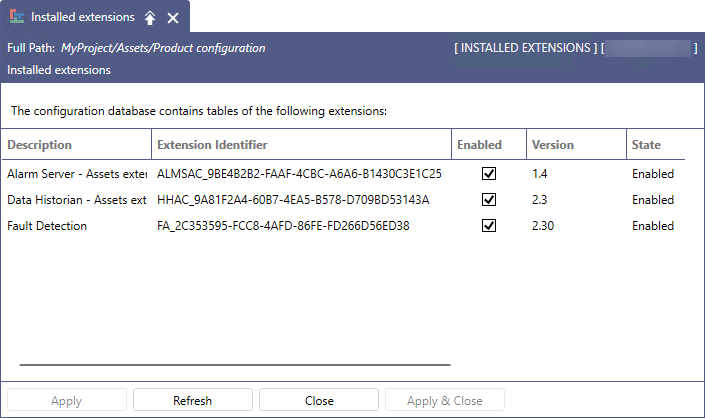
In Project Explorer, expand Assets > Product configuration > Installed extensions. In the Enabled column, select the checkboxes for Alarm Server - Assets extension and/or Data Historian - Assets extension, and then click Apply.