Subscriber Connections
There are four types of subscriber connections supported in IoTWorX:
-
Azure IoT Hub Subscriber Connection
-
Azure Event Hub Subscriber Connection
-
MQTT Subscriber Connection
-
Sparkplug Subscriber Connection
You can add Subscriber Connections for use later on when creating a new IoT Project. This makes it easier; to select from existing Subscriber Connections from a pulldown menu; than to add the required connection string information and related properties each time.
To Create a Subscriber Connection:
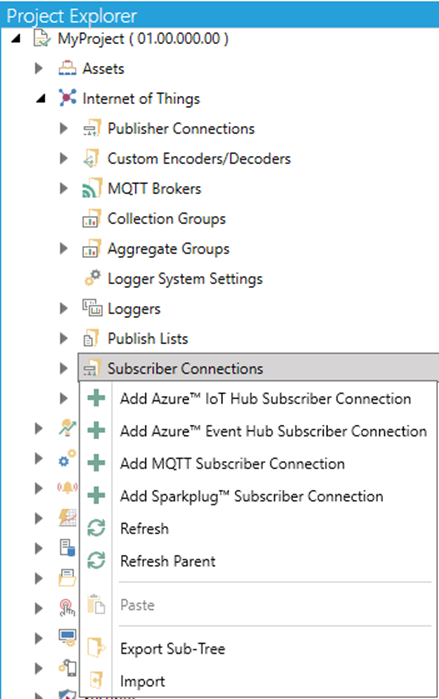
1. In the Workbench, expand a project and the expand the Internet of Things node. Right-click on the Subscriber Connections node, as shown below, and then click
on Add Subscriber Connection of a desired type.
Add Subscriber Connection from Project Explorer in the Workbench
-OR-
Select Subscriber Connections then click on the Add Subscriber Connection button of the given type (shown below) in the Edit section of the Home ribbon in the Workbench.
Add Subscriber Connection Buttons

-
This opens the Subscriber Connection properties window, as shown below, in the Workbench. Enter a Name for the Subscriber Connection in the top text entry field.

3. There are properties
common for most of the publisher connection types that can be set it General
Settings.
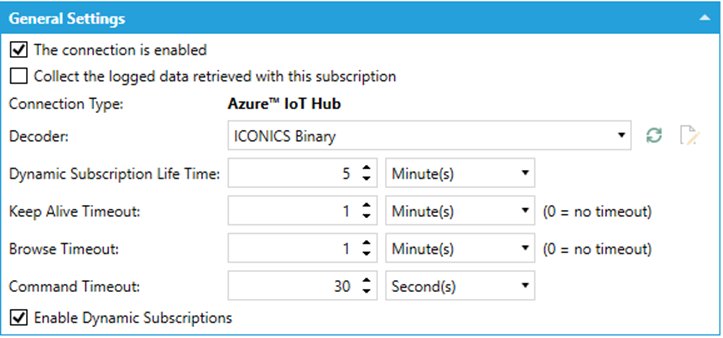
General Settings
-
The connection is enabled – Click this checkbox in order to keep the Subscriber Connection enabled.
-
Collect the logged data retrieved with this subscription – Click this checkbox if you would like to include collected logged data from Hyper Collector data buffered on the devices.
-
Decoder – Use the pulldown menu to select from ICONICS Binary, ICONICS Binary Gzip, ICONICS JSON, ICONICS JSON Gzip, or any of the custom decoder defined in Custom Encoders/Decoders.
-
Dynamic Subscription Life Time – Specifies how long the dynamically subscribed data points are valid in the Point Manager.
-
Keep Alive Timeout – This is how long the IoT Subscriber waits before the device is marked as offline. Meaning there are no new messages coming from the device.
-
Browse Timeout – The time within the browsed folders and data points are cached in the address space of the Point Manager. Entering '0' indicates no timeout.
-
Command Timeout – This is how long the IoT Subscriber waits for the response of the executed command. Commands are executed against the devices. If there is no response within specified time, the command completes with a timeout error.
-
Enable Dynamics Subscriptions - Click this checkbox to enable dynamic publish lists
4. Then specify the properties specific to the publisher connection type:
a. Azure IoT Hub Subscriber Connection (add link to the specific subpage)
b. Azure Event Hub Subscriber Connection (add link to the specific subpage)
c. MQTT Subscriber Connection (add link to the specific subpage)
d. Sparkplug
Subscriber Connection (add link to the specific subpage)
5. When you have completed your settings, click on the Apply button. Click on Close to return to the Workbench. Your new Subscription Connection will now appear in the Project Explorer.
See Also: