Mitsubishi Electric FA – Quick Start
Description: An introduction to the Mitsubishi Electric FA with examples.
General Requirement: Basic knowledge of Workbench and Mitsubishi Electric FA devices.
The Mitsubishi Electric FA can be used to support Mitsubishi Electric devices as well as establish connectivity with supporting connection protocols. The currently supported Mitsubishi Electric devices are:
-
Programmable Controllers - MELSEC
-
Human-Machine Interfaces (HMIs) - GOT
The connector can be configured through a provider in ICONICS' Workbench utility, providing options, such as:
-
Automatic Search for Mitsubishi Electric Devices (Network Discovery)
-
Mitsubishi Electric Device Properties Configuration
-
Mitsubishi Electric Device Tag Group Properties Configuration
This Quick Start provides basic instructions for using Mitsubishi Electric FA in GENESIS64.
The following figure shows the flow of the basic operation procedure.
Mitsubishi Electric FA Quick Start Flow

Add a Mitsubishi Electric FA device
-
Open the Workbench and expand Data Connectivity in the Project Explorer.
-
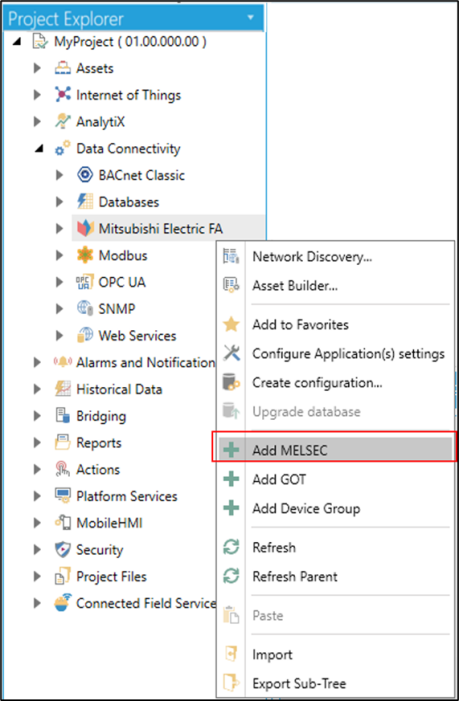
Right-click Mitsubishi Electric FA.
Add MELSEC via the Project Explorer in the Workbench
-
Right-click Add MELSEC (or Add GOT).
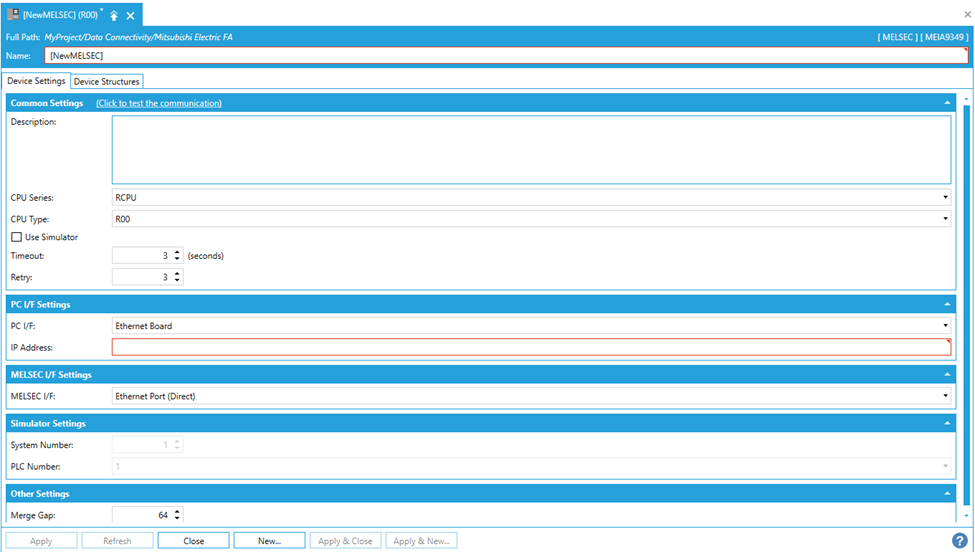
Device Properties Window
-
Enter the necessary information to the device properties.
Note that the cells that are encircled by the red rectangles must be properly entered to apply the change.
-
Click Apply.
The following steps explain how to use Network Discovery to search and add available device automatically.
-
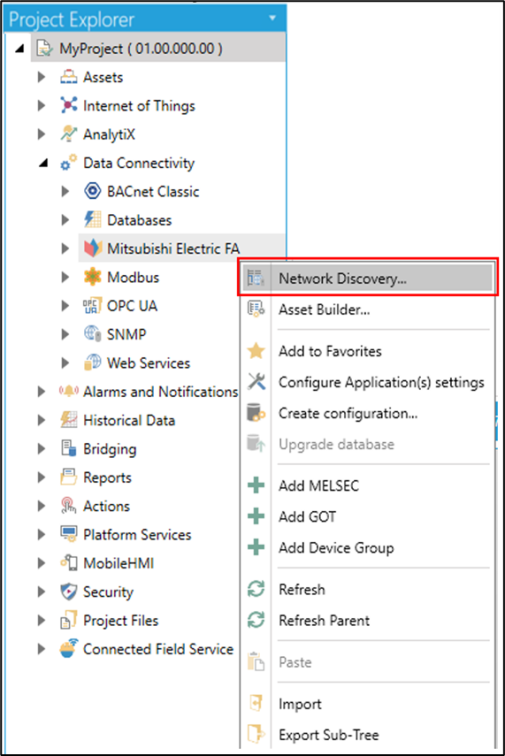
Right-click Mitsubishi Electric FA.
Network Discovery from the Project Explorer
-
Click Network Discovery to open the Mitsubishi Electric Network Discovery window.
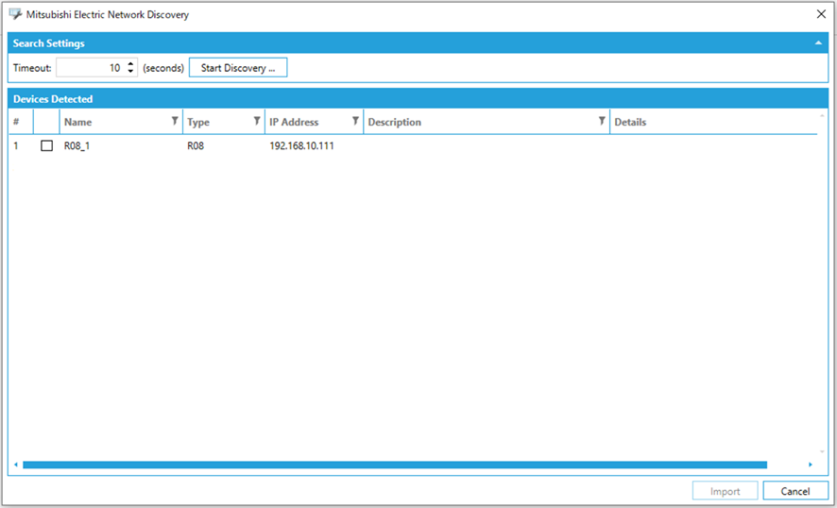
Network Discovery Window
-
Click the Start Discovery... button to start searching devices.
Available devices will be displayed on the screen if there is any.
-
Check off preferred devices and click the Import button.
The following steps explain how to test communication with added device in previous steps.
-
Double-click the device in the Project Explorer that a user wants to test the communication.
Click to test the communication

-
Click "Click to test the communication" in the Common Settings.
-
The following message appears if the communication test succeeds.
Communication Succeeded Message
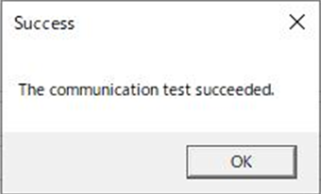
Please refer to the Troubleshooting for Mitsubishi Electric FA in the online help document if the communication test fails.
-
Click OK.
Add a tag group to the device
-
1. Right-click the added device.
Add Tag Group from the Project Explorer

-
Click Add Tag Group.
-
Enter a proper name to the tag group.
-
Click Apply.
Add tags to the tag group
-
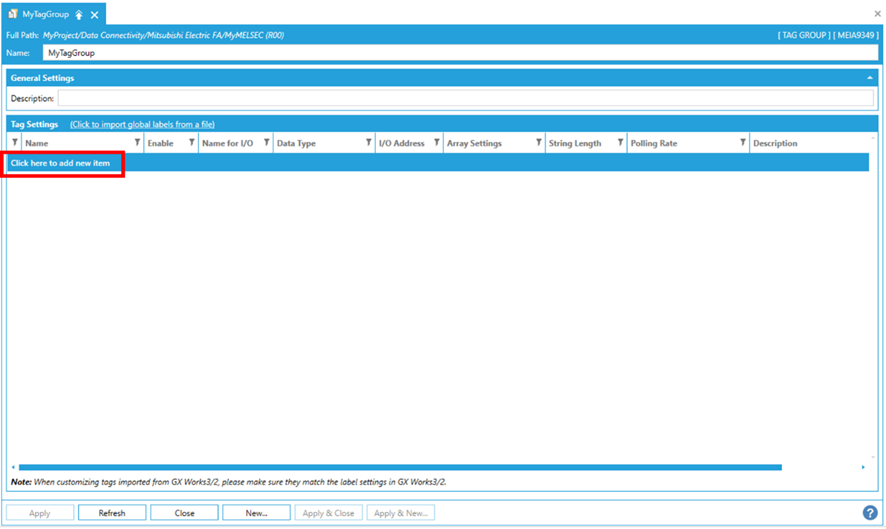
Click the added tag group so that the "Tag group properties" window opens.
Tag Group Properties Window
-
Click "Click here to add a new item" in the Tag Settings section to add a new tag.
Tag Settings Example

-
Enter a proper name and I/O address.
-
Click Apply.
Please follow this step if a user uses a MELSEC device and wants to add a device structure.
-
Double-click the MELSEC device so that the "Device property” window opens.
Device Structures button

-
Click the Device Structures tab on top of Common Settings.
Add Device Structure from a button

-
Click “Click here to add new item” to add a new device structure
-
Enter a proper name to the device structure.
-
Click Apply.
-
Click the device structure that was added in the previous steps.
Add a Member to the Device Structure

-
Click "Click here to add new item" in the Structure Types section.
Structure Settings example

-
Enter a proper name to the member of a structure device.
-
Click Apply.
Note: A user can import tags and device structures from GX Works3 project file to a MELSEC device.
Please refer to How to Import or Specification Restrictions under "GX Works3 Global Labels and Structures Import" in the online help document for more details.
Communicate with the device
-
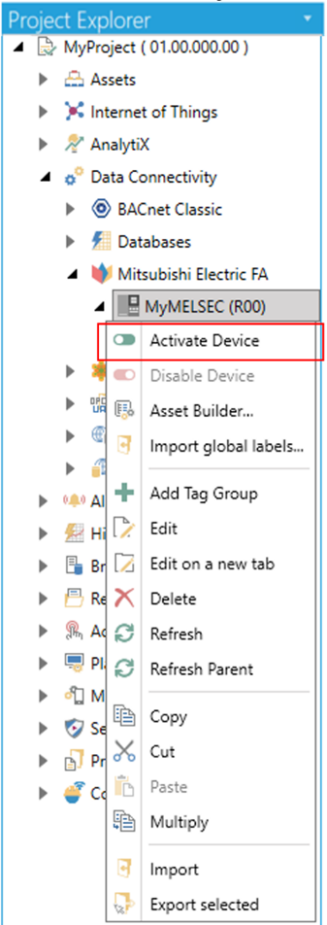
Right-click the device.
Activate Device from the Project Explorer
-
Click Activate Device.
[Note: if a user wants to configure the device again, it must be disabled.]
-
Open GraphWorX64.
-
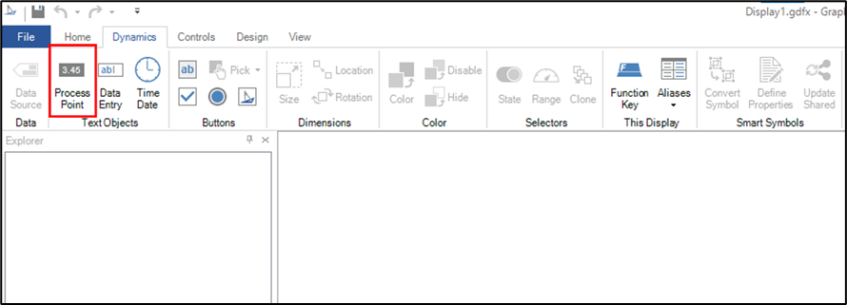
Click Dynamics in the Home Ribbon.
Process Point in the Home Ribbon
-
Click the Process Point in the Home Ribbon and place it on the Canvas, the section on the screen.
-
Click the Process Point that is placed in the previous step.
-
Click the Dynamics at the bottom on the right in the screen.
-
Click the DataSource.
-
Expand My Computer > Data Connectivity > Mitsubishi Electric FA > (Device_Name) > (TagGroup_Name).
Data Browser Window

-
Select a tag that a user created in the Workbench and click OK.
-
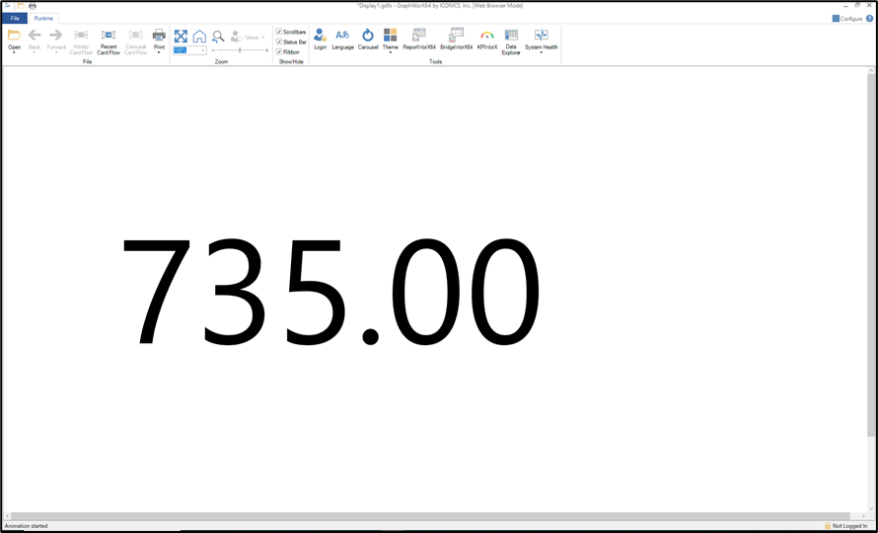
Click Runtime at the top on the right in the screen.
Runtime window
-
Confirm that the value of the tag is displayed on the Runtime screen.
-
Click Configure at the top on the right in the screen.
-
Save and close GraphWorX64.
Note: Please refer to System Configuration in the online help document for details or connectable Mitsubishi Electric FA device.
See Also: