Transaction Configurations
To Create a New Transaction Configuration:
-
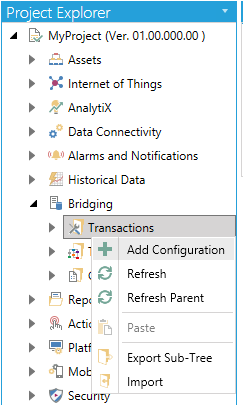
Open the Workbench and expand your project, then the Bridging node. Right-click on the Transactions node, then click on Add Configuration, as shown below.
Adding a New Transaction Configuration in the Project Explorer in the Workbench
-OR-
Select the Transactions node, then click on the Add Configuration button (shown below) in the Edit section of the Home ribbon in the Wokbench.
Add Configuration Button

-
This opens the Transaction Configuration Properties, shown below, beneath the Project Details section of the Workbench.
Transaction Configuration Properties
![]()
Generic Properties
-
Active Configuration - Check this checkbox to make the current transaction configuration active.
-
Description - Enter a description in the text entry field to distinguish this transaction configuration from others.
-
Temporary Directory - You can enter a temporary directory for the bridging transaction configuration in the text entry field or click on the
 button to open the Browse for Folder window and navigate
to your selected temporary directory.
button to open the Browse for Folder window and navigate
to your selected temporary directory.
Scheduling
-
Scheduling Mode - Use the pulldown menu to select from Local Scheduler or Distributed Load-Balancing Schedulers Network.
-
Scheduling Nodes - If you selected Distributed Load-Balancing Schedulers Network as the Scheduling Mode, you can enter scheduling nodes in the text entry field or click on the
 button to open the Select one or more scheduling nodes
window and choose from the listed options. Please specify a colon
":" separated list of node names where Load Balancing Schedulers
are running. At least one node (or IP Address, or machine name) should
be specified. The first node in the list is the active scheduler,
others are in standby for scheduler redundancy.
button to open the Select one or more scheduling nodes
window and choose from the listed options. Please specify a colon
":" separated list of node names where Load Balancing Schedulers
are running. At least one node (or IP Address, or machine name) should
be specified. The first node in the list is the active scheduler,
others are in standby for scheduler redundancy. -
Auto Switch to Topmost - Select this checkbox if you intend for the redundant schedulers to switch back to the topmost entry in the list when it comes back online.
Archiving
-
Archive condition - Use the pulldown menu to select from None, Minimum Time Extent, or Minimum Time Extent and Maximum Total Size.
-
Min. Time Extent - When this setting is active (by Archive condition setting), enter a minimum time extent (in days) for the archive condition in the text entry field or use the up/down arrow buttons.
-
Max. Total Size - When this setting is active, (by Archive condition setting), enter a maximum total size (in megabytes) for the archive condition in the text entry field or use the up/down arrow buttons.
-
Check every - When selected by clicking the radio button, enter a number (in days) in the text entry field (or use the up/down arrow buttons) to check the archiving condition.
-
Check on event - When selected by clicking the radio button, enter a condition to check the archiving condition in the text entry field or click on the
 button to open the data browser
and navigate to your selected condition.
button to open the data browser
and navigate to your selected condition. -
Archive older files - Click this checkbox to archive older files. Once selected, you can enter the files to archive in the text entry field or click on the
button to open
a file browser to navigate to your selected older files to archive. -
Archive only succeeded transactions - Click this checkbox to archive only succeeded transactions. Failed transactions will not be included.
Advanced Properties
-
Number of Threads - Enter a number of threads for the transaction configuration in the text entry field (or use the up and down arrows).
-
Cancel Timeout - Enter a number, in seconds (or use the up/down arrows) for when to cancel a timeout for the transaction.
-
Language - Enter a language for the transaction configuration in the text entry field or click on the
 button to open the Language
Selector.
button to open the Language
Selector. -
Acknowledge Code - An Alphanumeric id (must be numeric for voice alerts) that can be set up for use in acknowledging alerts sent via SMS, Voice or Email. If the "Enable Acknowledge Id" is unchecked in Workbench > Alarms and Notifications > AlertWorX > General Settings, this code is ignored.
-
Temporary Directory - Enter a temporary directory in the text entry field. A default directory may be listed. Click on the
button to open a file browser to navigate to your selected temporary
directory. -
Use a custom database for logging - Click this checkbox if you wish to use a custom database for logging rather than the current default database. Checking this box will activate the Connection String text entry field.
-
Connection String - If the 'Use a custom database for logging' checkbox has been checked, you can enter your preferred database information in the text entry field or click on the 'Configure connection' link, which will open a separate window where you can select and configure your preferred database. If you are upgrading a configuration from a previous version, you will either need to configure SQL Server with a certificate from a trusted certificate authority or you will need to update the connection strings.
-
Once you have finished setting your properties, you can click Apply to save your configuration and Close to return to the Workbench. Your new Transaction Configuration will now appear in the Project Explorer, beneath the Transactions node.
See Also: