Templates
The Templates node of the Bridging provider in the Workbench contains the templates used for workflow diagrams in Transactions.
To Create a New Template:
-
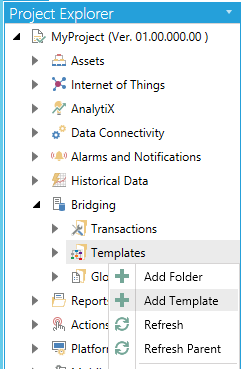
Open the Workbench and expand your project, then the Bridging node. Right-click on the Templates node, then click on Add Template, as shown below. You could also choose to create a separate template folder at this point.
Adding a Template from the Project Explorer in the Workbench
-OR-
Select the Templates node, then click on the Add Template button, shown below, in the Edit section of the Home ribbon in the Workbench.
Add Template Button

-
This opens the Template properties, shown below. Enter a name for the template in the Template Name text entry field.
Template Properties
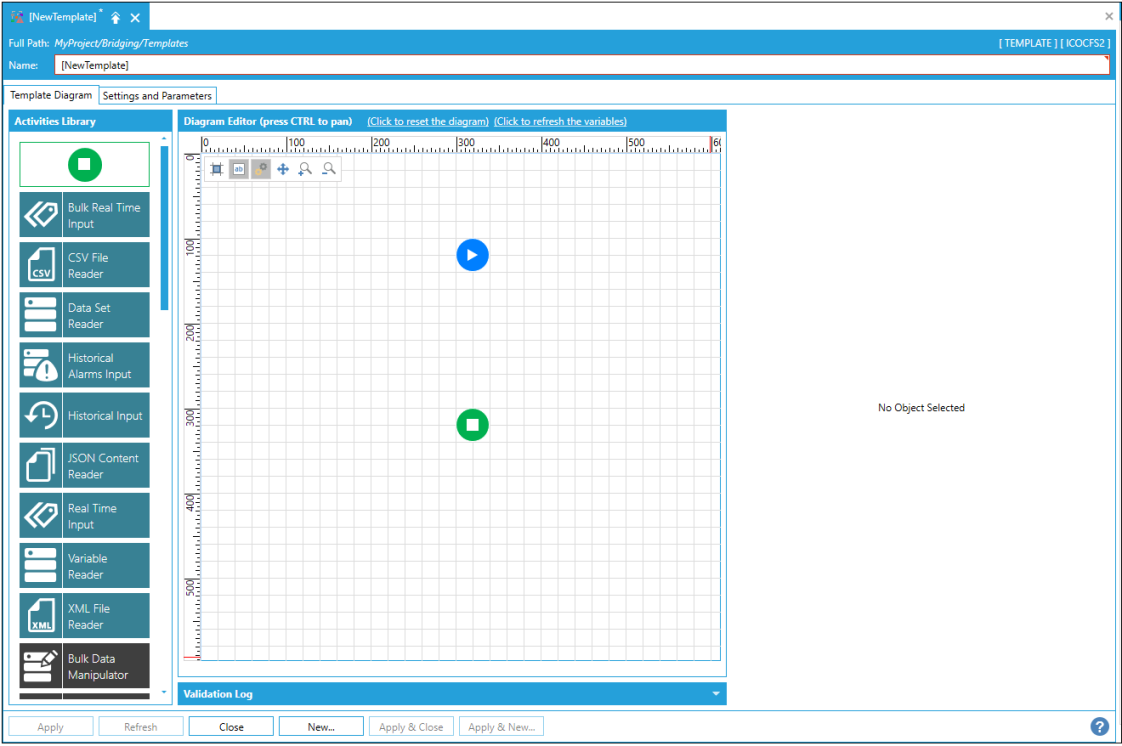
Template Diagram Tab
Activity Library
The Activity Library allows you to drag listed elements into the Diagram Editor. Each Activity brings up its own set of properties that appear to the right of the Diagram Editor when the Activity has been added.
Activities in the Activity Library include:
NOTE: See Creating a BridgeWorX64 Custom Activity for how to create a custom activity for use in BridgeWorX64.
You can select from the following items and set (or read) each Activity's individual properties:
Start
Start Activity

The Start activity is the starting activity of the workflow. It cannot be deleted and is unique in the whole workflow.
The Start activity has the following settings:
General Settings
-
Activity Name - The unique name of the activity. It can be used to identify the activity in the expressions or in traces.
-
Activity Label- A custom label that is used to show additional information in the block, but it's not as verbose as the description.
-
Activity Description - The description of the activity will be visualized as a tooltip when you move the mouse over the activity.
-
Activity Type - The starting activity of the workflow. This activity cannot be deleted and is unique within the workflow.
-
Position - The position of the activity in the diagram.
Return to Top of Activity Library List
End
End Activity

The Endactivity returns a pre-defined result (Success or Failure) when it is executed.
The End activity has the following settings:
General Settings
-
Activity Name - The unique name of the activity. It can be used to identify the activity in the expressions or in traces.
-
Activity Label - A custom label that is used to show additional information in the block, but it's not as verbose as the description.
-
Activity Description - The description of the activity will be visualized as a tooltip when you move the mouse over the activity.
-
Activity Type - The ending activity returns a pre-defined result (Success or Failure) when it is executed.
-
Position - The position of the activity in the diagram.
Other Settings
-
Result - The type of result of the workflow. Use the pulldown menu to select from Success or Failure.
Return to Top of Activity Library List
CSV File Reader
CSV File Reader Activity

The CSV File Reader activity reads the data from a CSV file. It eventually applies an expression filter to rows of data.
The CSV File Reader activity has the following settings:
General Settings
-
The activity is enabled - True to enable the activity.
-
Activity Name - The unique name of the activity. It can be used to identify the activity in the expressions or in traces.
-
Activity Label - A custom label that is used to show additional information in the block, but it's not as verbose as the description.
-
Activity Description - The description of the activity will be visualized as a tooltip when you move the mouse over the activity.
-
Activity Type - Reads the data from a CSV file. It eventually applies an expression filter to rows of data.
-
Position - The position of the activity in the diagram.
-
Follow Path - The follow path specifies how to link to activities. "Completed" path will execute the next branch despite the state of this block. With "State" path, it's possible to associate two branches with this block. The "Success" branch is executed if this block is successful. Otherwise, the "Failure" branch will be executed.
-
Color - Enter a HEX color code in the text entry field or click on the
 button in order to open the color picker window to select your preferred
color.
button in order to open the color picker window to select your preferred
color. -
Width - Use the pulldown menu to select from Small, Medium, or Large activity block width size.
-
Height - Use the pulldown menu to select from Small or Large activity block height size.
Timeout Settings
-
-
Timeout - Timeout applied when the data sources are requested.
-
Threads - The number of concurrent threads used to request the data sources.
-
Sampling Rate - Scan rate used to subscribe to the data sources.
-
CSV File Settings
-
Source Files - The expression used to evaluate the result of the condition block. Include one file per line, or expression that evaluates to a file path. Click on the 'Edit Expression' link to open the Expression Editor window, which can help in constructing required expressions. Click on the 'Browse Files' link to open a file explorer to navigate to your required source files. [See also Expression Functions for Datasets.]
-
Column Separator - The Column Separator is used to identify the columns in the CSV file.
-
Encapsulation - Select from None, Single Quote or Double Quote.
-
Header Line Offset - The offset of the CSV file header.
-
Header Row Lines - Number of lines to use for the header row.
-
First Column Offset - The CSV file will be read starting from this column.
-
Line Offset - The CSV files will be read starting from this line.
-
Lines per Data Row - The number of lines of the CSV files that will be used to create the data row.
Data Schema
-
Data Schema - Shows the list of columns exposed by the activity. If the schema is not Read-Only, it is possible to configure the list of columns manually. Click the 'Configure' link to manually configure the column list. You can also opt to 'Detect from file'.
Data Filter
-
Data Filter - Select the rows that will be returned to the next activity. By default, all rows are returned. You can use the columns of the data source to create the row filter. Click on the 'Edit Expression' link to open the Expression Editor window, which can help in constructing required expressions. [See also Expression Functions for Datasets.]
Retry Settings
-
Retry Count - The number of retrials before marking the activity as failed.
-
Delay - The delay between the retrials of the activity.
Return to Top of Activity Library List
Bulk Real Time Input
Bulk Real Time Input Activity

The Bulk Real Time Input activity, from the Source DataSet, builds a dynamic list of Real Time points, reads their values and provides output DataSet to the next block
The Bulk Real Time Input activity has the following settings:
General Settings
-
The activity is enabled - True to enable the activity.
-
Activity Name - The unique name of the activity. It can be used to identify the activity in the expressions or in traces.
-
Activity Label - A custom label that is used to show additional information in the block, but it's not as verbose as the description.
-
Activity Description - The description of the activity will be visualized as a tooltip when you move the mouse over the activity.
-
Activity Type - From the Source DataSet, builds a dynamic list of Real Time points, reads their values and provides output DataSet to the next block.
-
Position - The position of the activity in the diagram.
-
Follow Path - The follow path specifies how to link to activities. "Completed" path will execute the next branch despite the state of this block. With "State" path, it's possible to associate two branches with this block. The "Success" branch is executed if this block is successful. Otherwise, the "Failure" branch will be executed.
-
Color - Enter a HEX color code in the text entry field or click on the
button in order to open the color picker window to select your preferred
color. -
Width - Use the pulldown menu to select from Small, Medium, or Large activity block width size.
-
Height - Use the pulldown menu to select from Small or Large activity block height size.
Data Input
-
Consume data from - Use the pulldown menu to select from "Previous Activity" or "Specific Activity".
-
Activity Name- If you selected "Specific Activity" in the 'Consume data from' pulldown, you can enter an activity name in the text entry field or use the pulldown to select an existing activity name if available.
Timeout Settings
-
Timeout - Timeout applied when the data sources are requested.
-
Threads - The number of concurrent threads used to request the data sources.
-
Sampling Rate - Scan rate used to subscribe to the data sources.
Expression Settings
-
Tags Expression - This is the expression used to evaluate DA points names to read from. This expression is calculated per every row in the Source DataSet. You may use {{column:TagName}} syntax in the expression to reference elements within the source row. Click on the 'Edit Expression' link to open the Expression Editor window, which can help in constructing required expressions. [See also Expression Functions for Datasets.]
-
Split Array Values into multiple Data Rows - If checked, then if a DA Tag returns a value that is an array, these values will be separated and provided as multiple output Data Rows.
-
Succeed only if All tag values have Good Quality- If checked, if at least one tag value has Bad Quality, the entire operation will fail.
Data Schema
-
Data Schema - Shows the list of columns exposed by the activity. If the schema is not Read-Only, it is possible to configure the list of columns manually. Click the 'Configure' link to manually configure the column list.
Data Filter
-
Data Filter - Select the rows that will be returned to the next activity. By default, all rows are returned. You can use the columns of the data source to create the row filter. Click on the 'Edit Expression' link to open the Expression Editor window, which can help in constructing required expressions. [See also Expression Functions for Datasets.]
Retry Settings
-
Retry Count - The number of retrials before marking the activity as failed.
-
Delay - The delay between the retrials of the activity.
Return to Top of Activity Library List
Real Time Input
Real Time Input Activity

The Real Time Input activity reads the data from a Real Time Data source, converts it into a stream and provides it to the next block. It eventually applies an expression filter to the Real Time Data stream.
The Real Time Input activity has the following settings:
General Settings
-
The activity is enabled - True to enable the activity.
-
Activity Name - The unique name of the activity. It can be used to identify the activity in the expressions or in traces.
-
Activity Label - A custom label that is used to show additional information in the block, but it's not as verbose as the description.
-
Activity Description - The description of the activity will be visualized as a tooltip when you move the mouse over the activity.
-
Activity Type - Reads the data from a Real Time Data source, converts it into a stream and provides it to the next block. It eventually applies an expression filter to the Real Time Data stream.
-
Position - The position of the activity in the diagram.
-
Follow Path - The follow path specifies how to link to activities. "Completed" path will execute the next branch despite the state of this block. With "State" path, it's possible to associate two branches with this block. The "Success" branch is executed if this block is successful. Otherwise, the "Failure" branch will be executed.
-
Color - Enter a HEX color code in the text entry field or click on the
button in order to open the color picker window to select your preferred
color. -
Width - Use the pulldown menu to select from Small, Medium, or Large activity block width size.
-
Height - Use the pulldown menu to select from Small or Large activity block height size.
Data Sources
-
Data Sources - Click on the "+ Click here to add new item" link to add a new tag. You can enter a Point Name directly in the text entry field or click on the
 button to open
the Data Browser and navigate to your selected tag. You can also click
on the "(Click to add multiple tags)" link in the Data Sources
section header in order to add more than one tag at a time.
button to open
the Data Browser and navigate to your selected tag. You can also click
on the "(Click to add multiple tags)" link in the Data Sources
section header in order to add more than one tag at a time.
Timeout Settings
-
Timeout - Timeout applied when the data sources are requested.
-
Threads - The number of concurrent threads used to request the data sources.
-
Sampling Rate - Scan rate used to subscribe to the data sources.
Data Source Settings
-
Split Array Values into multiple Data Rows - If checked, then if a DA Tag returns a value that is an array, these values will be separated and provided as multiple output Data Rows.
-
Succeed only if All tag values have Good Quality- If checked, if at least one tag value has Bad Quality, the entire operation will fail.
Data Schema
-
Data Schema - Shows the list of columns exposed by the activity. If the schema is not Read-Only, it is possible to configure the list of columns manually. Click the 'Configure' link to manually configure the column list.
Data Filter
-
Data Filter - Select the rows that will be returned to the next activity. By default, all rows are returned. You can use the columns of the data source to create the row filter. Click on the 'Edit Expression' link to open the Expression Editor window, which can help in constructing required expressions. [See also Expression Functions for Datasets.]
Retry Settings
-
-
Retry Count - The number of retrials before marking the activity as failed.
-
Delay - The delay between the retrials of the activity.
-
Return to Top of Activity Library List
Data Set Reader
Data Set Reader Activity

The Data Set Reader activity reads the data from a DataSet source, converts it as a stream and provides it to the next block. It eventually applies an expression filter to the DataSet stream.
The Data Set Reader activity has the following settings:
General Settings
-
The activity is enabled - True to enable the activity.
-
Activity Name - The unique name of the activity. It can be used to identify the activity in the expressions or in traces.
-
Activity Label - A custom label that is used to show additional information in the block, but it's not as verbose as the description.
-
Activity Description - The description of the activity will be visualized as a tooltip when you move the mouse over the activity.
-
Activity Type - Reads the data from a DataSet source, converts it as a stream and provides it to the next block. It eventually applies an expression filter to the DataSet stream.
-
Position - The position of the activity in the diagram.
-
Follow Path - The follow path specifies how to link to activities. "Completed" path will execute the next branch despite the state of this block. With "State" path, it's possible to associate two branches with this block. The "Success" branch is executed if this block is successful. Otherwise, the "Failure" branch will be executed.
-
Color - Enter a HEX color code in the text entry field or click on the
button in order to open the color picker window to select your preferred
color. -
Width - Use the pulldown menu to select from Small, Medium, or Large activity block width size.
-
Height - Use the pulldown menu to select from Small or Large activity block height size.
Data Source
-
Point Name - Enter the data source, in the text entry field, to be used by this activity or click on the
button to open the Data Browser
and navigate to your selected data source.
Input Parameters
-
-
Input Parameters - Shows the parameters available for the selected data source. Click the 'Configure' link to manually configure the column list. You can also 'Refresh' the list.
-
Output Parameters
-
-
Output Parameters - Shows the parameters available for the selected data source. Click the 'Configure' link to manually configure the column list. You can also 'Refresh' the list.
-
Timeout Settings
-
-
Timeout - Timeout applied when the data sources are requested.
-
Threads - The number of concurrent threads used to request the data sources.
-
Sampling Rate - Scan rate used to subscribe to the data sources.
-
Data Schema
-
Data Schema - Shows the list of columns exposed by the activity. If the schema is not Read-Only, it is possible to configure the list of columns manually. Click the 'Configure' link to manually configure the column list. You can also Reset the Data Schema.
Data Filter
-
Data Filter - Select the rows that will be returned to the next activity. By default, all rows are returned. You can use the columns of the data source to create the row filter. Click on the 'Edit Expression' link to open the Expression Editor window, which can help in constructing required expressions. [See also Expression Functions for Datasets.]
Retry Settings
-
Retry Count - The number of retrials before marking the activity as failed.
-
Delay - The delay between the retrials of the activity.l
Return to Top of Activity Library List
Historical Alarms Input
Historical Alarms Input Activity
The Historical Alarms Input activity reads the data from an Historical Alarms source, converts it into a stream and provides it to the next block. It eventually applies an expression filter to the Historical Alarms stream.
The Historical Alarms Input activity has the following settings:
General Settings
-
The activity is enabled - True to enable the activity.
-
Activity Name - The unique name of the activity. It can be used to identify the activity in the expressions or in traces.
-
Activity Label - A custom label that is used to show additional information in the block, but it's not as verbose as the description.
-
Activity Description - The description of the activity will be visualized as a tooltip when you move the mouse over the activity.
-
Activity Type - Reads the data from an Historical Alarms source, converts it into a stream and provides it to the next block. It eventually applies an expression filter to the Historical Alarms stream.
-
Position - The position of the activity in the diagram.
-
Follow Path - The follow path specifies how to link to activities. "Completed" path will execute the next branch despite the state of this block. With "State" path, it's possible to associate two branches with this block. The "Success" branch is executed if this block is successful. Otherwise, the "Failure" branch will be executed.
-
Color - Enter a HEX color code in the text entry field or click on the
button in order to open the color picker window to select your preferred
color. -
Width - Use the pulldown menu to select from Small, Medium, or Large activity block width size.
-
Height - Use the pulldown menu to select from Small or Large activity block height size.
Data Source
-
Point Name - Enter the data source, in the text entry field, to be used by this activity or click on the
button to open the Data Browser
and navigate to your selected data source.
Timeout Settings
-
Timeout - Timeout applied when the data sources are requested.
-
Threads - The number of concurrent threads used to request the data sources.
-
Sampling Rate - Scan rate used to subscribe to the data sources.
Historical Data Settings
-
Start Date - The starting date/time of the historical read. Enter a date and time in the text entry field or click on the
 button to open the date/time
selection window.
button to open the date/time
selection window. -
End Date - The ending date/time of the historical read. Enter a date and time in the text entry field or click on the
button to open the date/time
selection window.
Data Schema
-
Data Schema - Shows the list of columns exposed by the activity. If the schema is not Read-Only, it is possible to configure the list of columns manually. Click the 'Configure' link to manually configure the column list. You can also Reset the Data Schema. You can also click on the 'Fields Editor' link to open the 'Add/Remove fields from the subscription' window, which allows you to configure Server Fields or Virtual Fields.
Data Filter
-
Data Filter - Select the rows that will be returned to the next activity. By default, all rows are returned. You can use the columns of the data source to create the row filter. Click on the 'Edit Expression' link to open the Expression Editor window, which can help in constructing required expressions. [See also Expression Functions for Datasets.]
Retry Settings
-
Retry Count - The number of retrials before marking the activity as failed.
-
Delay - The delay between the retrials of the activity.
Return to Top of Activity Library List
Historical Input
Historical Input Activity
The Historical Input activity reads the data from a Historical Data source, converts it into a stream, and provides it to the next block. It eventually applies an expression filter to the Historical Data stream.
The Historical Input activity contains the following settings:
General Settings
-
The activity is enabled - True to enable the activity.
-
Activity Name - The unique name of the activity. It can be used to identify the activity in the expressions or in traces.
-
Activity Label - A custom label that is used to show additional information in the block, but it's not as verbose as the description.
-
Activity Description - The description of the activity will be visualized as a tooltip when you move the mouse over the activity.
-
Activity Type - Reads the data from an Historical Alarms source, converts it into a stream and provides it to the next block. It eventually applies an expression filter to the Historical Alarms stream.
-
Position - The position of the activity in the diagram.
-
Follow Path - The follow path specifies how to link to activities. "Completed" path will execute the next branch despite the state of this block. With "State" path, it's possible to associate two branches with this block. The "Success" branch is executed if this block is successful. Otherwise, the "Failure" branch will be executed.
-
Color - Enter a HEX color code in the text entry field or click on the
button in order to open the color picker window to select your preferred
color. -
Width - Use the pulldown menu to select from Small, Medium, or Large activity block width size.
-
Height - Use the pulldown menu to select from Small or Large activity block height size.
Data Source
-
Point Name - Enter the data source, in the text entry field, to be used by this activity or click on the
button to open the Data Browser
and navigate to your selected data source.
Timeout Settings
-
Timeout - Timeout applied when the data sources are requested.
-
Threads - The number of concurrent threads used to request the data sources.
-
Sampling Rate - Scan rate used to subscribe to the data sources.
Historical Data Settings
-
Start Date - The starting date/time of the historical read. Enter a date and time in the text entry field or click on the expression button to configure the timestamp using an expression.
-
End Date - The ending date/time of the historical read. Enter a date and time in the text entry field or click on the expression button to configure the timestamp using an expression.
-
Threads - The number of concurrent threads to retrieve the HDA tags.
-
Aggregate - Use the pulldown menu to select from None, Interpolative, Average, TimeAverage, Total, Minimum, Maximum, MinimumActualTime, MaximumActualTime, Range, Sum, AnnotationCount, Count, Delta, DurationGood, DurationBad, PercentGood, PercentBad or WorstQuality.
-
Processing Time - Set the processing time for the Aggregate function by entering a number in the first text entry field (or using the up/down arrows), then selecting from Days, Hours, Minutes or Seconds.
-
Read Size - The number of samples requested from the historian in a single read. This does not limit the number of samples returned. Multiple calls will be made automatically, if needed. We do not recommend changing this number unless you are advised to change it to solve a specific issue.
-
Ignore Bad Quality Data Samples - Check the box if you do not want Bad Quality Data Samples included
Data Schema
-
Data Schema - Shows the list of columns exposed by the activity. If the schema is not Read-Only, it is possible to configure the list of columns manually. Click the 'Configure' link to manually configure the column list. You can also 'Reset' the Data Schema.
Data Filter
-
Data Filter - Select the rows that will be returned to the next activity. By default, all rows are returned. You can use the columns of the data source to create the row filter. Click on the 'Edit Expression' link to open the Expression Editor window, which can help in constructing required expressions. [See also Expression Functions for Datasets.]
Retry Settings
-
Retry Count - The number of retrials before marking the activity as failed.
-
Delay - The delay between the retrials of the activity.
Return to Top of Activity Library List
JSON Content Reader
JSON Content Reader

The JSON Content Reader activity reads the data from JSON content. It eventually applies an expression filter to rows of data.
The JSON Content Reader activity contains the following settings:
General Settings
-
The activity is enabled - True to enable the activity.
-
Activity Name - The unique name of the activity. It can be used to identify the activity in the expressions or in traces.
-
Activity Label - A custom label that is used to show additional information in the block, but it's not as verbose as the description.
-
Activity Description - The description of the activity will be visualized as a tooltip when you move the mouse over the activity.
-
Activity Type - Reads the data from JSON content. It eventually applies an expression filter to rows of data.
-
Position - The position of the activity in the diagram.
-
Follow Path - The follow path specifies how to link to activities. "Completed" path will execute the next branch despite the state of this block. With "State" path, it's possible to associate two branches with this block. The "Success" branch is executed if this block is successful. Otherwise, the "Failure" branch will be executed.
-
Color - Enter a HEX color code in the text entry field or click on the
button in order to open the color picker window to select your preferred
color. -
Width - Use the pulldown menu to select from Small, Medium, or Large activity block width size.
-
Height - Use the pulldown menu to select from Small or Large activity block height size.
Timeout Settings
-
Timeout - Timeout applied when the data sources are requested.
-
Threads - The number of concurrent threads used to request the data sources.
-
Sampling Rate - Scan rate used to subscribe to the data sources.
JSON Reader Settings
-
JSON Source Type - Use the pulldown menu to select from Expression or External File. This will affect the following setting
-
Expression - If Expression is selected as the JSON Source Type, this is the expression used to refer to JSON content. You can enter an expression in the text entry field or click on the nearby 'Edit Expression' link, which will open the 'Edit the expression' window, allowing you to construct your desired expression. [See also Expression Functions for Datasets.]
-
External File - If External File is selected as the JSON Source Type, this is the file path or expression used to retrieve the file path for the file with the JSON content. You can enter a file path or an expression in the text entry field or click on the nearby 'Browse Files' link, to open a file explorer to navigate to your selected file path, or on the nearby 'Edit Expression' link, which will open the 'Edit the expression' window, allowing you to construct your desired expression. [See also Expression Functions for Datasets.]
-
JSON Parse Mode - Use the pulldown menu to select from 'Match Predefined Columns by Positions', 'Match Predefined Columns by Names', 'Parse as Name-Value Pairs', or 'Convert to XML'.
-
Include Array Indices - This selection is activated upon selection of the JSON Parse Mode of 'Parse as Name-Value Pairs'. Check the checkbox if you wish to include array indices.
-
Write to Xml File - This selection is activated upon selection of the JSON Parse Mode of 'Convert to XML'. This provides an option to write XML content into an external file. When checked, you will be able to enter the location of your selected XML file in the text entry field or click on the nearby 'Browse Files' link, which will open a file explorer, allowing you to navigate to your selected XML file or on the nearby 'Edit Expression' link, which will open the 'Edit the expression' window, allowing you to construct your desired expression.
Data Schema
-
Data Schema - Shows the list of columns exposed by the activity. If the schema is not Read-Only, it is possible to configure the list of columns manually. Click the 'Configure' link to manually configure the column list. You can also 'Reset' the Data Schema.
Data Filter
-
Data Filter - Select the rows that will be returned to the next activity. By default, all rows are returned. You can use the columns of the data source to create the row filter. Click on the 'Edit Expression' link to open the Expression Editor window, which can help in constructing required expressions. [See also Expression Functions for Datasets.]
Retry Settings
-
Retry Count - The number of retrials before marking the activity as failed.
-
Delay - The delay between the retrials of the activity.
Return to Top of Activity Library List
XML File Reader
XML File Reader Activity

The XML File Reader activity reads the data from an XML file. It eventually applies an extension filter to rows of data.
The XML File Reader activity has the following settings:
General Settings
-
The activity is enabled - True to enable the activity.
-
Activity Name - The unique name of the activity. It can be used to identify the activity in the expressions or in traces.
-
Activity Label - A custom label that is used to show additional information in the block, but it's not as verbose as the description.
-
Activity Description - The description of the activity will be visualized as a tooltip when you move the mouse over the activity.
-
Activity Type - Reads the data from an XML file. It eventually applies an expression filter to rows of data.
-
Position - The position of the activity in the diagram.
-
Follow Path - The follow path specifies how to link to activities. "Completed" path will execute the next branch despite the state of this block. With "State" path, it's possible to associate two branches with this block. The "Success" branch is executed if this block is successful. Otherwise, the "Failure" branch will be executed.
-
Color - Enter a HEX color code in the text entry field or click on the
button in order to open the color picker window to select your preferred
color. -
Width - Use the pulldown menu to select from Small, Medium, or Large activity block width size.
-
Height - Use the pulldown menu to select from Small or Large activity block height size.
Timeout Settings
-
Timeout - Timeout applied when the data sources are requested.
-
Threads - The number of concurrent threads used to request the data sources.
-
Sampling Rate - Scan rate used to subscribe to the data sources.
XML Settings
-
Configure Validation -This opens the 'Configure the validation of the XML activity' window, where you can add/specify XSD files used for validation, as well as enable the validation according to XSD schemas, if desired.
-
Source Type - Use the pulldown menu to select from either Directory or External Web Site.
-
Source File(s) - If Directory is selected as Source Type, you can enter the expression used to evaluate the result of the condition block. Include one file per line, or an expression that evaluates to a file path. Click on the 'Edit Expression' link to open the Expression Editor window, which can help in constructing required expressions. Click on the 'Browse Files' link to open a file explorer to navigate to your required source files. [See also Expression Functions for Datasets.]
-
External Web Site - If External Web Site is selected as Source Type, you can enter the URL here.
-
User Name - Enter the user name in the text entry field - if required for access to the directory or external web site.
-
Password - Enter the password in the text entry field - if required for access to the directory or external web site.
-
XPath Query - Enter the query syntax in the text entry field.
-
Max XML nodes - The maximum number of XML nodes that will be processed.
-
Retrieve Data As - Use the pulldown menu to select from either Child Node Values or Attribute Values.
-
Attempt to map XML data by column names rather than column position - Click this checkbox if you want XML data mapped by column names.
Data Schema
-
Data Schema - Shows the list of columns exposed by the activity. If the schema is not Read-Only, it is possible to configure the list of columns manually. Click the 'Configure' link to manually configure the column list. You can also opt to 'Detect from file'.
Data Filter
-
Data Filter - Select the rows that will be returned to the next activity. By default, all rows are returned. You can use the columns of the data source to create the row filter. Click on the 'Edit Expression' link to open the Expression Editor window, which can help in constructing required expressions. [See also Expression Functions for Datasets.]
Retry Settings
-
Retry Count - The number of retrials before marking the activity as failed.
-
Delay - The delay between the retrials of the activity.
Return to Top of Activity Library List
Bulk Data Manipulator
Bulk Data Manipulator Activity
The Bulk Data Manipulator activity executes the GridWorX Data Manipulator for every row in the input DataSet, passing input parameter values for each data row and exposing output parameters as Output.
The Bulk Data Manipulator activity contains the following settings:
General Settings
-
The activity is enabled - True to enable the activity.
-
Activity Name - The unique name of the activity. It can be used to identify the activity in the expressions or in traces.
-
Activity Label - A custom label that is used to show additional information in the block, but it's not as verbose as the description.
-
Activity Description - The description of the activity will be visualized as a tooltip when you move the mouse over the activity.
-
Activity Type - Executes the GridWorX Data Manipulator for every row in the input DataSet, passing input parameter values for each data row and exposing output parameters as Output.
-
Position - The position of the activity in the diagram.
-
Follow Path - The follow path specifies how to link to activities. "Completed" path will execute the next branch despite the state of this block. With "State" path, it's possible to associate two branches with this block. The "Success" branch is executed if this block is successful. Otherwise, the "Failure" branch will be executed.
-
Color - Enter a HEX color code in the text entry field or click on the
button in order to open the color picker window to select your preferred
color. -
Width - Use the pulldown menu to select from Small, Medium, or Large activity block width size.
-
Height - Use the pulldown menu to select from Small or Large activity block height size.
Data Input
-
Consume data from - Use the pulldown menu to select from Previous Activity or Specific Activity.
-
Activity Name - If you selected 'Specific Activity' in the 'Consume data from' setting, enter your selected activity in the text entry field or use the pulldown menu to select an existing activity.
Data Source
-
Point Name - Enter the data source, in the text entry field, to be used by this activity or click on the
button to open the Data Browser
and navigate to your selected data source.
Input Parameters
-
Input Parameters - Shows the parameters available for the selected data source. Click the 'Configure' link to manually configure the column list. You can also 'Refresh' the list.
Output Parameters
-
Output Parameters - Shows the parameters available for the selected data source. Click the 'Configure' link to manually configure the column list. You can also 'Refresh' the list.
Timeout Settings
-
Timeout - Timeout applied when the data sources are requested.
-
Threads - The number of concurrent threads used to request the data sources.
-
Sampling Rate - Scan rate used to subscribe to the data sources.
Other Settings
-
Enable Database Transaction scope - The Bulk Data Manipulator activity executes a GridWorX data manipulator 'N' times for each of its source rows. If you check this checkbox, these database commands are wrapped in a single database transaction (not to be confused with a standard BridgeWorX transaction). This means that if a particular command fails, the entire batch would roll back; i.e., the state of the database would return to what it was just before execution of the Bulk Data Manipulator activity. So, either all commands succeed, or no changes are committed to the database. When this setting is unchecked (not enabled), BridgeWorX will keep executing the Bulk Data Manipulator activity, even if one or more executions fail. Should this occur, any previously succeeded commands (inserts, updates, deletes, etc.) will remain committed in the database.
-
Succeed only if All source rows are processed successfully - If checked, if the Data Manipulator command fails for at least one source row, the entire operation should fail.
Data Schema
-
Data Schema - Shows the list of columns exposed by the activity. If the schema is not Read-Only, it is possible to configure the list of columns manually. Click the 'Configure' link to manually configure the column list. You can also 'Reset' the Data Schema.
Data Filter
-
Data Filter - Select the rows that will be returned to the next activity. By default, all rows are returned. You can use the columns of the data source to create the row filter. Click on the 'Edit Expression' link to open the Expression Editor window, which can help in constructing required expressions. [See also Expression Functions for Datasets.]
Retry Settings
-
Retry Count - The number of retrials before marking the activity as failed.
-
Delay - The delay between the retrials of the activity.
Return to Top of Activity Library List
CSV File Output
CSV File Output Activity
The CSV File Output activity writes the (filtered) output of the previous activity into a CSV file.
The CSV File Output activity contains the following settings:
General Settings
-
The activity is enabled - True to enable the activity.
-
Activity Name - The unique name of the activity. It can be used to identify the activity in the expressions or in traces.
-
Activity Label - A custom label that is used to show additional information in the block, but it's not as verbose as the description.
-
Activity Description - The description of the activity will be visualized as a tooltip when you move the mouse over the activity.
-
Activity Type - Writes the (filtered) output of the previous activity into a CSV file.
-
Position - The position of the activity in the diagram.
-
Follow Path - The follow path specifies how to link to activities. "Completed" path will execute the next branch despite the state of this block. With "State" path, it's possible to associate two branches with this block. The "Success" branch is executed if this block is successful. Otherwise, the "Failure" branch will be executed.
-
Color - Enter a HEX color code in the text entry field or click on the
button in order to open the color picker window to select your preferred
color. -
Width - Use the pulldown menu to select from Small, Medium, or Large activity block width size.
-
Height - Use the pulldown menu to select from Small or Large activity block height size.
Data Input
-
Consume data from - Use the pulldown menu to select from "Previous Activity" or "Specific Activity".
-
Activity Name- If you selected "Specific Activity" in the 'Consume data from' pulldown, you can enter an activity name in the text entry field or use the pulldown to select an existing activity name if available.
Timeout Settings
-
Timeout - Timeout applied when the data sources are requested.
-
Threads - The number of concurrent threads used to request the data sources.
-
Sampling Rate - Scan rate used to subscribe to the data sources.
CSV File Settings
-
Target File Name - Enter a target file name in the text entry field. Click the 'Edit Expression' link to open the Expression Editor in order to construct your intended expression.
-
Target folder - The expression used to evaluate the target directory. Specify the file or expression that evaluates to a file path. Click on the 'Edit Expression' link to open the Expression Editor window, which can help in constructing required expressions. Click on the 'Browse File' link to open the Browse For Folder window and navigate to your selected target folder. [See also Expression Functions for Datasets.]
-
Column Separator - The Column Separator is used to identify the columns in the CSV file. Use the pulldown to select from Comma, Semicolon, Tab, Space or Special Character. If you select Special Character, you can then enter it into the nearby text entry field.
-
Encapsulation - Use the pulldown to select from None, Single Quote or Double Quote.
-
Include Headers in the CSV file - Check this checkbox if you would like to include headers.
-
Append new lines to existing CSV file. Do not overwrite if file already exists - Click this checkbox to allow new lines to be added to the existing CSV file.
Data Schema
-
Data Schema - Shows the list of columns exposed by the activity. If the schema is not Read-Only, it is possible to configure the list of columns manually. Click the 'Configure' link to manually configure the column list. You can also 'Reset' the Data Schema.
Data Filter
-
Data Filter - Select the rows that will be returned to the next activity. By default, all rows are returned. You can use the columns of the data source to create the row filter. Click on the 'Edit Expression' link to open the Expression Editor window, which can help in constructing required expressions. [See also Expression Functions for Datasets.]
Retry Settings
-
Retry Count - The number of retrials before marking the activity as failed.
-
Delay - The delay between the retrials of the activity.
Return to Top of Activity Library List
Bulk Real Time Output
Bulk Real Time Output Activity

The Bulk Real Time Output activity, from the Source DataSet, builds a dynamic list of Real Time points and corresponding data values, then writes those values to points.
The Bulk Real Time Output activity contains the following settings:
General Settings
-
The activity is enabled - True to enable the activity.
-
Activity Name - The unique name of the activity. It can be used to identify the activity in the expressions or in traces.
-
Activity Label - A custom label that is used to show additional information in the block, but it's not as verbose as the description.
-
Activity Description - The description of the activity will be visualized as a tooltip when you move the mouse over the activity.
-
Activity Type - From the Source DataSet, builds a dynamic list of Real Time points and corresponding data values, then writes those values to points.
-
Position - The position of the activity in the diagram.
-
Follow Path - The follow path specifies how to link to activities. "Completed" path will execute the next branch despite the state of this block. With "State" path, it's possible to associate two branches with this block. The "Success" branch is executed if this block is successful. Otherwise, the "Failure" branch will be executed.
-
Color - Enter a HEX color code in the text entry field or click on the
button in order to open the color picker window to select your preferred
color. -
Width - Use the pulldown menu to select from Small, Medium, or Large activity block width size.
-
Height - Use the pulldown menu to select from Small or Large activity block height size.
Data Input
-
Consume data from - Use the pulldown menu to select from Previous Activity or Specific Activity.
-
Activity Name - If you selected 'Specific Activity' in the 'Consume data from' setting, enter your selected activity in the text entry field or use the pulldown menu to select an existing activity.
Timeout Settings
-
Timeout - Timeout applied when the data sources are requested.
-
Threads - The number of concurrent threads used to request the data sources.
-
Sampling Rate - Scan rate used to subscribe to the data sources.
Expression Settings
-
Tags Expression - The expression used to build DA point names to write to. The expression is calculated per every row in the Source DataSet. You may use {{column:ColumnName}} syntax in the expression to reference elements within the Source row. Click on the 'Edit Expression' link to open the Expression Editor window, which can help in constructing required expressions. [See also Expression Functions for Datasets.]
-
Tag Values Expression - The expression used to build the value for writing. This expression is calculated per every row in the Source DataSet. You may use {{column:ColumnName}} syntax in the expression to reference elements within the Source row. Click on the 'Edit Expression' link to open the Expression Editor window, which can help in constructing required expressions. [See also Expression Functions for Datasets.]
-
Wait after Write - Use the pulldown menu to select from [None], 1.0x Scan Period, 1.5x Scan Period, 2.0x Scan Period, 2.5x Scan Period, or 3.0x Scan Period. This setting indicates the maximum time interval to wait for the next update from the OPC Server after a successful Write. Shorter wait intervals would result in faster completion of this activity. However, there might be a risk that a subsequent Read request immediately after for the same tag from the current or parallel transaction could possibly return an 'old' value and not the one just written. Typically, the OPC Server should send a 'new value' data update within one scan period after a successful Write.
-
Succeed only if All writes succeeded -Click this checkbox to report this activity as successful only if all Writes are successful.
Data Schema
-
Data Schema - Shows the list of columns exposed by the activity. If the schema is not Read-Only, it is possible to configure the list of columns manually. Click the 'Configure' link to manually configure the column list. You can also 'Reset' the Data Schema.
Data Filter
-
Data Filter - Select the rows that will be returned to the next activity. By default, all rows are returned. You can use the columns of the data source to create the row filter. Click on the 'Edit Expression' link to open the Expression Editor window, which can help in constructing required expressions. [See also Expression Functions for Datasets.]
Retry Settings
-
Retry Count - The number of retrials before marking the activity as failed.
-
Delay - The delay between the retrials of the activity.
Return to Top of Activity Library List
Data Manipulator
Data Manipulator Activity

The Data Manipulator activity executes the GridWorX Data Manipulator, passing input parameter values and exposing output parameters as Output.
The Data Manipulator activity contains the following settings:
General Settings
-
The activity is enabled - True to enable the activity.
-
Activity Name - The unique name of the activity. It can be used to identify the activity in the expressions or in traces.
-
Activity Label - A custom label that is used to show additional information in the block, but it's not as verbose as the description.
-
Activity Description - The description of the activity will be visualized as a tooltip when you move the mouse over the activity.
-
Activity Type - Executes the GridWorX Data Manipulator, passing input parameter values and exposing output parameters as Output.
-
Position - The position of the activity in the diagram.
-
Follow Path - The follow path specifies how to link to activities. "Completed" path will execute the next branch despite the state of this block. With "State" path, it's possible to associate two branches with this block. The "Success" branch is executed if this block is successful. Otherwise, the "Failure" branch will be executed.
-
Color - Enter a HEX color code in the text entry field or click on the
button in order to open the color picker window to select your preferred
color. -
Width - Use the pulldown menu to select from Small, Medium, or Large activity block width size.
-
Height - Use the pulldown menu to select from Small or Large activity block height size.
Data Source
-
Point Name - Enter the data source, in the text entry field, to be used by this activity or click on the
button to open the Data Browser
and navigate to your selected data source.
Input Parameters
-
Input Parameters - Shows the parameters available for the selected data source. Click the 'Configure' link to manually configure the column list. You can also 'Refresh' the list.
Output Parameters
-
Output Parameters - Shows the parameters available for the selected data source. Click the 'Configure' link to manually configure the column list. You can also 'Refresh' the list.
Timeout Settings
-
Timeout - Timeout applied when the data sources are requested.
-
Threads - The number of concurrent threads used to request the data sources.
-
Sampling Rate - Scan rate used to subscribe to the data sources.
Other Settings
-
Enable Database Transaction scope -
Data Schema
-
Data Schema - Shows the list of columns exposed by the activity. If the schema is not Read-Only, it is possible to configure the list of columns manually. Click the 'Configure' link to manually configure the column list. You can also 'Reset' the Data Schema.
Data Filter
-
Data Filter - Select the rows that will be returned to the next activity. By default, all rows are returned. You can use the columns of the data source to create the row filter. Click on the 'Edit Expression' link to open the Expression Editor window, which can help in constructing required expressions. [See also Expression Functions for Datasets.]
Retry Settings
-
Retry Count - The number of retrials before marking the activity as failed.
-
Delay - The delay between the retrials of the activity.
Return to Top of Activity Library List
Generic JSON Writer
Generic JSON Writer Activity

The Generic JSON Writer activity prepares JSON content and writes it to the file.
The Generic JSON Writer activity contains the following settings
General Settings
-
The activity is enabled -True to enable the activity.
-
Activity Name -The unique name of the activity. It can be used to identify the activity in the expressions or in traces.
-
Activity Label -A custom label that is used to show additional information in the block, but it's not as verbose as the description.
-
Activity Description -The description of the activity will be visualized as a tooltip when you move the mouse over the activity.
-
Activity Type -Prepares JSON content and writes it to the file.
-
Position -The position of the activity in the diagram.
-
Follow Path -The follow path specifies how to link to activities. "Completed" path will exeute the next branch despite the state of this block. With "State" path, it's possible to associate two branches with this block. The "Success" branch is executed if this block is successful. Otherwise, the "Failure" branch will be executed.
-
Color - Enter a HEX color code in the text entry field or click on the
button in order to open the color picker
window to select your preferred color. -
Width - Use the pulldown menu to select from Small, Medium, or Large activity block width size.
-
Height - Use the pulldown menu to select from Small or Large activity block height size.
Timeout Settings
-
Timeout - Timeout applied when the data sources are requested.
-
Threads - The number of concurrent threads used to request the data sources.
-
Sampling Rate - Scan rate used to subscribe to the data sources.
Other Settings
-
JSON Doc Preview -Preview of JSON Content, with placeholders/anchors for runtime data enclosed with '{}'. Click on the "JSON Designer" link to open the JSON Content Designer window.
-
Target File Name - Enter a target file name in the text entry field.
-
Target folder - The expression used to evaluate the target directory. Specify the file or expression that evaluates to a file path. Click on the 'Edit Expression' link to open the Expression Editor window, which can help in constructing required expressions. Click on the 'Browse Folder' link to open the Browse For Folder window and navigate to your selected target folder. [See also Expression Functions for Datasets.]
Data Schema
-
Data Schema - Shows the list of columns exposed by the activity. If the schema is not Read-Only, it is possible to configure the list of columns manually. Click the 'Configure' link to manually configure the column list. You can also 'Reset' the Data Schema.
Data Filter
-
Data Filter - Select the rows that will be returned to the next activity. By default, all rows are returned. You can use the columns of the data source to create the row filter. Click on the 'Edit Expression' link to open the Expression Editor window, which can help in constructing required expressions. [See also Expression Functions for Datasets.]
Retry Settings
-
Retry Count - The number of retrials before marking the activity as failed.
-
Delay - The delay between the retrials of the activity.
Return to Top of Activity Library List
Real Time Output
Real Time Output Activity

The Real Time Output activity writes the stream into a Real Time Data Tag.
The Real Time Output activity contains the following settings:
General Settings
-
The activity is enabled - True to enable the activity.
-
Activity Name - The unique name of the activity. It can be used to identify the activity in the expressions or in traces.
-
Activity Label - A custom label that is used to show additional information in the block, but it's not as verbose as the description.
-
Activity Description - The description of the activity will be visualized as a tooltip when you move the mouse over the activity.
-
Activity Type - Writes the stream into a Real Time Data Tag.
-
Position - The position of the activity in the diagram.
-
Follow Path - The follow path specifies how to link to activities. "Completed" path will execute the next branch despite the state of this block. With "State" path, it's possible to associate two branches with this block. The "Success" branch is executed if this block is successful. Otherwise, the "Failure" branch will be executed.
-
Color - Enter a HEX color code in the text entry field or click on the
button in order to open the color picker window to select your preferred
color. -
Width - Use the pulldown menu to select from Small, Medium, or Large activity block width size.
-
Height - Use the pulldown menu to select from Small or Large activity block height size.
Data Sources
-
Data Sources - Click on the "+ Click here to add new item" link to add a new tag. You can enter a Point Name directly in the text entry field or click on the
button to open
the Data Browser and navigate to your selected tag. You can also click
on the "(Click to add multiple tags)" link in the Data Sources
section header in order to add more than one tag at a time.
Timeout Settings
-
Timeout - Timeout applied when the data sources are requested.
-
Threads - The number of concurrent threads used to request the data sources.
-
Sampling Rate - Scan rate used to subscribe to the data sources.
Other Settings
-
Wait after Write - Indicates the maximum time interval to wait for the next data update from the OPC server after a successful Write. Shorter wait intervals would result in faster completion of this activity. However, there might be a risk that a subsequent Read request immediately after for the same tag from the current or parallel transaction could possible return an 'old' value and not the one just written. Typically, the OPC server should send a 'new value' data update within one scan period after a successful Write.
-
Success only if all writes succeeded - If any tag write fails, entire operation should fail.
Data Schema
-
Data Schema - Shows the list of columns exposed by the activity. If the schema is not Read-Only, it is possible to configure the list of columns manually. Click the 'Configure' link to manually configure the column list. You can also 'Reset' the Data Schema.
Data Filter
-
Data Filter - Select the rows that will be returned to the next activity. By default, all rows are returned. You can use the columns of the data source to create the row filter. Click on the 'Edit Expression' link to open the Expression Editor window, which can help in constructing required expressions. [See also Expression Functions for Datasets.]
Retry Settings
-
Retry Count - The number of retrials before marking the activity as failed.
-
Delay - The delay between the retrials of the activity.
Return to Top of Activity Library List
Web Service Manipulator
Web Service Manipulator Activity

The Web Service Manipulator activity executes the Web Service Data Manipulator, passing input parameter values and exposing return value as Output.
The Web Service Manipulator activity contains the following settings:
General Settings
-
The activity is enabled - True to enable the activity.
-
Activity Name - The unique name of the activity. It can be used to identify the activity in the expressions or in traces.
-
Activity Label - A custom label that is used to show additional information in the block, but it's not as verbose as the description.
-
Activity Description - The description of the activity will be visualized as a tooltip when you move the mouse over the activity.
-
Activity Type - Executes Web Service Data Manipulator, passing input parameter values and exposing return value as Output..
-
Position - The position of the activity in the diagram.
-
Follow Path - The follow path specifies how to link to activities. "Completed" path will execute the next branch despite the state of this block. With "State" path, it's possible to associate two branches with this block. The "Success" branch is executed if this block is successful. Otherwise, the "Failure" branch will be executed.
-
Color - Enter a HEX color code in the text entry field or click on the
button in order to open the color picker window to select your preferred
color. -
Width - Use the pulldown menu to select from Small, Medium, or Large activity block width size.
-
Height - Use the pulldown menu to select from Small or Large activity block height size.
Data Source
-
Point Name - Enter the data source, in the text entry field, to be used by this activity or click on the
button to open the Data Browser
and navigate to your selected data source.
Input Parameters
-
Input Parameters - Shows the parameters available for the selected data source. Click the 'Configure' link to manually configure the column list. You can also 'Refresh' the list.
Output Parameters
-
Output Parameters - Shows the parameters available for the selected data source. Click the 'Configure' link to manually configure the column list. You can also 'Refresh' the list.
Timeout Settings
-
Timeout - Timeout applied when the data sources are requested.
-
Threads - The number of concurrent threads used to request the data sources.
-
Sampling Rate - Scan rate used to subscribe to the data sources.
Data Schema
-
Data Schema - Shows the list of columns exposed by the activity. If the schema is not Read-Only, it is possible to configure the list of columns manually. Click the 'Configure' link to manually configure the column list. You can also 'Reset' the Data Schema.
Data Filter
-
Data Filter - Select the rows that will be returned to the next activity. By default, all rows are returned. You can use the columns of the data source to create the row filter. Click on the 'Edit Expression' link to open the Expression Editor window, which can help in constructing required expressions. [See also Expression Functions for Datasets.]
Retry Settings
-
Retry Count - The number of retrials before marking the activity as failed.
-
Delay - The delay between the retrials of the activity.
Return to Top of Activity Library List
XML File Output
XML File Output Activity
The XML File Output activity writes the (filtered) output of some other activity into an XML file.
The XML File Output activity has the following settings:
General Settings
-
The activity is enabled - True to enable the activity.
-
Activity Name - The unique name of the activity. It can be used to identify the activity in the expressions or in traces.
-
Activity Label - A custom label that is used to show additional information in the block, but it's not as verbose as the description.
-
Activity Description - The description of the activity will be visualized as a tooltip when you move the mouse over the activity.
-
Activity Type - Writes the (filtered) output of some other activity into an XML file.
-
Position - The position of the activity in the diagram.
-
Follow Path - The follow path specifies how to link to activities. "Completed" path will execute the next branch despite the state of this block. With "State" path, it's possible to associate two branches with this block. The "Success" branch is executed if this block is successful. Otherwise, the "Failure" branch will be executed.
-
Color - Enter a HEX color code in the text entry field or click on the
button in order to open the color picker window to select your preferred
color. -
Width - Use the pulldown menu to select from Small, Medium, or Large activity block width size.
-
Height - Use the pulldown menu to select from Small or Large activity block height size.
Data Input
-
Consume data from - Use the pulldown menu to select from Previous Activity or Specific Activity.
-
Activity Name - If you selected 'Specific Activity' in the 'Consume data from' setting, enter your selected activity in the text entry field or use the pulldown menu to select an existing activity.
Timeout Settings
-
Timeout - Timeout applied when the data sources are requested.
-
Threads - The number of concurrent threads used to request the data sources.
-
Sampling Rate - Scan rate used to subscribe to the data sources.
XML File Settings
-
Target File Name - Enter a target file name in the text entry field.
-
Target folder - The expression used to evaluate the target directory. Specify the file or expression that evaluates to a file path. Click on the 'Edit Expression' link to open the Expression Editor window, which can help in constructing required expressions. Click on the 'Browse Folder' link to open the Browse For Folder window and navigate to your selected target folder. [See also Expression Functions for Datasets.]
-
Content Nodes Path - Enter your selected content nodes path in the text entry field.
-
Write Values as XML Attributes - Click this checkbox if you want the values written as XML attributes.
Retry Settings
-
Retry Count - The number of retrials before marking the activity as failed.
-
Delay - The delay between the retrials of the activity.
Return to Top of Activity Library List
Data Set Transformer
Data Set Transformer Activity
![]()
The Data Set Transformer activity takes the output Data Set of some other activity and converts it into a different Data Set. You can hide or rename source column(s), add calculated columns, or filter source rows.
The Data Set Transformer activity has the following settings:
General Settings
-
The activity is enabled - True to enable the activity.
-
Activity Name - The unique name of the activity. It can be used to identify the activity in the expressions or in traces.
-
Activity Label - A custom label that is used to show additional information in the block, but it's not as verbose as the description.
-
Activity Description - The description of the activity will be visualized as a tooltip when you move the mouse over the activity.
-
Activity Type - Takes the output Data Set of some other activity and converts it into a different Data Set. You can hide or rename source column(s), add calculated columns, or filter source rows.
-
Position - The position of the activity in the diagram.
-
Follow Path - The follow path specifies how to link to activities. "Completed" path will execute the next branch despite the state of this block. With "State" path, it's possible to associate two branches with this block. The "Success" branch is executed if this block is successful. Otherwise, the "Failure" branch will be executed.
-
Color - Enter a HEX color code in the text entry field or click on the
button in order to open the color picker window to select your preferred
color. -
Width - Use the pulldown menu to select from Small, Medium, or Large activity block width size.
-
Height - Use the pulldown menu to select from Small or Large activity block height size.
Data Input
-
Consume data from - Use the pulldown menu to select from Previous Activity or Specific Activity.
-
Activity Name - If you selected 'Specific Activity' in the 'Consume data from' setting, enter your selected activity in the text entry field or use the pulldown menu to select an existing activity.
Timeout Settings
-
Timeout - Timeout applied when the data sources are requested.
-
Threads - The number of concurrent threads used to request the data sources.
-
Sampling Rate - Scan rate used to subscribe to the data sources.
Data Schema
-
Data Schema - Shows the list of columns exposed by the activity. If the schema is not Read-Only, it is possible to configure the list of columns manually. Click the 'Configure' link to manually configure the column list. You can also Reset the Data Schema.
Data Filter
-
Data Filter - Select the rows that will be returned to the next activity. By default, all rows are returned. You can use the columns of the data source to create the row filter. Click on the 'Edit Expression' link to open the Expression Editor window, which can help in constructing required expressions. [See also Expression Functions for Datasets.]
Retry Settings
-
Retry Count - The number of retrials before marking the activity as failed.
-
Delay - The delay between the retrials of the activity.
Return to Top of Activity Library List
Dynamic Tag Writer
Dynamic Tag Writer Activity

The Dynamic Tag Writer activity writes a value into a Dynamic DA Tag.
The Dynamic Tag Writer activity has the following settings:
General Settings
-
The activity is enabled - True to enable the activity.
-
Activity Name - The unique name of the activity. It can be used to identify the activity in the expressions or in traces.
-
Activity Label - A custom label that is used to show additional information in the block, but it's not as verbose as the description.
-
Activity Description - The description of the activity will be visualized as a tooltip when you move the mouse over the activity.
-
Activity Type - Writes a value into a Dynamic DA Tag.
-
Position - The position of the activity in the diagram.
-
Follow Path - The follow path specifies how to link to activities. "Completed" path will execute the next branch despite the state of this block. With "State" path, it's possible to associate two branches with this block. The "Success" branch is executed if this block is successful. Otherwise, the "Failure" branch will be executed.
-
Color - Enter a HEX color code in the text entry field or click on the
button in order to open the color picker window to select your preferred
color. -
Width - Use the pulldown menu to select from Small, Medium, or Large activity block width size.
-
Height - Use the pulldown menu to select from Small or Large activity block height size.
Timeout Settings
-
Timeout - Timeout applied when the data sources are requested.
-
Threads - The number of concurrent threads used to request the data sources.
-
Sampling Rate - Scan rate used to subscribe to the data sources.
Destination Dynamic Tags
-
Destination Dynamic Tags Expression - Click on the "+ Click here to add new item" to enter a new destination dynamic tag. You will be able to enter a Point Name Expression (the expression that evaluates to a tag name) in the left-side text entry field or click on the
 button to open the Expression Editor window, which can help in constructing
required expressions. On the right side, you'll be able to enter the
Output Expression in the text entry field or click on the button to open the Expression
Editor window, which can help in constructing required expressions.
[See also Expression
Functions for Datasets.]
button to open the Expression Editor window, which can help in constructing
required expressions. On the right side, you'll be able to enter the
Output Expression in the text entry field or click on the button to open the Expression
Editor window, which can help in constructing required expressions.
[See also Expression
Functions for Datasets.] -
Wait after Write - Indicates the maximum time interval to wait for the next data update from the OPC server after a successful Write. Shorter wait intervals would result in faster completion of this activity. However, there might be a risk that a subsequent Read request immediately after for the same tag from a current or parallel transaction could possibly return an 'old' value and not the one just written. Typically, the OPC server should send a 'new value' data update within one scan period after a succesful write.
-
Succeed only if All writes succeeded - If any tag write fails, the entire operation should fail.
Data Schema
-
Data Schema - Shows the list of columns exposed by the activity. If the schema is not Read-Only, it is possible to configure the list of columns manually. Click the 'Configure' link to manually configure the column list. You can also Reset the Data Schema.
Data Filter
-
Data Filter - Select the rows that will be returned to the next activity. By default, all rows are returned. You can use the columns of the data source to create the row filter. Click on the 'Edit Expression' link to open the Expression Editor window, which can help in constructing required expressions.
Retry Settings
-
Retry Count - The number of retrials before marking the activity as failed.
-
Delay - The delay between the retrials of the activity.
Return to Top of Activity Library List
Condition
Condition Activity
The Condition activity evaluates the expression and, depending on the expression, redirects the workflow.
The Condition activity has the following settings:
General Settings
-
The activity is enabled - True to enable the activity.
-
Activity Name - The unique name of the activity. It can be used to identify the activity in the expressions.
-
Activity Label - A custom label that is used to show additional information in the block, but it's not as verbose as the description.
-
Activity Description - The description of the activity will be visualized as a tooltip when you move the mouse over the activity.
-
Activity Type - Evaluates the expression and, depending on the expression, redirects the workflow.
-
Position - The position of the activity within the workflow.
-
Color - Enter a HEX color code in the text entry field or click on the
button in order to open the color picker window to select your preferred
color. -
Width - Use the pulldown menu to select from Small, Medium, or Large activity block width size.
-
Height - Use the pulldown menu to select from Small or Large activity block height size.
Timeout Settings
-
Timeout - Timeout applied when the data sources are requested.
-
Threads - The number of concurrent threads used to request the data sources.
-
Sampling Rate - Scan rate used to subscribe to the data sources.
Condition Settings
-
Condition - The expression used to evaluate the result of the condition block. Click on the 'Edit Expression' link to open the Expression Editor window, which can help in constructing required expressions. [See also Expression Functions for Datasets.]
Retry Settings
-
Retry Count - The number of retries before marking the activity as Failed.
-
Delay - The delay between the retrials of the activity.
Return to Top of Activity Library List
Information Broker
Information Broker

The Information Broker prepares JSON content and sends an outgoing message to Information Broker.
The Information Broker activity has the following settings:
General Settings
-
The activity is enabled - True to enable the activity.
-
Activity Name - The unique name of the activity. It can be used to identify the activity in the expressions.
-
Activity Label - A custom label that is used to show additional information in the block, but it's not as verbose as the description.
-
Activity Description - The description of the activity will be visualized as a tooltip when you move the mouse over the activity.
-
Activity Type - Prepares JSON content and sends an outgoing message to Information Broker.
-
Position - The position of the activity within the workflow.
-
Follow Path - The follow path specifies how to link to activities. "Completed" path will execute the next branch despite the state of this block. With "State" path, it's possible to associate two branches with this block. The "Success" branch is executed if this block is successful. Otherwise, the "Failure" branch will be executed.
-
Color - Enter a HEX color code in the text entry field or click on the
button in order to open the color picker window to select your preferred
color. -
Width - Use the pulldown menu to select from Small, Medium, or Large activity block width size.
-
Height - Use the pulldown menu to select from Small or Large activity block height size.
Timeout Settings
-
Timeout - Timeout applied when the data sources are requested.
-
Threads - The number of concurrent threads used to request the data sources.
-
Sampling Rate - Scan rate used to subscribe to the data sources.
Information Broker Activity
-
Publish Point -IoT Point Manager Publish Method. Enter a method in the text entry field or click on the
to open the Data Browser and navigate
to your selected publish method. -
MQTT Topic -MWTT conversation topic. Enter a topic in the text entry field or click on the "Edit Expression" link to open the Expression Editor to construct your expression/topic. [See also Expression Functions for Datasets.]
-
Quality of Service -Use the pulldown menu to select from At most once (delivery not guaranteed), At least once, or Exactly once.
-
Retain Message in MQTT Broker -True to hold the message in the MQTT Broker.
-
JSON Payload Preview - Message content encoded as JSON. Enter the message to preview (in JSON format) or click on the "JSON Designer" link, which opens the JSON Content Designer window.
Retry Settings
-
Retry Count - The number of retries before marking the activity as Failed.
-
Delay - The delay between the retrials of the activity.
Return to Top of Activity Library List
Send Email
Send Email Activity

The Send Emailactivity sends an email using the server specified in the tag.
The Send Email activity contains the following settings:
General Settings
-
The activity is enabled -True to enable the activity.
-
Activity Name - The unique name of the activity. It can be used to identify the activity in the expressions.
-
Activity Label - A custom label that is used to show additional information in the block, but it's not as verbose as the description.
-
Activity Description - The description of the activity will be visualized as a tooltip when you move the mouse over the activity.
-
Activity Type - Sends an email using the server specified in the tag.
-
Position - The position of the activity within the workflow.
-
Follow Path - The follow path specifies how to link to activities. The "Completed" path will execute the next branch despite the state of the block. With the "State" path, it's possible to associate two branches with this block. The "Success" branch is executed if this block is successful. Otherwise, the "Failure" branch will be executed. Use the pulldown menu to select either Completed or State.
-
Color - Enter a HEX color code in the text entry field or click on the
button in order to open the color picker window to select your preferred
color. -
Width - Use the pulldown menu to select from Small, Medium, or Large activity block width size.
-
Height - Use the pulldown menu to select from Small or Large activity block height size.
Timeout Settings
-
Timeout -Timeout applied when the data sources are requested.
-
Threads - The number of concurrent threads used to request the data sources.
-
Sampling Rate - Scan rate used to subscribe to the data sources.
Email Settings
-
Provider Type - Select the provider that will be used to send the email message.
-
To address - Enter a recipient's email address in the text entry field. Click on the 'Edit Expression' link to open the 'Expression Editor' window, which can help in constructing required expressions.
-
Cc address - Enter a carbon copy recipient's email address in the text entry field. Click on the 'Edit Expression' link to open the Expression Editor window, which can help in constructing required expressions.
-
Bcc address - Enter a blind carbon copy recipient's email address in the text entry field. Click on the 'Edit Expression' link to open the Expression Editor window, which can help in constructing required expressions.
-
From - Enter the sender email address in the text entry field. Click on the 'Edit Expression'link to open the Extension Editor window, which can help in constructing required expressions.
-
Subject - Enter a subject for the email in the text entry field. Click on the 'Edit Expression' link to open the Expression Editor window, which can help in constructing required expressions.
-
Message - Enter a message in the text entry field. Click on the 'Edit Expression' link to open the Expression Editor window, which can help in constructing required expressions. The following shortcuts can also be used in the message field:
/T - current workflow name
/B - activity in which last error occurred
/E - last error
/L - last executed activity name
/C - current activity name
/D - current activity description
Note: The email is sent using ICONICS AlertWorX Server. Please make sure that a default email node is configured correctly and that the email server is running.
[See also Expression Functions for Datasets.]
-
Use HTML Text - Click this checkbox if you would like to send the message in HTML format.
-
Attach a file to the E-Mail - Click this checkbox to include an attachment in the email.
-
File Path - Enter the file path to the attachment in the text entry field or click on the
 button
to open a file browser to navigate to your attachment.
button
to open a file browser to navigate to your attachment. -
Post Event when block processed - Posts a GenEvent message when the block is processed.
Retry Settings
-
Retry Count - The number of retries before marking the activity as Failed.
-
Delay - The delay between the retrials of the activity.
Return to Top of Activity Library List
Send Sms
Send Sms

The Send Smsactivity sends a SMS using the server specified in the tag.
The Send Sms activity contains the following settings:
General Settings
-
The activity is enabled - True to enable the activity.
-
Activity Name - The unique name of the activity. It can be used to identify the activity in the expressions.
-
Activity Label - A custom label that is used to show additional information in the block, but it's not as verbose as the description.
-
Activity Description - The description of the activity will be visualized as a tooltip when you move the mouse over the activity.
-
Activity Type - Sends a SMS using the server specified in the tag.
-
Position - The position of the activity within the workflow.
-
Follow Path - The follow path specifies how to link to activities. The "Completed" path will execute the next branch despite the state of the block. With the "State" path, it's possible to associate two branches with this block. The "Success" branch is executed if this block is successful. Otherwise, the "Failure" branch will be executed. Use the pulldown menu to select either Completed or State.
-
Color - Enter a HEX color code in the text entry field or click on the
button in order to open the color picker window to select your preferred
color. -
Width - Use the pulldown menu to select from Small, Medium, or Large activity block width size.
-
Height - Use the pulldown menu to select from Small or Large activity block height size.
Timeout Settings
-
Timeout - Timeout applied when the data sources are requested.
-
Threads - The number of concurrent threads used to request the data sources.
-
Sampling Rate - Scan rate used to subscribe to the data sources.
SmS Settings
-
Provider Type -Select the provider that will be used to send the SMS message.
-
To address - Enter a recipient's address in the text entry field. Click on the 'Edit Expression' link to open the 'Expression Editor' window, which can help in constructing required expressions.
-
Message -Enter a message in the text entry field. Click on the 'Edit Expression' link to open the Expression Editor window, which can help in constructing required expressions. The following shortcuts can also be used in the message field:
The following shortcuts can also be used in the message field:
/T - current workflow name
/B - activity in which last error occurred
/E - last error
/L - last executed activity name
/C - current activity name
/D - current activity description
Note: The email is sent using ICONICS AlertWorX Server. Please make sure that a default email node is configured correctly and that the email server is running.
[See also Expression Functions for Datasets.]
-
Post Event when block processed - Posts a GenEvent message when the block is processed.
Retry Settings
-
Retry Count - The number of retries before marking the activity as Failed.
-
Delay - The delay between the retrials of the activity.
Return to Top of Activity Library List
Send Voice Message Activity

The Send Voice messageactivity sends a Voice message using the server specified in the tag.
The Send Voice message activity contains the following settings:
General Settings
-
The activity is enabled - True to enable the activity.
-
Activity Name - The unique name of the activity. It can be used to identify the activity in the expressions.
-
Activity Label - A custom label that is used to show additional information in the block, but it's not as verbose as the description.
-
Activity Description - The description of the activity will be visualized as a tooltip when you move the mouse over the activity.
-
Activity Type - Send a Voice message using the specified provider.
-
Position - The position of the activity within the workflow.
-
Follow Path - The follow path specifies how to link to activities. The "Completed" path will execute the next branch despite the state of the block. With the "State" path, it's possible to associate two branches with this block. The "Success" branch is executed if this block is successful. Otherwise, the "Failure" branch will be executed. Use the pulldown menu to select either Completed or State.
-
Color - Enter a HEX color code in the text entry field or click on the
button in order to open the color picker window to select
your preferred color. -
Width - Use the pulldown menu to select from Small, Medium, or Large activity block width size.
-
Height - Use the pulldown menu to select from Small or Large activity block height size.
Timeout Settings
-
Timeout - Timeout applied when the data sources are requested.
-
Threads - The number of concurrent threads used to request the data sources.
-
Sampling Rate - Scan rate used to subscribe to the data sources.
Voice Settings
-
Provider Type - Select the provider that will be used to send the voice message.
-
To address - Enter a recipient's address in the text entry field. Click on the 'Edit Expression' link to open the 'Expression Editor' window, which can help in constructing required expressions.
-
Message - Enter a message in the text entry field. Click on the 'Edit Expression' link to open the Expression Editor window, which can help in constructing required expressions. The following shortcuts can also be used in the message field:
-
Post Event when block processed - Posts a GenEvent message when the block is processed.
The following shortcuts can also be used in the message field:
/T - current workflow name
/B - activity in which last error occurred
/E - last error
/L - last executed activity name
/C - current activity name
/D - current activity description
Note: Please make sure that the selected provider is configured correctly.
Retry Settings
-
Retry Count - The number of retries before marking the activity as Failed.
-
Delay - The delay between the retrials of the activity.
Return to Top of Activity Library List
Send WhatsApp Activity

The Send WhatsAppactivity sends a message to WhatsApp using the server specified in the tag.
The Send WhatsApp activity contains the following settings:
General Settings
-
The activity is enabled -True to enable the activity.
-
Activity Name - The unique name of the activity. It can be used to identify the activity in the expressions.
-
Activity Label - A custom label that is used to show additional information in the block, but it's not as verbose as the description.
-
Activity Description - The description of the activity will be visualized as a tooltip when you move the mouse over the activity.
-
Activity Type - Sends a message to WhatsApp using the server specified in the tag.
-
Position - The position of the activity within the workflow.
-
Follow Path - The follow path specifies how to link to activities. The "Completed" path will execute the next branch despite the state of the block. With the "State" path, it's possible to associate two branches with this block. The "Success" branch is executed if this block is successful. Otherwise, the "Failure" branch will be executed. Use the pulldown menu to select either Completed or State.
-
Color - Enter a HEX color code in the text entry field or click on the
button in order to open the color picker window to select
your preferred color. -
Width - Use the pulldown menu to select from Small, Medium, or Large activity block width size.
-
Height - Use the pulldown menu to select from Small or Large activity block height size.
Timeout Settings
-
Timeout -Timeout applied when the data sources are requested.
-
Threads - The number of concurrent threads used to request the data sources.
-
Sampling Rate - Scan rate used to subscribe to the data sources.
WhatsApp Settings
-
Provider Type -Select the provider that will be used to send the WhatsApp message.
-
To address - Enter a recipient's address in the text entry field. Click on the 'Edit Expression' link to open the 'Expression Editor' window, which can help in constructing required expressions.
-
Message - Enter a message in the text entry field. Click on the 'Edit Expression' link to open the Expression Editor window, which can help in constructing required expressions. The following shortcuts can also be used in the message field:
-
Post Event when block processed - Posts a GenEvent message when the block is processed.
The following shortcuts can also be used in the message field:
/T - current workflow name
/B - activity in which last error occurred
/E - last error
/L - last executed activity name
/C - current activity name
/D - current activity description
Note: Please make sure that the selected provider is configured correctly.
Retry Settings
-
Retry Count - The number of retries before marking the activity as Failed.
-
Delay - The delay between the retrials of the activity.
Return to Top of Activity Library List
Teams IM

The Send Teams IM activity sends a message using Microsoft Teams.
The Send Teams IM activity contains the following settings:
General Settings
-
The activity is enabled - True to enable the activity.
-
Activity Name - The unique name of the activity. It can be used to identify the activity in the expressions.
-
Activity Label - A custom label that is used to show additional information in the block, but it's not as verbose as the description.
-
Activity Description - The description of the activity will be visualized as a tooltip when you move the mouse over the activity.
-
Activity Type - Sends an email using the server specified in the tag.
-
Position - The position of the activity within the workflow.
-
Follow Path - The follow path specifies how to link to activities. The "Completed" path will execute the next branch despite the state of the block. With the "State" path, it's possible to associate two branches with this block. The "Success" branch is executed if this block is successful. Otherwise, the "Failure" branch will be executed. Use the pulldown menu to select either Completed or State.
-
Color - Enter a HEX color code in the text entry field or click on the
 button in order
to open the color picker window to select your preferred
color.
button in order
to open the color picker window to select your preferred
color. -
Width - Use the pulldown menu to select from Small, Medium, or Large activity block width size.
-
Height - Use the pulldown menu to select from Small or Large activity block height size.
Timeout Settings
-
Timeout - Timeout applied when the data sources are requested.
-
Threads - The number of concurrent threads used to request the data sources.
-
Sampling Rate - Scan rate used to subscribe to the data sources.
Teams Instant Messaging Settings
-
Group Update – Click on this checkbox to ensure that all users are in the group. If a user has left the group they will be added back into the group.
-
IM Address - Enter a recipient's email address in the text entry field. Click on the 'Edit Expression' link to open the Expression Editor window, which can help in constructing required expressions.
-
Subject - Enter a subject for the email in the text entry field. Click on the 'Edit Expression' link to open the Expression Editor window, which can help in constructing required expressions.
-
Message - Enter a message in the text entry field. Click on the 'Edit Expression' link to open the Expression Editor window, which can help in constructing required expressions.
-
Importance – Select Normal, Important or Urgent flag for the message.
-
Use HTML Text - Click this checkbox if you would like to send the message in HTML format.
-
Post Event when block processed - Posts a GenEvent message when the block is processed.
The following shortcuts can also be used in the message field:
/T - current workflow name
/B - activity in which last error occurred
/E - last error
/L - last executed activity name
/C - current activity name
/D - current activity description
Note: The TeamslM is sent using ICONICS AlertWorX Server. Please make sure that a default Team node is configured correctly and that the AlertRest server is running.
Retry Settings
-
Retry Count - The number of retries before marking the activity as Failed.
-
Delay - The delay between the retrials of the activity.
Return to Top of Activity Library List
Delay
Delay Activity

The Delayactivity adds a delay to workflow execution.
The Delay activity has the following settings:
General Settings
-
The activity is enabled - True to enable the activity.
-
Activity Name - The unique name of the activity. It can be used to identify the activity in the expressions.
-
Activity Label - A custom label that is used to show additional information in the block, but it's not as verbose as the description.
-
Activity Description - The description of the activity will be visualized as a tooltip when you move the mouse over the activity.
-
Activity Type - Adds a delay to workflow execution.
-
Position - The position of the activity within the workflow.
-
Follow Path - The follow path specifies how to link to activities. The "Completed" path will execute the next branch despite the state of the block. With the "State" path, it's possible to associate two branches with this block. The "Success" branch is executed if this block is successful. Otherwise, the "Failure" branch will be executed. Use the pulldown menu to select either Completed or State.
-
Color - Enter a HEX color code in the text entry field or click on the
button in order to open the color picker window to select your preferred
color. -
Width - Use the pulldown menu to select from Small, Medium, or Large activity block width size.
-
Height - Use the pulldown menu to select from Small or Large activity block height size.
Delay Settings
-
Delay up to - The expression used to control the length of the delay. Range is 100 to 3,600,000. Click on the 'Edit Expression' link to open the Expression Editor window, which can help in constructing required expressions. [See also Expression Functions for Datasets.]
-
Interrupt the delay when condition is TRUE - Checking this checkbox allows you to set an expression that, when true, will interrupt the delay.
-
Delay expression- The expression used to control the delay. Click on the 'Edit Expression' link to open the Expression Editor window, which can help in constructing required expressions. [See also Expression Functions for Datasets.]
-
Sampling Rate - Scan rate to evaluate the expression. Enter a number (in miliseconds) in the text entry field or click on the up/down arrow buttons.
Data Schema
-
Data Schema - Shows the list of columns exposed by the activity. If the schema is not Read-Only, it is possible to configure the list of columns manually. Click the 'Configure' link to manually configure the column list. You can also Reset the Data Schema.
Data Filter
-
Data Filter - Select the rows that will be returned to the next activity. By default, all rows are returned. You can use the columns of the data source to create the row filter. Click on the 'Edit Expression' link to open the Expression Editor window, which can help in constructing required expressions.
Retry Settings
-
Retry Count - The number of retries before marking the activity as Failed.
-
Delay - The delay (in seconds) between the retrials of the activity.
Return to Top of Activity Library List
File Transfer
File Transfer Activity
![]()
The File Transfer activity transfers a file from one location to another.
The File Transfer activity has the following settings:
General Settings
-
The activity is enabled - True to enable the activity.
-
Activity Name - The unique name of the activity. It can be used to identify the activity in the expressions.
-
Activity Label - A custom label that is used to show additional information in the block, but it's not as verbose as the description.
-
Activity Description - The description of the activity will be visualized as a tooltip when you move the mouse over the activity.
-
Activity Type - Transfers a file from one location to another.
-
Position - The position of the activity within the workflow.
-
Follow Path - The follow path specifies how to link to activities. The "Completed" path will execute the next branch despite the state of the block. With the "State" path, it's possible to associate two branches with this block. The "Success" branch is executed if this block is successful. Otherwise, the "Failure" branch will be executed. Use the pulldown menu to select either Completed or State.
-
Color - Enter a HEX color code in the text entry field or click on the
button in order to open the color picker window to select your preferred
color. -
Width - Use the pulldown menu to select from Small, Medium, or Large activity block width size.
-
Height - Use the pulldown menu to select from Small or Large activity block height size.
Timeout Settings
-
Timeout - Timeout applied when the data sources are requested.
-
Threads - The number of concurrent threads used to request the data sources.
-
Sampling Rate - Scan rate used to subscribe to the data sources.
Transfer Settings
-
Source Type - Use the pulldown menu to select from either Directory or FTP Server.
Directory
-
Source File(s) - Enter the location of the source files in the text entry field (include one file per line or expression that evaluates to a file path) or click on the Edit Expression link (to include an expression that evaluates to a file path) or click on the Browse Files link to open a file browser to navigate to your selected file(s). [See also Expression Functions for Datasets.]
-
Destination Type - Use the pulldown menu to select from either Directory or FTP Server.
Directory
-
Directory - Enter a location in the text entry field or click on the "(Browse Dir)" to open the Browse for Folder window to select your intended folder.
-
File Naming - Use the pulldown menu to select from "Same As Source" or "Custom Name".
-
Custom Name - Enter a name in the text entry field or click on the Edit Expression link to construct an expression.
FTP Server
-
FTP Location - Enter the location of the FTP Server in the text entry field.
-
User - Enter the user name to access the FTP server in the text entry field.
-
Password - Enter the user password to access the Ftp server in the text entry field.
-
Transfer Type - Use the pulldown menu to select from ASCII or Binary.
-
PASV Mode - Click this checkbox if you wish to use passive (rather than active) mode.
-
Keep Connection Alive - Click this checkbox if you wish to keep the Ftp server connection alive.
-
Timeout - Enter a timeout duration in the text entry field.
-
File Naming - Use the pulldown menu to select from "Same As Source" or "Custom Name".
-
Custom Name- Enter a name in the text entry field or click on the Edit Expression link to construct an expression.
FTP Server
-
FTP Location - Enter the location of the FTP Server in the text entry field.
-
User Name - Enter the user name to access the FTP Server in the text entry field.
-
User Password - Enter the user password to access the FTP Server in the text entry field.
-
Transfer Type - Use the pulldown menu to select from ASCII or Binary.
-
PASV Mode - Click this checkbox if you wish to use passive (rather than active) mode.
-
Keep Connection Alive - Click this checkbox if you wish to keep the FTP server connection alive.
-
Timeout - Enter a timeout duration in the text entry field.
-
Destination Type- Use the pulldown menu to select from either Directory or FTP Server.
Directory
-
Directory - Enter a location in the text entry field or click on the "(Browse Dir)" to open the Browse for Folder window to select your intended folder.
-
File Naming - Use the pulldown menu to select from "Same As Source" or "Custom Name".
-
Custom Name - Enter a name in the text entry field or click on the Edit Expression link to construct an expression.
FTP Server
-
Ftp Location - Enter the location of the FTP Server in the text entry field.
-
User Name - Enter the user name to access the FTP Server in the text entry field.
-
User Password - Enter the user password to access the FTP Server in the text entry field.
-
Transfer Type - Use the pulldown menu to select from ASCII or Binary.
-
PASV Mode - Click this checkbox if you wish to use passive (rather than active) mode.
-
Keep Connection Alive - Click this checkbox if you wish to keep the FTP Server connection alive.
-
Timeout - Enter a timeout duration in the text entry field.
-
Destination File Naming - Use the pulldown menu to select from "Same As Source" or "Custom Name".
-
Custom Name- Enter a name in the text entry field or click on the Edit Expression link to construct an expression.
Retry Settings
-
Retry Count - The number of retries before marking the activity as Failed.
-
Delay - The delay (in seconds) between the retrials of the activity.
Return to Top of Activity Library List
GenEvent Output
GenEvent Output Activity

The GenEvent Output activity writes a message to the GenEvent Server.
The GenEvent Output activity has the following settings:
General Settings
-
The activity is enabled - True to enable the activity.
-
Activity Name - The unique name of the activity. It can be used to identify the activity in the expressions.
-
Activity Label - A custom label that is used to show additional information in the block, but it's not as verbose as the description.
-
Activity Description - The description of the activity will be visualized as a tooltip when you move the mouse over the activity.
-
Activity Type - Writes a message to the GenEvent Server.
-
Position - The position of the activity within the workflow.
-
Follow Path - The follow path specifies how to link to activities. The "Completed" path will execute the next branch despite the state of the block. With the "State" path, it's possible to associate two branches with this block. The "Success" branch is executed if this block is successful. Otherwise, the "Failure" branch will be executed. Use the pulldown menu to select either Completed or State.
-
Color - Enter a HEX color code in the text entry field or click on the
button in order to open the color picker window to select your preferred
color. -
Width - Use the pulldown menu to select from Small, Medium, or Large activity block width size.
-
Height - Use the pulldown menu to select from Small or Large activity block height size.
Event Settings
-
Event Text - Enter the source, in the text entry field, by which the application is registered on the specified computer. You can also click on the 'Edit Expression' link to open the Expression Editor to construct your intended expression. You can also use the following shortcuts in the Event Text field:
/T - current workflow name
/B - activity in which last error occurred
/E - last error
/L - last executed activity name
/C - current activity name
/D - current activity description
[See also Expression Functions for Datasets.]
-
Severity - Enter the severity of the event in the text entry field or use the up/down arrows.
-
Timeout - The timeout is applied when the DA tags are requested within the expression. Enter a timeout (in milliseconds) in the text entry field or use the up/down arrows.
-
Scan Rate- This is the scan rate used to subscribe DA tags in the expression. Enter a scan rate (in milliseconds) in the text entry field or use the up/down arrows.
Retry Settings
-
Retry Count - The number of retries before marking the activity as Failed.
-
Delay - The delay, in seconds, between the retrials of the activity.
Return to Top of Activity Library List
Alarm Event Output
Alarm Event Output Activity

The Alarm Event Output activity writes a message to the GenEvent Server that sources alarm data.
The Alarm Event Output activity has the following settings:
General Settings
-
The activity is enabled - True to enable the activity.
-
Activity Name - The unique name of the activity. It can be used to identify the activity in the expressions.
-
Activity Label - A custom label that is used to show additional information in the block, but it's not as verbose as the description.
-
Activity Description - The description of the activity will be visualized as a tooltip when you move the mouse over the activity.
-
Activity Type - Writes a message to the GenEvent Server that sources alarm data.
-
Position - The position of the activity within the workflow.
-
Follow Path - The follow path specifies how to link to activities. The "Completed" path will execute the next branch despite the state of the block. With the "State" path, it's possible to associate two branches with this block. The "Success" branch is executed if this block is successful. Otherwise, the "Failure" branch will be executed. Use the pulldown menu to select either Completed or State.
-
Color - Enter a HEX color code in the text entry field or click on the
button in order to open the color picker window to select your preferred
color. -
Width - Use the pulldown menu to select from Small, Medium, or Large activity block width size.
-
Height - Use the pulldown menu to select from Small or Large activity block height size.
Alarm Event Settings
-
Event Text - The expression used to evaluate the event message. Enter the text in the text entry field or click on the "Edit Expression" link to open the Expression Editor to construct your expression. You can use the following shortcuts in the Event Text field:
/T - current workflow name
/B - activity in which last error occurred
/E - last error
/L - last executed activity name
/C - current activity name
/D - current activity description
[See also Expression Functions for Datasets.]
-
Severity -Severity of the event. Enter a number in the text entry field or use the up/down arrow buttons.
-
Timeout -The timeout is applied when the DA tags are requested within the expression. Enter a timeout (in milliseconds) in the text entry field or use the up/down arrow buttons.
-
Scan Rate - Scan rate used to subscribe DA tags in expression. Enter a rate in the text entry field or use the up/down arrow buttons.
Retry Settings -
-
Retry Count - The number of retries before marking the activity as Failed.
-
Delay - The delay, in seconds, between the retrials of the activity.
Return to Top of Activity Library List
NT Event Output
NT Event Output Activity

The NT Event Output activity writes an error, warning, information, success audit, or failure audit with the given message text to the event log, using the specified registered event source.
The NT Event Output activity has the following settings:
General Settings
-
The activity is enabled - True to enable the activity.
-
Activity Name - The unique name of the activity. It can be used to identify the activity in the expressions.
-
Activity Label - A custom label that is used to show additional information in the block, but it's not as verbose as the description.
-
Activity Description - The description of the activity will be visualized as a tooltip when you move the mouse over the activity.
-
Activity Type - Writes an error, warning, information, success audit, or failure audit with the given message text to the event log, using the specified registered event source.
-
Position - The position of the activity within the workflow.
-
Follow Path - The follow path specifies how to link to activities. The "Completed" path will execute the next branch despite the state of the block. With the "State" path, it's possible to associate two branches with this block. The "Success" branch is executed if this block is successful. Otherwise, the "Failure" branch will be executed. Use the pulldown menu to select either Completed or State.
-
Color - Enter a HEX color code in the text entry field or click on the
button in order to open the color picker window to select your preferred
color. -
Width - Use the pulldown menu to select from Small, Medium, or Large activity block width size.
-
Height - Use the pulldown menu to select from Small or Large activity block height size.
Event Settings
-
Event Text - Enter the source, in the text entry field, by which the application is registered on the specified computer. You can use the following shortcuts in the Event Text field:
/T - current workflow name
/B - activity in which last error occurred
/E - last error
/L - last executed activity name
/C - current activity name
/D - current activity description
-
Event Source - Enter the string, in the text entry field, to write to the event log.
-
Event Type - Use the pulldown menu to select from Information, Error, Failure Audit, Warning or Success Audit.
Retry Settings
-
Retry Count - The number of retries before marking the activity as Failed.
-
Delay - The delay, in seconds, between the retrials of the activity.
Return to Top of Activity Library List
Generate Report
Generate Report Activity

The Generate Reportactivity generates a new report using the report tag and the parameters specified.
The Generate Report Activity contains the following settings:
General Settings
-
The activity is enabled - True to enable the activity.
-
Activity Name - The unique name of the activity. It can be used to identify the activity in the expressions.
-
Activity Label - A custom label that is used to show additional information in the block, but it's not as verbose as the description.
-
Activity Description - The description of the activity will be visualized as a tooltip when you move the mouse over the activity.
-
Activity Type - Generates a new report using the report tag and the parameters specified.
-
Position - The position of the activity within the workflow.
-
Follow Path - The follow path specifies how to link to activities. The "Completed" path will execute the next branch despite the state of the block. With the "State" path, it's possible to associate two branches with this block. The "Success" branch is executed if this block is successful. Otherwise, the "Failure" branch will be executed. Use the pulldown menu to select either Completed or State.
-
Color - Enter a HEX color code in the text entry field or click on the
button in order to open the color picker window to select your preferred
color. -
Width - Use the pulldown menu to select from Small, Medium, or Large activity block width size.
-
Height - Use the pulldown menu to select from Small or Large activity block height size.
Data Source
-
Point Name - Enter the data source, in the text entry field, to be used by this activity or click on the
button to open the Data Browser
and navigate to your selected data source.
Input Parameters
-
Input Parameters - Shows the parameters available for the selected data source. Click the 'Configure' link to manually configure the column list. You can also 'Refresh' the list.
Timeout Settings
-
Timeout - Timeout applied when the data sources are requested.
-
Threads - The number of concurrent threads used to request the data sources.
-
Sampling Rate - Scan rate used to subscribe to the data sources.
Retry Settings
-
Retry Count - The number of retries before marking the activity as Failed.
-
Retry Delay (seconds) - The delay between the retrials of the activity.
-
The activity is enabled - When checked, the selected activity remains active in the diagram. When unchecked, the activity will appear greyed out, but be inactive within the diagram.
Return to Top of Activity Library List
Variable Reader Activity
![]()
The Variable Reader activity reads data from entire Global or Local Variable, converts it into a Dataset and passes it to other block(s)
The Variable Reader activity contains the following settings
General Settings
-
The activity is enabled -True to enable the activity.
-
Activity Name -The unique name of the activity. It can be used to identify the activity in the expressions.
-
Activity Label -A custom label that is used to show additional information in the block, but it's not as verbose as the description.
-
Activity Description -The description of the activity will be visualized as a tooltip when you move the mouse over the activity.
-
Activity Type - Sends an email using the server specified in the tag.
-
Position -The position of the activity within a workflow.
-
Follow Path -The follow path specifies how to link to activities. The "Completed" path will exeute the next branch despite the state of this block. With "State" path, it is possible to associate two branches with this block. The "Success" branch is executed if this block is successful. Otherwise, the "Failure" branch will be executed. Use the pulldown menu to select either "Completed", or "State".
-
Color - Enter a HEX color code in the text entry field or click on the
 button
in order to open the color picker window to select your preferred
color.
button
in order to open the color picker window to select your preferred
color. -
Width - Use the pulldown menu to select from Small, Medium, or Large activity block width size.
-
Height - Use the pulldown menu to select from Small or Large activity block height size.
Timeout Settings
-
Timeout - Timeout applied when the data sources are requested.
-
Threads - The number of concurrent threads used to request the data sources.
-
Sampling Rate - Scan rate used to subscribe to the data sources.
Other Settings
-
Global Or Local Variable - Select the global or local variable to be used by this activity by clicking on the
 button to open the Data Browser
and navigate to your selected data source.
button to open the Data Browser
and navigate to your selected data source.
Data Schema
-
Data Schema - Shows the list of columns exposed by the activity. If the schema is not Read-Only, it is possible to configure the list of columns manually. Click the 'Configure' link to manually configure the column list. You can also ‘Reset’ and ‘Refresh’ the Data Schema.
Data Filter
-
Data Filter - Select the rows that will be returned to the next activity. By default, all rows are returned. You can use the columns of the data source to create the row filter. Click on the 'Edit Expression' link to open the Expression Editor window, which can help in constructing required expressions. [See also Expression Functions for Datasets.]
Retry Settings
-
Retry Count - The number of retrials before marking the activity as failed.
-
Delay - The delay between the retrials of the activity.
Return to Top of Activity Library List
Variable Writer activity
![]()
The Variable Writer activity writes a Dataset into a Global or Local Variable
The Variable Writer activity contains the following settings
General Settings
-
The activity is enabled -True to enable the activity.
-
Activity Name -The unique name of the activity. It can be used to identify the activity in the expressions or in traces.
-
Activity Label -A custom label that is used to show additional information in the block, but it's not as verbose as the description.
-
Activity Description -The description of the activity will be visualized as a tooltip when you move the mouse over the activity.
-
Activity Type -Prepares JSON content and writes it to the file.
-
Position -The position of the activity in the diagram.
-
Follow Path -The follow path specifies how to link to activities. "Completed" path will execute the next branch despite the state of this block. With "State" path, it's possible to associate two branches with this block. The "Success" branch is executed if this block is successful. Otherwise, the "Failure" branch will be executed.
-
Color - Enter a HEX color code in the text entry field or click on the
button
in order to open the color picker window to select your preferred
color. -
Width - Use the pulldown menu to select from Small, Medium, or Large activity block width size.
-
Height - Use the pulldown menu to select from Small or Large activity block height size.
Data Input
-
Consume data from - Use the pulldown menu to select from "Previous Activity" or "Specific Activity".
-
Activity Name - If you selected "Specific Activity" in the 'Consume data from' pulldown, you can enter an activity name in the text entry field or use the pulldown to select an existing activity name if available.
Timeout Settings
-
Timeout - Timeout applied when the data sources are requested.
-
Threads - The number of concurrent threads used to request the data sources.
-
Sampling Rate - Scan rate used to subscribe to the data sources.
Other Settings
-
Target Global Or Local Variable - Select the global or local variable to be used by this activity by clicking on the
button
to open the Data Browser and navigate to your selected data
source. -
Append to Existing Rows - Click this checkbox to allow new lines to be added to the existing Rows.
You can modify Target Column Expression. Click on the 'Edit Expression' link to open the Expression Editor window, which can help in constructing required expressions.
Data Schema
-
Data Schema - Shows the list of columns exposed by the activity. If the schema is not Read-Only, it is possible to configure the list of columns manually. Click the 'Configure' link to manually configure the column list. You can also ‘Reset’ the Data Schema.
Data Filter
-
Data Filter - Select the rows that will be returned to the next activity. By default, all rows are returned. You can use the columns of the data source to create the row filter. Click on the 'Edit Expression' link to open the Expression Editor window, which can help in constructing required expressions. [See also Expression Functions for Datasets.]
Retry Settings
-
Retry Count - The number of retrials before marking the activity as failed.
-
Delay - The delay between the retrials of the activity.
Return to Top of Activity Library List
Bulk Web Service Manipulator activity
![]()
The Bulk Web Service Manipulator activity executes Web Service Data Manipulator for every row in the input DataSet, passing input parameter values for each data row and exposing output parameters as Output.
The Bulk Web Service Manipulator activity contains the following settings:
General Settings
-
The activity is enabled - True to enable the activity.
-
Activity Name - The unique name of the activity. It can be used to identify the activity in the expressions or in traces.
-
Activity Label - A custom label that is used to show additional information in the block, but it's not as verbose as the description.
-
Activity Description - The description of the activity will be visualized as a tooltip when you move the mouse over the activity.
-
Activity Type - Executes Web Service Data Manipulator, passing input parameter values and exposing return value as Output.
-
Position - The position of the activity in the diagram.
-
Follow Path - The follow path specifies how to link to activities. "Completed" path will execute the next branch despite the state of this block. With "State" path, it's possible to associate two branches with this block. The "Success" branch is executed if this block is successful. Otherwise, the "Failure" branch will be executed.
-
Color - Enter a HEX color code in the text entry field or click on the button in order to open the color picker window to select your preferred color.
-
Width - Use the pulldown menu to select from Small, Medium, or Large activity block width size.
-
Height - Use the pulldown menu to select from Small or Large activity block height size.
Data Input
-
Consume data from - Use the pulldown menu to select from "Previous Activity" or "Specific Activity".
-
Activity Name - If you selected "Specific Activity" in the 'Consume data from' pulldown, you can enter an activity name in the text entry field or use the pulldown to select an existing activity name if available.
Data Source
-
Point Name - Enter the data source, in the text entry field, to be used by this activity or click on the
button
to open the Data Browser and navigate to your selected data
source.
Input Parameters
-
Input Parameters - Shows the parameters available for the selected data source. Click the 'Configure' link to manually configure the column list. You can also 'Refresh' the list.
Output Parameters
-
Output Parameters - Shows the parameters available for the selected data source. Click the 'Configure' link to manually configure the column list. You can also 'Refresh' the list.
Timeout Settings
-
Timeout - Timeout applied when the data sources are requested.
-
Threads - The number of concurrent threads used to request the data sources.
-
Sampling Rate - Scan rate used to subscribe to the data sources.
Other Settings
-
Succeed only if All source rows are processed successfully - If checked, if the Web Service Data Manipulator command fails for at least one source row, the entire operation should fail.
Data Schema
-
Data Schema - Shows the list of columns exposed by the activity. If the schema is not Read-Only, it is possible to configure the list of columns manually. Click the 'Configure' link to manually configure the column list. You can also ‘Reset’ the Data Schema.
Data Filter
-
Data Filter - Select the rows that will be returned to the next activity. By default, all rows are returned. You can use the columns of the data source to create the row filter. Click on the 'Edit Expression' link to open the Expression Editor window, which can help in constructing required expressions. [See also Expression Functions for Datasets.]
Retry Settings
-
Retry Count - The number of retrials before marking the activity as failed.
-
Delay - The delay between the retrials of the activity.
Return to Top of Activity Library List
Historical Upload activity
![]()
The Historical Upload activity sends Historical Data Samples to HDA source using an output Dataset of other Activity.
The Historical Upload activity contains the following settings:
General Settings
-
The activity is enabled - True to enable the activity.
-
Activity Name - The unique name of the activity. It can be used to identify the activity in the expressions or in traces.
-
Activity Label - A custom label that is used to show additional information in the block, but it's not as verbose as the description.
-
Activity Description - The description of the activity will be visualized as a tooltip when you move the mouse over the activity.
-
Activity Type - Executes Web Service Data Manipulator, passing input parameter values and exposing return value as Output.
-
Position - The position of the activity in the diagram.
-
Follow Path - The follow path specifies how to link to activities. "Completed" path will execute the next branch despite the state of this block. With "State" path, it's possible to associate two branches with this block. The "Success" branch is executed if this block is successful. Otherwise, the "Failure" branch will be executed.
-
Color - Enter a HEX color code in the text entry field or click on the
 button
in order to open the color picker window to select your preferred
color.
button
in order to open the color picker window to select your preferred
color. -
Width - Use the pulldown menu to select from Small, Medium, or Large activity block width size.
-
Height - Use the pulldown menu to select from Small or Large activity block height size.
Data Input
-
Consume data from - Use the pulldown menu to select from "Previous Activity" or "Specific Activity".
-
Activity Name - If you selected "Specific Activity" in the 'Consume data from' pulldown, you can enter an activity name in the text entry field or use the pulldown to select an existing activity name if available.
Timeout Settings
-
Timeout - Timeout applied when the data sources are requested.
-
Threads - The number of concurrent threads used to request the data sources.
-
Sampling Rate - Scan rate used to subscribe to the data sources.
Historical Samples (per each Source Row)
-
HDA Tag Point Name - The expression used to build HDA point names to write to. The expression is calculated per every row in the Source DataSet. You may use {{column:TagName}} syntax in the expression to reference elements within the Source row. Click on the 'Edit Expression' link to open the Expression Editor window, which can help in constructing required expressions. [See also Expression Functions for Datasets.]
-
Data Value - The expression used to build the value for writing. This expression is calculated per every row in the Source DataSet. You may use {{column:Value}} syntax in the expression to reference elements within the Source row. Click on the 'Edit Expression' link to open the Expression Editor window, which can help in constructing required expressions.
-
Timestamp - The expression used to build the date/time for writing. This expression is calculated per every row in the Source DataSet. You may use {{column:Timestamp}} syntax in the expression to reference elements within the Source row. Click on the 'Edit Expression' link to open the Expression Editor window, which can help in constructing required expressions
-
Quality - The expression used to build the quality for writing. This expression is calculated per every row in the Source DataSet. You may use totype({{column:Quality}}, "uint")syntax in the expression to reference elements within the Source row. Click on the 'Edit Expression' link to open the Expression Editor window, which can help in constructing required expressions.
HDA Options
-
Perform insert - If unchecked, the new records are not inserted.
-
Perform Replace - If unchecked, the existing records are not updated.
-
Skip Samples with Bad Quality - If checked, if the value has Bad Quality, it is skipped.
-
Skip Samples with Uncertain Quality - If checked, if the value has Uncertain Quality, it is skipped.
-
Batch Size (number of data samples) – Enter the number of data samples in the batch.
Data Schema
-
Data Schema - Shows the list of columns exposed by the activity. If the schema is not Read-Only, it is possible to configure the list of columns manually. Click the 'Configure' link to manually configure the column list. You can also 'Reset' the Data Schema.
Data Filter
-
Data Filter - Select the rows that will be returned to the next activity. By default, all rows are returned. You can use the columns of the data source to create the row filter. Click on the 'Edit Expression' link to open the Expression Editor window, which can help in constructing required expressions. [See also Expression Functions for Datasets.
Retry Settings
-
Retry Count - The number of retrials before marking the activity as failed.
-
Delay - The delay between the retrials of the activity.
Return to Top of Activity Library List
Generic Method Call activity
![]()
The Generic Method Call activity calls a Method in specific Point Manager, passing input and output Arguments. There is no automatic discovery of method parameters for a given method. The list of parameters must be populated manually, using information form the Point Manager documentation or its developer(s).
The Generic Method Call activity contains the following settings:
General Settings
-
The activity is enabled - True to enable the activity.
-
Activity Name - The unique name of the activity. It can be used to identify the activity in the expressions or in traces.
-
Activity Label - A custom label that is used to show additional information in the block, but it's not as verbose as the description.
-
Activity Description - The description of the activity will be visualized as a tooltip when you move the mouse over the activity.
-
Activity Type - Executes Web Service Data Manipulator, passing input parameter values and exposing return value as Output.
-
Position - The position of the activity in the diagram.
-
Follow Path - The follow path specifies how to link to activities. "Completed" path will execute the next branch despite the state of this block. With "State" path, it's possible to associate two branches with this block. The "Success" branch is executed if this block is successful. Otherwise, the "Failure" branch will be executed.
-
Color - Enter a HEX color code in the text entry field or click on the
 button
in order to open the color picker window to select your preferred
color.
button
in order to open the color picker window to select your preferred
color. -
Width - Use the pulldown menu to select from Small, Medium, or Large activity block width size.
-
Height - Use the pulldown menu to select from Small or Large activity block height size.
Data Source
-
Point Name - Enter the method name, in the text entry field, to be used by this activity or click on the
 button to open the Data Browser
and navigate to your selected data source.
button to open the Data Browser
and navigate to your selected data source.
Input Parameters
-
Input Parameters - Shows the parameters available for the selected data source. There is no automatic discovery of method parameters for a given method. The list of parameters must be populated manually, using information from the Point Manager documentation or its developer(s). Click the 'Configure' link to manually configure the column list. You can also 'Refresh' the list.
Timeout Settings
Timeout - Timeout applied when the data sources are requested.
-
Threads - The number of concurrent threads used to request the data sources.
-
Sampling Rate - Scan rate used to subscribe to the data sources.
Data Schema
-
Data Schema - Shows the list of columns exposed by the activity. If the schema is not Read-Only, it is possible to configure the list of columns manually. Click the 'Configure' link to manually configure the column list. You can also ‘Reset’ the Data Schema.
Data Filter
-
Data Filter - Select the rows that will be returned to the next activity. By default, all rows are returned. You can use the columns of the data source to create the row filter. Click on the 'Edit Expression' link to open the Expression Editor window, which can help in constructing required expressions. [See also Expression Functions for Datasets.]
Retry Settings
-
Retry Count - The number of retrials before marking the activity as failed.
-
Delay - The delay between the retrials of the activity.
Return to Top of Activity Library List
Diagram Editor
The Diagram Editor, when first opened, will display a Start Action. This is the starting activity of the Workflow. It cannot be deleted and is a unique element within the Workflow.
You can expand the Diagram Editor window in order to provide more room to create your Workflow Diagram. You can also use the following tools from the toolbar that first appears by default:
|
|
Snaps the items to the grid. |
|
|
Toggles labels. |
|
|
Toggles the Activity Library. |
|
|
Autofit |
|
|
Zoom in. |
|
|
Zooms out. |


-
CTRL + mouse movement -Allows you to pan within the diagram editor space
-
Click to reset the diagram - This link returns the diagram to its original starting point without any added activities.
-
Click to refresh the variables - This link allows you to refresh any set variables within included activities in the diagram editor.
Validation Log
The Validation Log provides immediate validating of the most recently added elements (activities, etc.) to the diagram.
-
You can click Apply to save your template properties and Close to return to the Workbench. Your new template will now appear in the Project Explorer, beneath the Templates node or template folder.
Settings and Parameters Tab
Template Properties - Settings and Parameters Tab
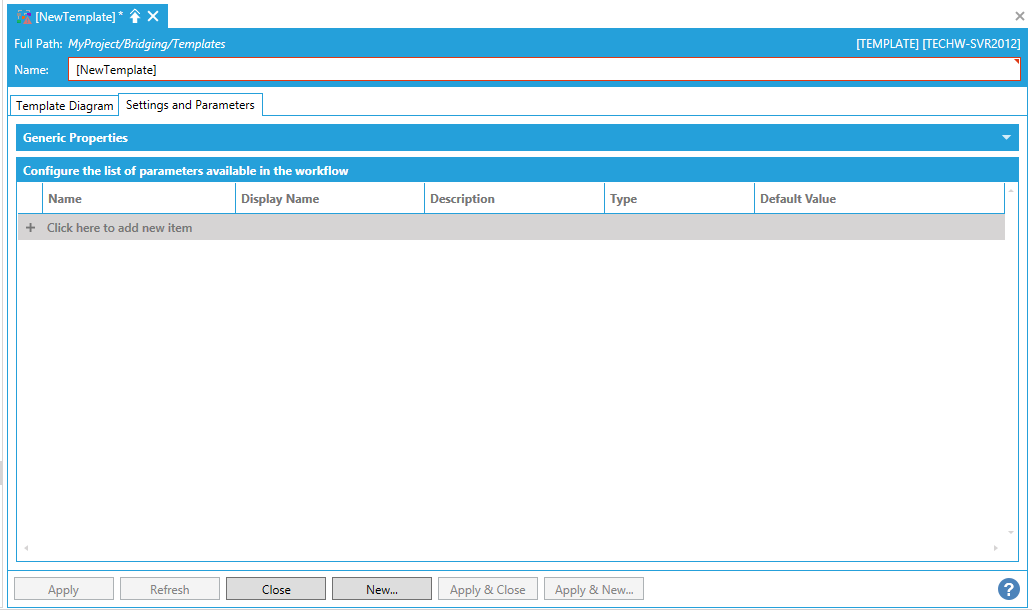
Generic Properties
-
Description - Enter a description for the Generic Properties of the Settings and Parameters in the text entry field.
Conifigure the list of parameters in the workflow
-
+ Click here to add new item - Click this link to enter a new entry in the window.
-
Name -Enter a name in the text entry field for the parameter to use in the workflow.
-
Display Name -Enter a name in the text entry field for how the parameter name will appear within the workflow.
-
Description -Enter a description for the parameter in the text entry field.
-
Type -Use the pulldown menu to select a parameter type from Boolean, DateTime, Double, Integer, or String.
-
Default Value - Enter a default value for the parameter in the text entry field. A pre-filled example will appear based on the selected Type.
-
You can click Apply to save your template properties and Close to return to the Workbench. Your new template will now appear in the Project Explorer, beneath the Templates node or template folder.
See Also: