Licensing an Additional Node
After purchasing an additional node, you need to activate the license for that node, and then you can connect it to the base node of your system. The process of licensing an additional node is the same as activating the license for the base node. Learn more
You can connect additional nodes to the base node and configure them together in what is referred to as a single system. To work together as a system, the nodes must meet the following criteria.
-
Base nodes and additional nodes communicate with each other to confirm their license status.
-
The typical update rate for license status in a system is 5 minutes, and base nodes expect to receive updates at least every 30 minutes.
-
A base node rejects the connection of an additional node if it is not of the same system. This is defined within the license programmed to the nodes.
-
Duplicate node license numbers in a system are identified as a license violation.
To connect an additional node to the base node:
- Open Workbench and in Project Explorer, expand your project > Servers and Redundancy > Server Connections.
-
Add a FrameWorX connection to the parent machine. Learn more
Depending on your network settings, you may prefer creating a reverse FrameWorX connection. Learn more
-
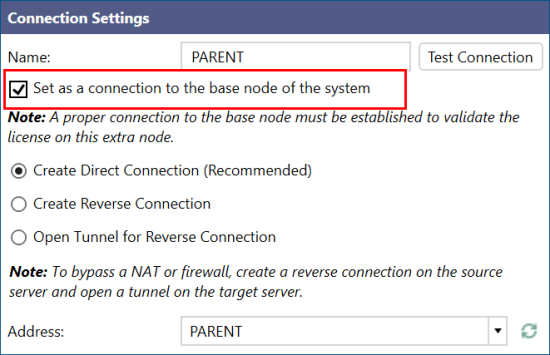
In the Connection Settings form of the new connection, select Set as a connection to the base node of the system, and then click Apply.

Within five minutes, the node will try to connect to the parent and validate the license. The node checks the connectivity with the parent periodically and ensures that the license is always validated.
What's Next?