Checking the Compatibility of Your Version 10.97 Project
Before you uninstall your current GENESIS installation and install version 11, run GENESIS Version 11 Compatibility Analyzer, a stand-alone tool that has been designed to facilitate a smooth transition of your GENESIS system from version 10.97.0 and later to version 11.
The Compatibility Analyzer checks the installed GENESIS components, your project data, and GraphWorX displays and identifies areas that may cause compatibility issues.
After scanning the system, the application displays the following results:
- List of detected issues (breaking changes)
- Detailed log with the list of warnings for each breaking change
- List of actions that are required to solve the identified breaking changes
Many of the detected issues can be resolved after installing the new version in the GENESIS Version 11 Upgrade Utility migration tool. The Compatibility Analyzer indicates this in the list of actions.
To check the compatibility using the Compatibility Analyzer:
- Download the IcoCompatibilityAnalyzer__<latest>.zip file from the Community Portal and unpack it.
- Open the unpacked folder and run IcoCompatibilityAnalyzer.exe with administrator privileges. If a Windows dialog appears, click Yes.
-
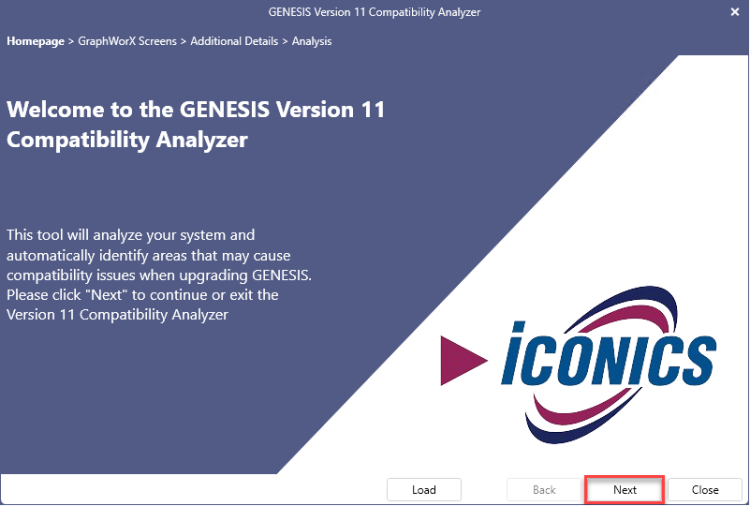
On the application splash screen, click Next.
-
Select the GraphWorX displays that you want to analyze. Do one of the following:
-
In the GraphWorX Screens dialog, select Click here to add new item, and then click
 on the right of the new entry to select the desired folder. You can also drag and drop the folder from its location, opened in a file manager.
 -
Click the Add multiple directories link next to the GraphWorX Screens heading and select all desired directories stored in the same location using the Ctrl or Shift key.
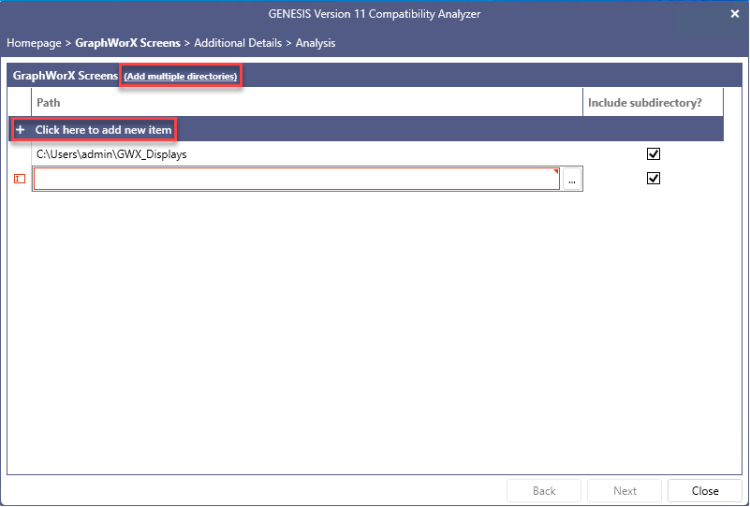 If you do not want to include the selected folder's subdirectories in the analysis, clear the checkbox in the Include subdirectory? column.
-
-
Click Next and select the additional options that apply to your situation.
To select or clear all checkboxes at once, click Toggle All Options.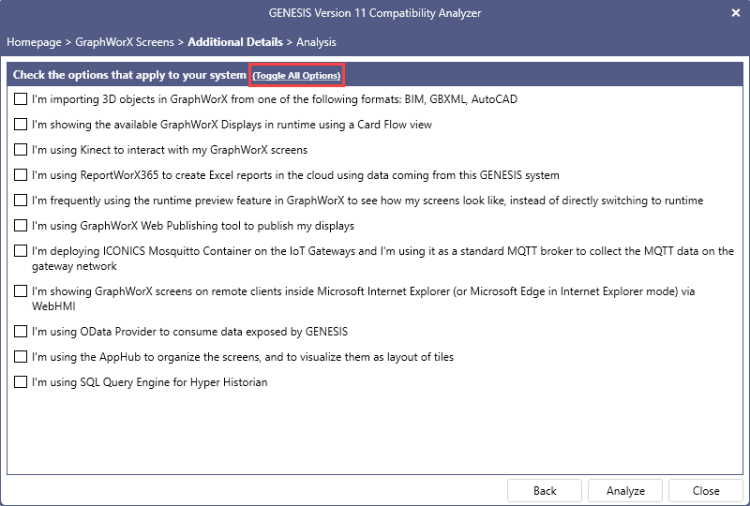
- Click Analyze. When the analysis finishes, the results are displayed.
-
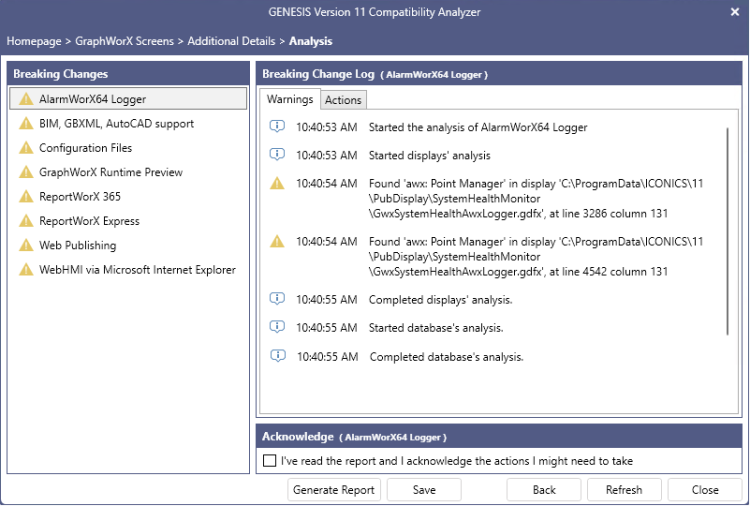
In the left pane of the results display, select the desired feature. In the right pane on the Warnings tab, view the warnings about possible issues (breaking changes) regarding the selected feature.
-
Switch to the Actions tab to view the actions required to solve the issue.
To keep track of acknowledging the warnings and suggested actions, select the checkbox in the Acknowledge section for each detected breaking change. The icon in the Breaking Changes pane changes to indicate your progress.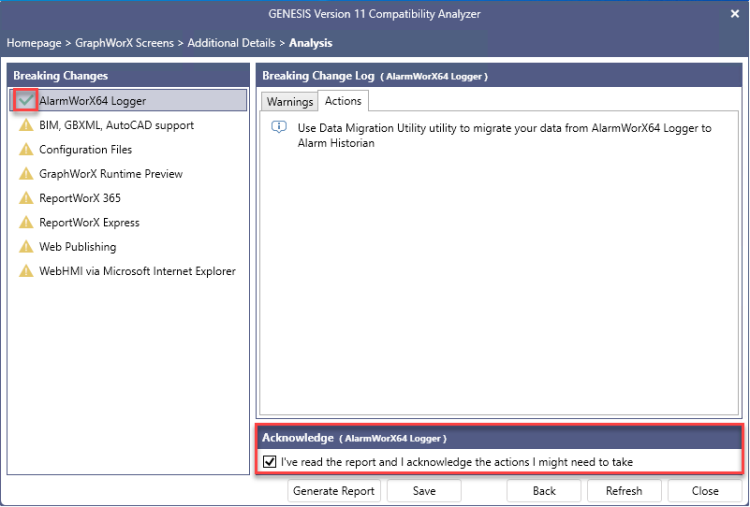
-
Save the analysis report.
- Click Generate Report to export your results as a .csv file.
-
Click Save to save your results as a .json file so that you can go back to it later. This is useful for large projects where the analysis is going to take some time to complete.
To open the saved results, start the Compatibility Analyzer application again, click Load, and then select the saved .json file.
- After using the Compatibility Analyzer, you can address the breaking changes in several ways, depending on the actions needed to solve the identified issues.
- Pay attention to the warnings highlighting features that will no longer be available, such as Kinect or view modes in GraphWorX.
Solve the issue in the current GENESIS installation, then upgrade the system to version 11. This applies, for example, to migrating Windows Communication Foundation or mismatches in GraphWorX or HTML5 displays and configuration settings.
Install GENESIS version 11 and run the Upgrade Utility to detect and upgrade any remaining issues. Learn more
You need to use the Data Migration Utility (formerly ConverterWorX) to migrate the AlarmWorX64 configuration and data.
What's Next?