Publishing Data to an MQTT Broker
Publishing sends GENESIS data out to an MQTT broker so that other systems—a cloud application, a corporate historian, or another GENESIS system—can subscribe to it. You define the tags to send in a publish list, and then attach that list to an MQTT publisher connection that encodes and sends them.
Before you begin, connect to an MQTT broker so that a broker definition is available to select.
The Internet of Things Publisher is part of an add-on license. Learn more
To publish data to an MQTT broker:
-
Open Workbench. In the Project Explorer, expand your project > Data Connectivity > Internet of Things, right-click Publish Lists, and select Add Publish List.
-
In the publish list configuration dialog, enter a Name for the list.
-
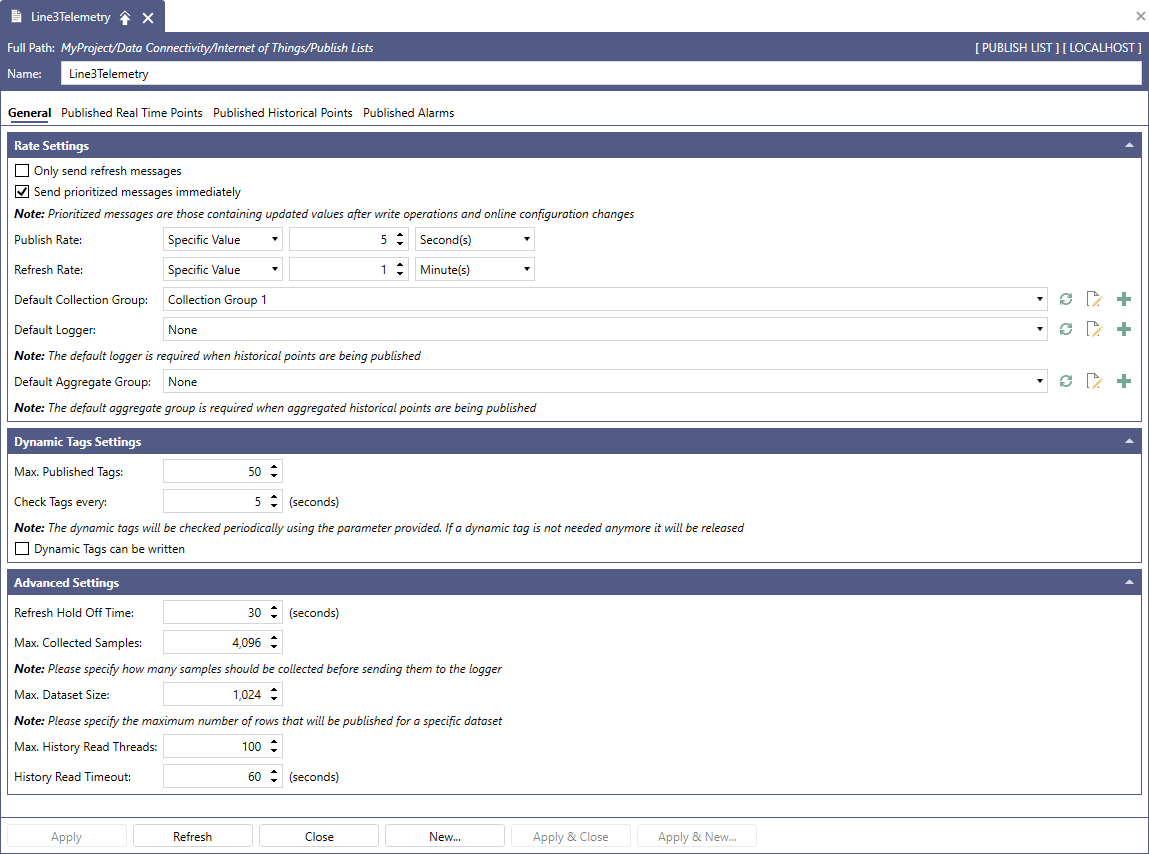
On the General tab in the Rate Settings section, define how often data leaves GENESIS:
-
In Publish Rate, select Specific Value and enter an interval, or select Trigger and browse to a trigger. Changed values are sent at this rate.
-
In Refresh Rate, select Specific Value and enter an interval, or select Trigger and browse to a trigger. All values, changed or not, are sent at this rate.
Select Only send refresh messages if the subscribing system expects a complete set of values in every message rather than a stream of changes.
-
In Default Collection Group, select the group that defines how often the points in this list are sampled or click
 beside the field to create one. The collection rate must be faster than the publish rate.
-
-
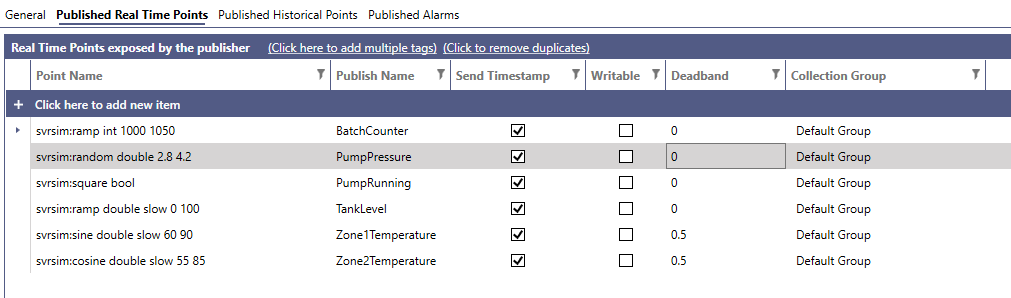
On the Published Real Time Points tab, specify what to send. When finished, click Apply and Close.
-
Click (Click here to add multiple tags) and use the Data Browser to select the tags you want to publish.
-
For each point, enter a Publish Name. This is the name the subscribing system sees, so use it to expose a stable name that does not change when the underlying tag does.
-
Confirm that Real Time Publishing is selected for each point and enter a Deadband for any point that should only be sent when it changes by more than a set amount.
Right-click the grid to apply a setting to every point at once. For example, Mark all points as writable or Enable real time publishing for all points.
-
-
Right-click Publisher Connections, select Add MQTT Publisher Connection, and then enter a Name for the connection.
-
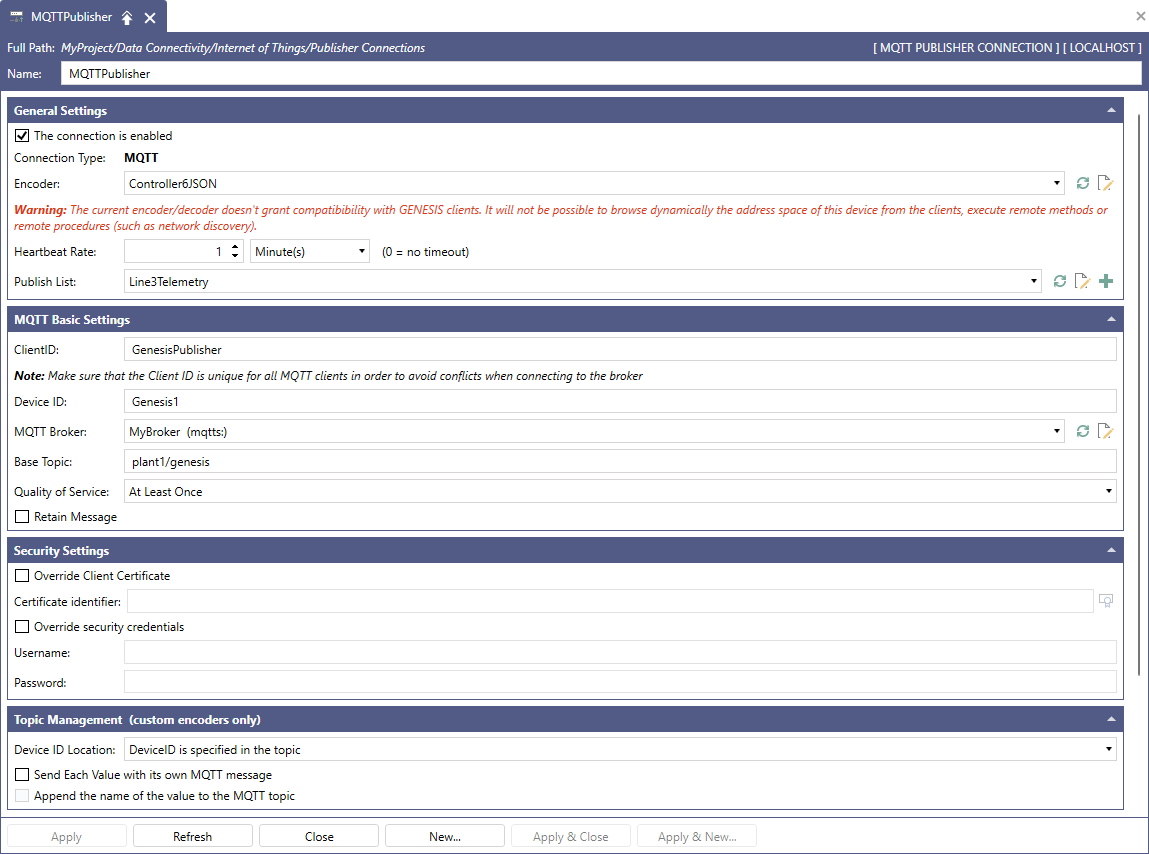
In the General Settings section, configure the connection:
-
Select The connection is enabled.
-
In Encoder, select the message format to publish in. Use JSON for a GENESIS subscriber or a custom encoder for a format the receiving system defines. Learn more
-
In Publish List, select the list you created in step 2.
-
-
In the MQTT Basic Settings section, configure where the data goes:
-
Enter a ClientID that is unique among all clients connected to the broker and a Device ID that identifies this system to the subscriber. The device ID cannot contain spaces or slashes.
-
In MQTT Broker, select the broker definition that points at the broker you want to publish to. If it does not appear, click the refresh button beside the field.
-
Enter the Base Topic to publish under; for example,
plant1/genesis. Where subscribers identify the sender from the topic, include the device ID as the last level: with a Device ID ofDevice1, a topic ofplant1/genesis/Device1lets a subscriber attribute every message correctly.
The Topic Management and Back Channel sections are enabled only when a custom encoder is selected. Use them to control where the device ID appears in the topic, to publish each value as its own message, and to define a topic that carries writes back from the subscriber.
-
-
Click Apply & Close and then verify that the GENESIS Internet of Things Publisher Point Manager service is running. On the Home ribbon in Workbench, ensure the traffic light for the Publisher is green.
What's Next?