Creating a Parameterized Data Source
This procedure builds on the concepts covered by Create a Data Source, and expands on how to add parameters to your Data Source.
NOTE: This procedure uses the SQL Server database, RollerChainManufacturing, as an example.
To create a parameterized Data Source:
-
Open Workbench and expand your project folder, and then go to Data Connectivity > Databases > SQL Connections.
-
Right-click the desired database connection, and then select Add Data Source. The Data Source Configuration window is displayed.
NOTE: to continue the example used in Connecting to an Existing SQL Server Database, right-click RollerChainManufacturing.
-
On the Data Commands tab, enter a name for the data source. To follow the example, use PartsDetails_Daily.
-
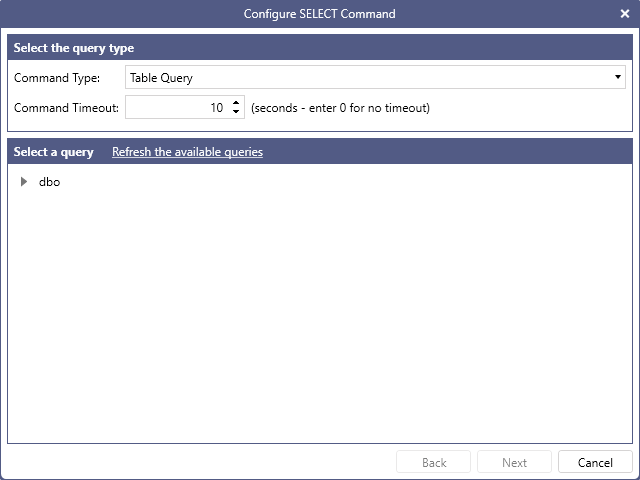
Select the Configure Command link to display the Configure SELECT Command dialog, which you use to configure your query.
-
From the Command Type drop-down, select the type of command you want to create. To follow the example, select Table Query. For more details about the possible options, and about Command Timeout, refer to Create a Data Source.
-
In the Select a query section, expand dbo > Tables, select the desired table and select Next to display the pre-built query.
NOTE: To follow the example, select the PartsDetails_Daily table.
-
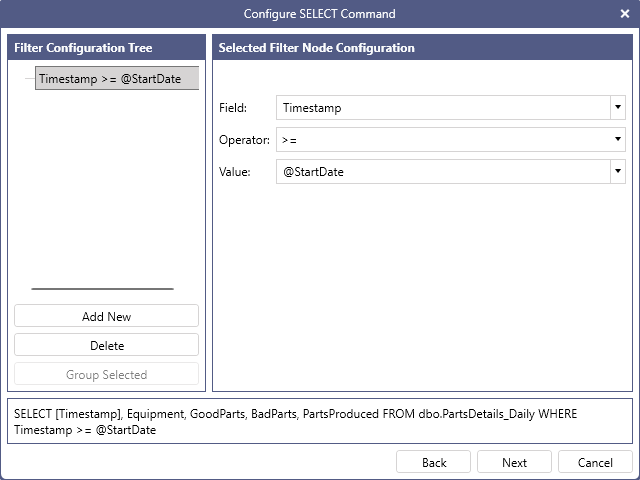
Select Next to navigate to the Filter Configuration screen. Under Filter Configuration Tree, click Add New to create a new filter. Use the Selected Filter Node Configuration panel to configure your filter. The options are:
Option Description And/Or This option is only available for filters other than the first filter. Use it to configure the logical combination between the current and the preceding filter. You can group filters together by selecting them from the Filter Configuration Tree and clicking the Group Selected button. Field Enter the name of the column that you want to filter on. You can also use the dropdown to select one of the columns in the SELECT list of the query. Operator Select the operator for the comparison. Value Enter the comparison value for the filter. This can be a static value or a parameter name. To enter a parameter name, prefix the name with the @ character, for example @param1. NOTE: To follow the example, select Timestamp from the Field dropdown, select >= as the operator and enter @StartDate in the Value box.
-
To create another filter, click the Add New button again. To follow the example, select AND from the And/Or dropdown, select Timestamp from the Field dropdown, select <= as the operator and enter @EndDate in the Value box. The desired WHERE statement is appended to the query.
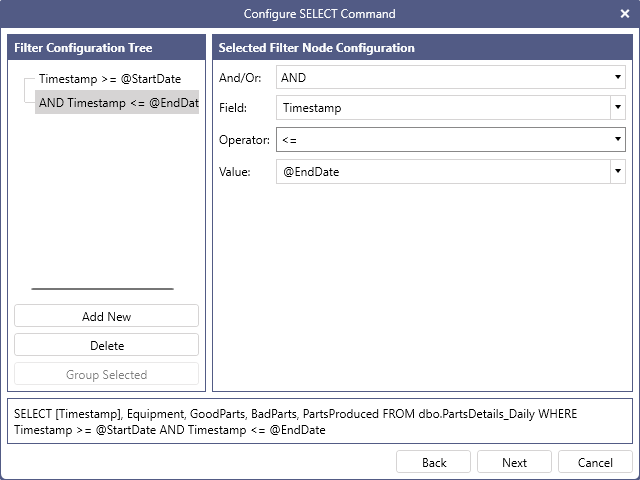
TIP: You can manually type the WHERE statement and, in general, modify the query, in the previous Customize the query screen.
-
Select Next and then Next again to proceed to the Configure Parameters screen. The configured parameters are displayed, along with their properties:
Property Description Name The name of the parameter. Data Type The data type of the parameter. For more information, refer to Data Types Reference. Direction Defines the direction of the parameter. Input represents a parameter from GENESIS to the database: this is the option to use for parameters in a SQL query. Output represents a parameter from the database to GENESIS. Input/Output represents a parameter that is both input and output. Return Value is used for stored procedures return values. Output, Input/Output and Return Value are typically used when calling a stored procedure that exposes those kinds of parameters. Length The size, in bytes, of the parameter for the specified data type. For fixed-length types (Int, Double, etc.) the size is automatically assigned. For fixed or variable-length string types, you can enter the value directly. 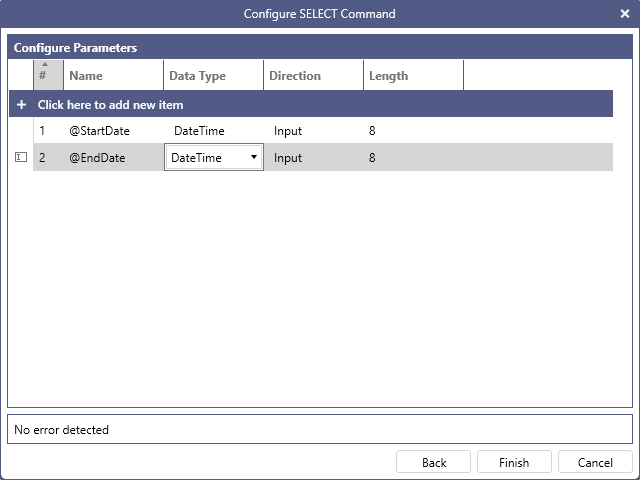
NOTE: From the Data Type drop-down, select DateTime for both parameters if not already selected.
-
Select Finish to close the Configure SELECT Command dialog. The Schema Auto Detection - Parameter values required dialog is displayed. Click OK and the schema will be automatically detected. Select Apply to save the Data Source.
NOTE: The Schema Auto Detection - Parameter values required dialog calls the server to execute the query to retrieve the returned schema columns. If the query has parameters, you have to supply values for the parameters in order to determine the returned columns.
-
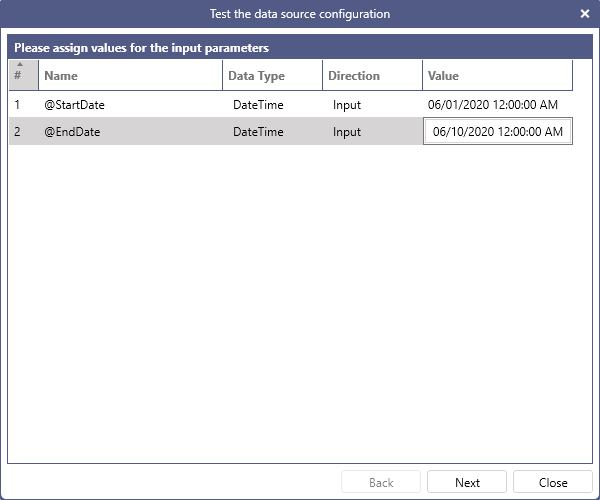
On the Data Commands tab, select Test Command. The Test the data source configuration dialog is displayed and the Please assign values for the input parameters screen is shown. Enter the desired values for the parameters to use for the query execution.
NOTES:
- For this example, use 06/01/2020 for the @StartDate parameter and 06/10/2020 for the @EndDate parameter. The result of the query is displayed.
- The format of the dates may be different if you are using a machine with a regional format different than English (United States). In that case, use your current regional format to enter the dates.
-
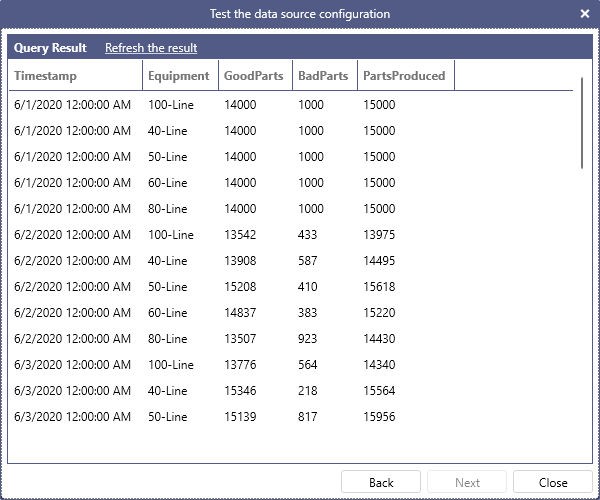
Select Next. The query result is displayed.
