Connecting to an Existing SQL Server Database
The zip file contains RollerChainManufacturing.bak, which is the SQL Server backup file that you need to restore. Make sure to add Network Service to the restored database's db_owner role.
To connect to a SQL Server database:
- Open Workbench, and then expand MyProject > Data Connectivity > Databases.
-
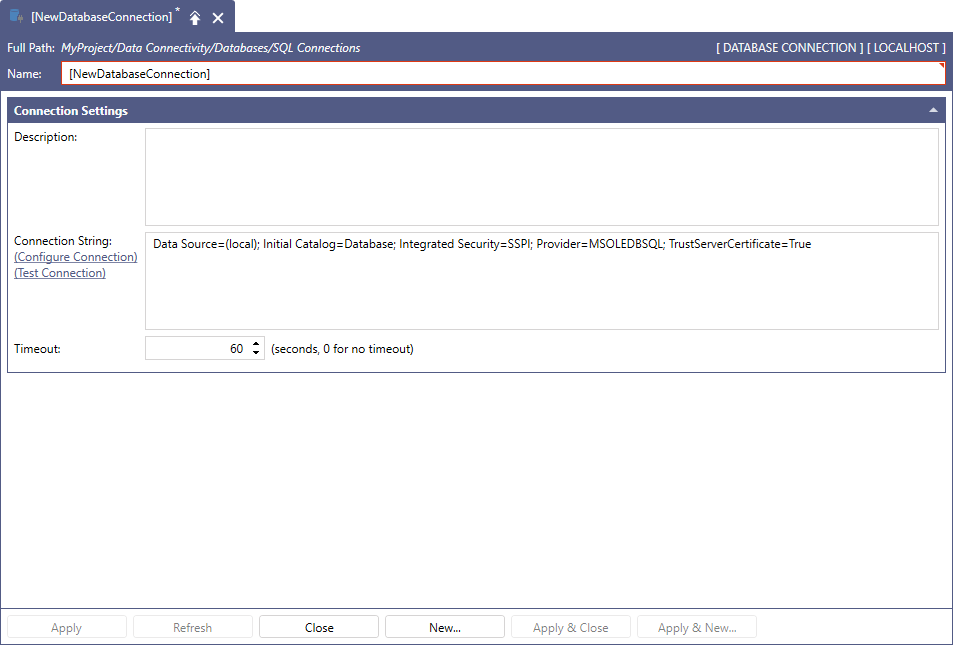
Right-click SQL Connections, and then select AddSQL Server Native Connection. The SQL Server Connection window is displayed.
-
Enter a name for the connection. For this example, enter RollerChainManufacturing.
Connection names must be unique across all server types. For example, you cannot have a connection named RollerChainManufacturing under both SQL Connections and Oracle Connections. -
Click the Configure Connection link to display the SQL Server Connection String dialog. The connection string identifies the server and the database that you want to connect to, along with all other necessary options.

-
From the SQL Server drop-down, select (local) to connect to the SQL Server where Workbench is running.
The SQL Server drop-down has a list of the SQL Server instances that are available in Workbench. You can select the server to connect to from the list, or enter the name of the desired server directly in the drop-down. If (local) is not available in the drop-down, select the option where the RollerChainManufacturing database is installed. This might occur if the database is installed on a remote server. -
Complete the following fields, and then click OK to return to the SQL Server Connection window. Note that Workbench has automatically built the connection string.
You can enter the connection string manually in the box, if desired, or make changes after the connection string has been generated.SQL Server Connection String Dialog Fields
Description
Security Mode
Select Windows NT Integrated Security. For more information about security modes, refer to Microsoft SQL Server Authentication Options.
User name
Specifies a user name to use when connecting to the SQL Server. This field only applies when Security Mode is either SQL Security or Entra ID Security.
Password
Specifies a password to use when connecting to the SQL Server. This field only applies when Security Mode is either SQL Security or Entra ID Security.
Encrypt Connection
Select this option to encrypt the connection to the database. Newer versions of Microsoft SQL Server require encryption by default, and this is the recommended option for a secure system.
Trust Server Certificate
Select this option to trust the server's certificate even if it is not signed by a Certification Authority. This option is useful if the server is using a self-signed certificate to encrypt the connection. For a secure system, do not select this option. Use a fully signed certificate instead.
Database
From the drop-down, select the name of the database that you want to connect to. For this example, select the RollerChainManufacturing database. The drop-down lists the databases that are available on the selected SQL Server with the selected options.
You can also enter the name of the database in the box, if desired. - Enter the desired value in the Timeout field. This value represents how long the GENESIS Databases Point Manager will wait for the connection to be established before returning an error.
- To verify the information that you entered, click the Test Connection link. If the connection information is correct, a success message is displayed. Click Apply to complete the connection configuration.