Configuring Images for Equipment Hierarchy
Tiers in equipment hierarchy and equipment in the asset tree are represented by small, iconic images that have been configured in Assets. By default, you select an icon for each tier in the asset tree. However, you can select a different icon for each individual type of equipment at the time you add the equipment to the asset tree. For example, you can use the icon of an office building for the Building tier of the hierarchy, but when you add a warehouse, select the warehouse icon instead.
You can use the predefined set of images that are available in the Assets configuration, or customize it by adding or removing items or replacing the default images with your own.
These images are also used in the Table and Fault Viewer controls in GraphWorX.
To configure Assets images for equipment hierarchy:
-
Open Workbench and in Project Explorer, expand your project > Assets > Product configuration,
and double-click Images.
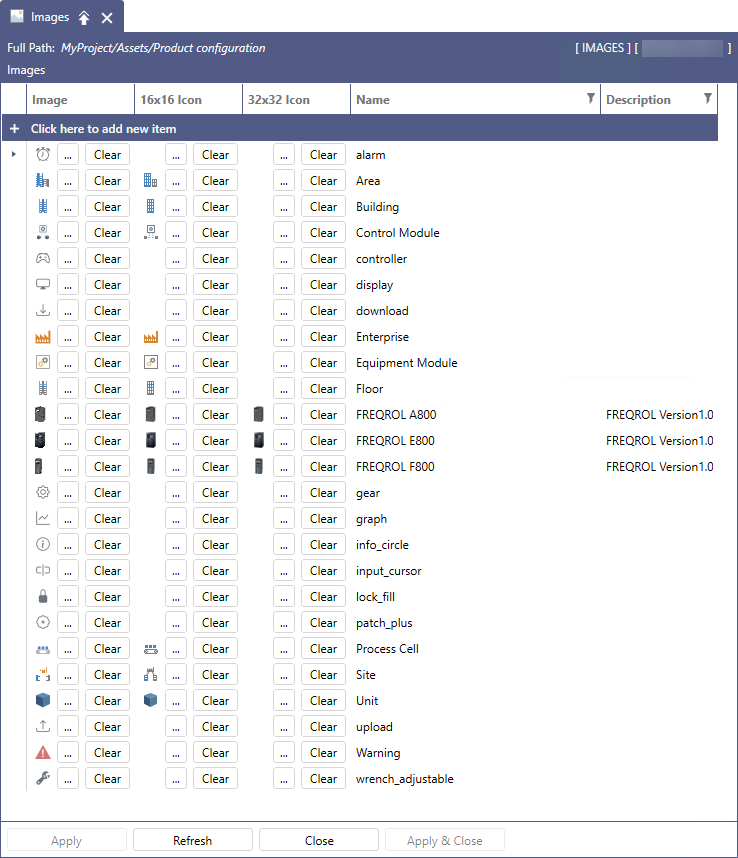
This opens a table of icons available for use in the tiers of the equipment hierarchy.
-
Explore the default images and, if desired, create your own to use in a new item or replace an existing icon. Save each new image to a file in a .jpg or .png format.
You can configure up to three versions of an icon image for use in Assets. In addition to the default image file that appears in the asset tree, you can provide a 16 by 16-pixel version of the icon that appears in drop-down lists where users select an icon, and a 32 by 32-pixel version of the icon that appears in the heading area of the Equipment tab. If you do not provide the two latter versions, the default version is used.
-
Edit the Images table as desired, and then click Apply.
-
Customize an existing item:
-
To replace the default image, click
 in the Image column, and then select the desired image in the browser and click Open. To replace the 16x16 or 32x32-pixel icons, do the same in the related columns.
 -
To remove an icon from the configuration, click Clear in the desired column. You can only remove the 16x16 or 32x32-pixel icons.
-
To edit the name or description, click into the text box in the respective column and enter the desired text.
-
-
Add a new item:
-
At the top of the image list, select Click here to add new item. A new row is added to the table.
-
In the Name column, enter a name that clearly identifies the icon or the tier where it is intended for use. Optionally, add more details to the Description column.
-
Click
in the Image column, and then select the desired .jpg or .png file in the browser and click Open to link the image to the item. To add the 16x16 or 32x32-pixel icons, do the same in the related columns.
-
-
Remove an item:
-
To remove a specific item from the configuration, right-click anywhere in the item row and select Delete Item.
-
To remove multiple items, select the desired items using Ctrl+left-click, and then right-click the selected area and click Delete selected Item(s).
-
To remove the entire list, right-click anywhere in the table and select Delete all Items.
-
-