Configuring Email Message Settings
After configuring the Email Settings tab of an email node, you can configure the alarm filter and notification message preferences on the Message Settings tab.
Setting up alarm filters allows you to limit alarm notifications that trigger outgoing messages. You can base the filter on specific alarm criteria, such as high-severity alarms or specific alarm areas.
You can define the subject, the body, and the recipient of the alarm message to be sent. Optionally, you can create templates of subject and message combinations to reuse for other configurations. Learn more
To configure the message settings of an email node:
-
In the email node configuration dialog, switch to the Message Settings tab.
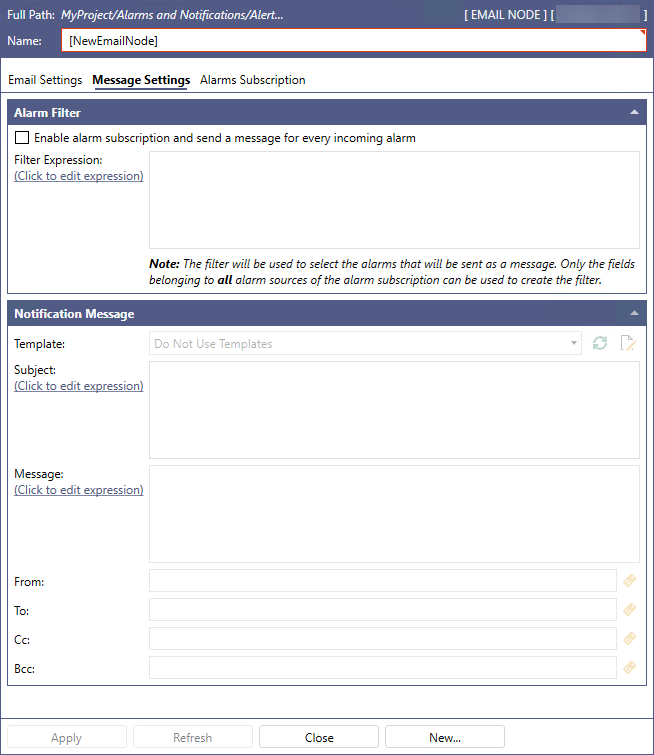
- In the Alarm Filter section, select the Enable Alarm Subscription and Send a Message for every incoming alarm checkbox to activate alarm messages, filtering, message templates, and alarm subscriptions.
-
In Filter Expression, select Click to edit expression to open the expression configuration dialog.

-
Build the expression by doing the following:
- In the left panel, double-click the desired parameter to include it to your expression.
- In the right panel, select the element type, such as Arithmetic, Relational, or Logical, to display the full list, and select the desired element.
- Enter the value or description.
Examples:
-
Example 1: To only send alarm messages for severity equal to or greater than 800, enter
x={{field:Severity}} >= 800,
using the Severity parameter and the Greater Than or Equal element from the Relational category, and setting the value to 800.
-
Example 2: To only send alarm messages for alarms containing source Tower3, enter
x=rgmatch({{field:SourceName}},"Tower3"),
selecting the rgmatch function from the String Functions list in the Functions category and replacing the string in parentheses with the SourceName element and the "Tower3" value.
- Click
 to test the expression, and when it returns "No errors", click OK.
 -
In the Notification Message section, do one of the following:
- In Template, select an existing template from the drop-down list.
-
Click
 to edit or create a template. Learn more
 -
Select Do Not Use Templates and enter the desired text or expression in Subject and Message.
Use the Click to edit expression link to define the subject or message expression in the expression dialog.
-
Enter the desired addresses in the following fields, and then click Apply. Click
 to open Data Browser and select the sender or recipient.
- In From, enter the name and/or address of the sender.
- In To, enter the name and/or address of the recipient.
- In CC, enter the names and/or addresses of any additional email recipients.
- In BCC, enter the names and/or addresses of any additional email recipients that you do not want to appear in the email header.
- (Optional) Enable email messages in HTML format in the platform services for Alert Notifications Point Manager. Learn more
What's Next?