Configuring Email Hardware and Data Settings
After creating a new Email node, the dialog opens on the Email Settings tab.
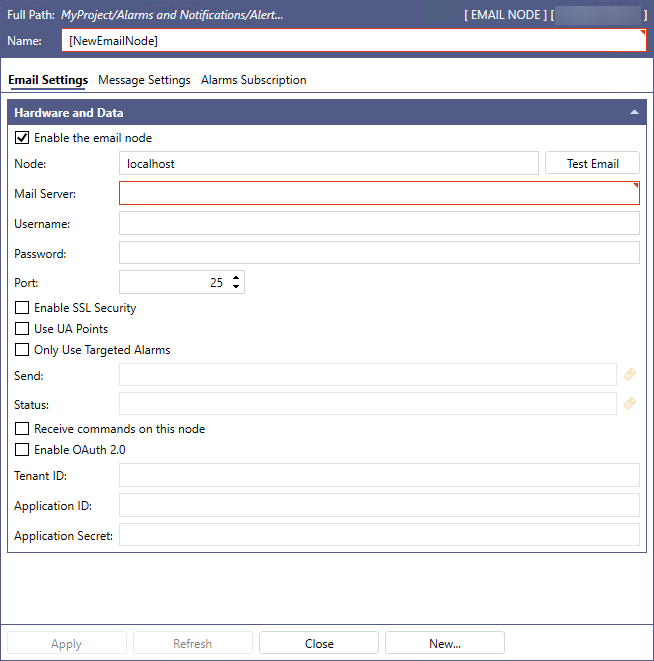
Configure the following Hardware and Data settings, and then click Apply.
|
Setting |
Description |
|---|---|
|
Enable the email node |
Select the checkbox to activate the node. |
|
Node |
Enter the node name of the Alert Email Service. |
|
Mail Server |
Enter the name of the mail server used for outgoing email notifications, and then enter the following information for connecting to the server.
|
|
Enable SSL Security |
Select the checkbox if the mail server requires an SSL/TLS security connection. |
|
Use UA Points |
Select the checkbox to load the Notification Message Fields as data points, and then complete the following fields.
|
|
Receive commands on this node |
Select the checkbox to receive commands from the client. |
 to open Data Browser and select the data source.
To test the email connection, click Test Email next to the Node text box. In the Send a test message dialog, complete the Node name (should be entered automatically), From email address, To email address, Subject, and Message, and then click Send Message.
What's Next?