Creating Groups
As the security administrator, you can create groups with pre-assigned privileges that control access to individual applications and other system features. You also assign user membership to these groups, extending the user's effective rights and privileges. The following is an overview of group security rules:
- A user who lacks a privilege can be given membership to a group, and the group privileges are extended to that user.
- User membership can be added to one or more groups. However, you cannot add a group to other groups.
-
Group membership gives the user permission to specific actions assigned to the group or to the individual user.
To create a group:
-
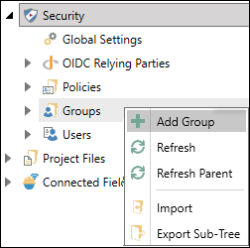
Open Workbench and in the Project Explorer, expand the Security node.
-
Right-click Groups and select Add Group.
 View image
 -
In the Groups pane, identify the basic General Properties.
Section
Description

Identify the group Name.

Select the checkboxes for this group:
- This is the default group—indicates the group permissions that apply for all users.
 When securing important information, do not use the default group. The default group allows anonymous users access to available applications without logging in to the system.
 - Reserved Licensing—Ensures priority access to a connected system at all times.
- Write Licensing—Gives permission to write to data points, alarms, and commands (default option).

(Optional) Defines a Root Asset, Default Asset, and other identifiers, limiting the group to the specified assets in the navigation tree (not covered in the Start-Up Guide).
- This is the default group—indicates the group permissions that apply for all users.
-
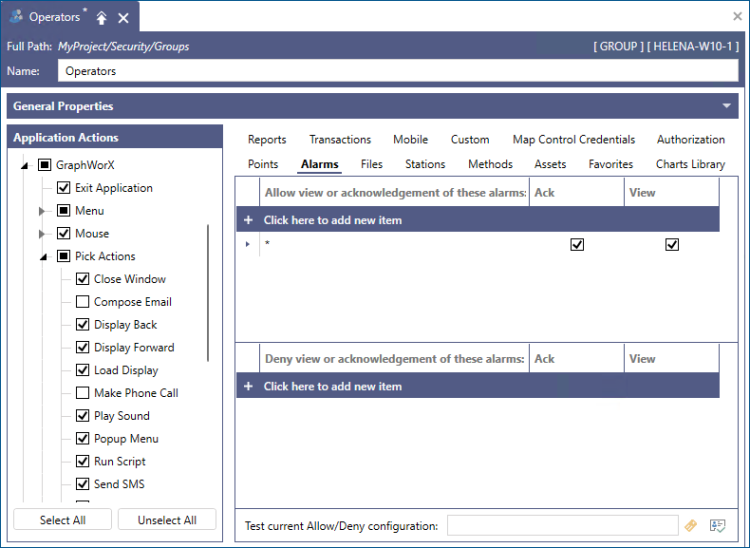
In the Application Actions section, select or clear the desired checkboxes to grant or deny the group members permission to perform the actions in an application.
Example: Expand GraphWorX, then expand Pick Actions, and then clear Compose Emailand Make a Phone Call.
View image - Use the tabs on the right to allow or deny access to data sources, assets, and alarms. Use the wild card asterisk (*) on the Alarms tab to allow all the functions associated with alarms, and then click Apply.
- In Project Explorer, right-click the group name (in this case it's Operators) and select Membership. The Set the membership dialog appears.
-
Select the user name from the drop-down list and click
 to add the user, and then click OK.
 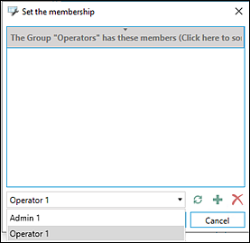 If the membership in a group includes a large number of users, you can alternatively add all user names to a spreadsheet, and then use the import/export feature in Workbench. (These steps are not covered in the Start-Up Guide.)