Adding Users
When adding a user, you assign role-based security parameters and privileges for accessing client applications. There are three user roles:
- Administrator—This role grants all available privileges to configure security settings and allow or deny access to other users.
 The first user that you create must be an administrator. This is done to ensure that you can access and manage the system.
 - Operator—This role has read-only rights to view data and enables writing to data points, alarms, and commands, but does not allow access to the settings configuration.
- Read Only—This role only allows viewing data.
Adding a user is basically the same for all user roles. However, for operators and read-only users, the administrator uses Application Actions to control specific actions in an individual application or uses the tabs to complete the user account definitions to allow or deny actions. ![]() View image
View image
To add users:
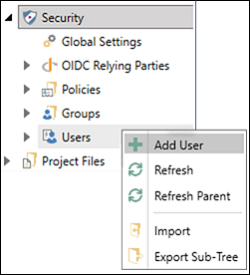
- Open Workbench and in the Project Explorer, expand the Security node.
- Right-click Users and select Add User.
 View image
 -
In the Security Users pane, complete the required information.
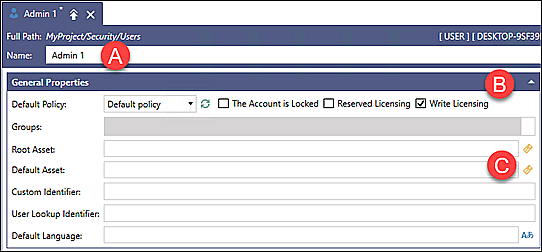
The following table describes the General Properties options.
Section
Description

Enter the user account name.

Select the Default Policy from the list and select the appropriate policy options based on the user profile.
- Account is locked—When the user account is locked, the security administrator selects the checkbox to unlock the account.
- Reserved Licensing—Ensures priority access to a connected system at all times.
- Write Licensing—Gives permission to write to data points, alarms, and commands (default option).

(Optional) Define a Root Asset, Default Asset, and other identifiers, limiting the user to the specified assets in the Project Explorer tree—not covered in the Start-Up Guide.
-
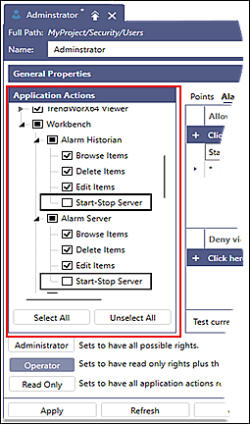
In the Application Actions section, all applications are selected by default. As an administrator, you control specific actions within an application for the user.
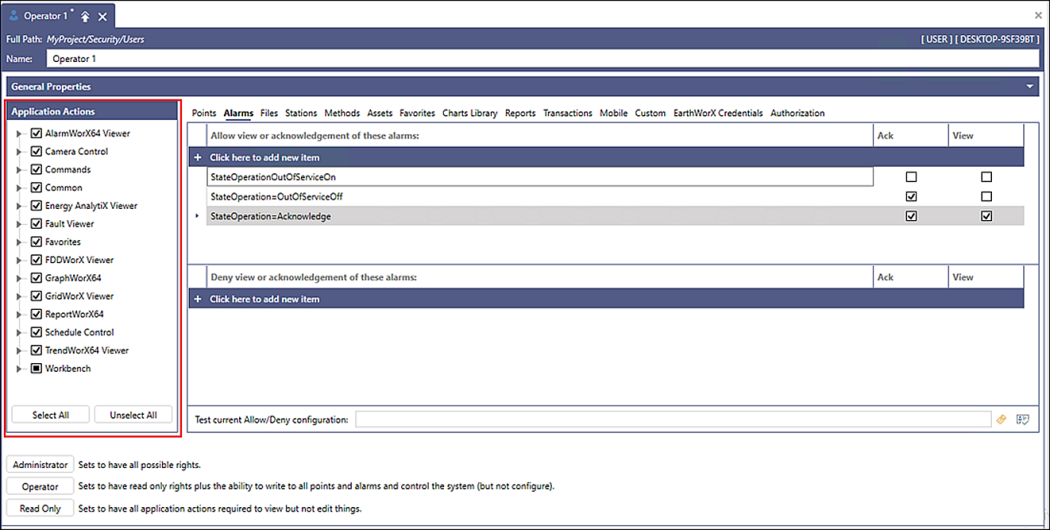
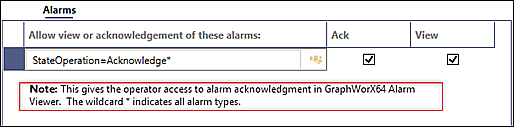
View imageSelecting the Administrator, Operator, Read Only, Select All or Unselect All button overrides any default or custom application action selections. - Use the tabs on the right, such as Points, Alarms, and Assets, to allow or deny access to data sources, alarms, and assets. The following is a basic example that enables the operator to acknowledge an alarm.
- Select the Alarm tab and select + Click here to add new item.
- Click the alarm icon (
 ) to open the Alarm selection dialog.
 - Enter an asterisk (*) in the box.
- Select Acknowledge and click OK.
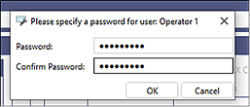
- Click Apply. The Specify a password dialog appears.
- Enter and confirm the user password, and then click OK.