Configuring Alarm Historian Redundancy
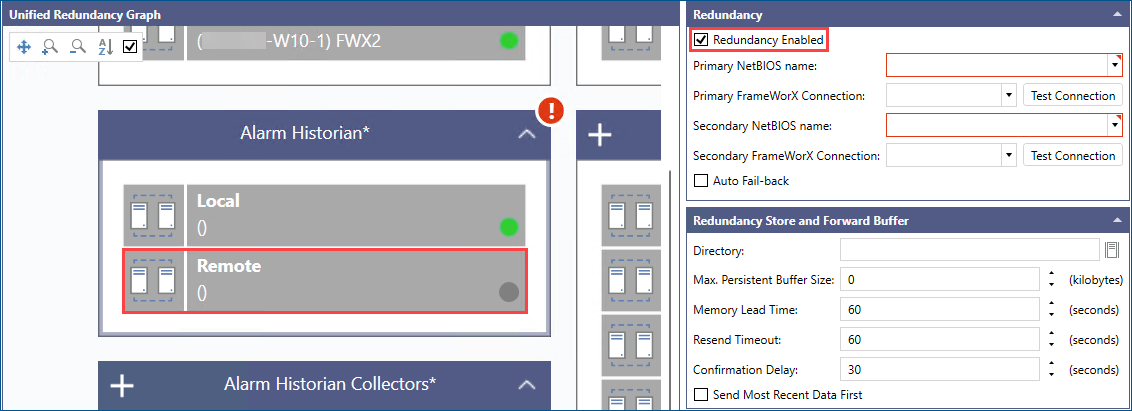
You can make your Alarm Historian redundant in Workbench in Unified Redundancy. Alarm Historian supports two-node redundancy of both data access and storage, meaning that this configuration additionally handles the synchronization of the stored data.
The Alarm Historian cluster box with the currently used connection is created automatically. You can add the redundant connection in the cluster settings.
To configure Alarm Historian redundancy:
-
Open Workbench and in Project Explorer, expand your project > Servers and Redundancy > Unified Redundancy and in the Unified Redundancy Graph panel, click the Alarm Historian box heading. The configuration dialog opens in the right panel.
-
In the Redundancy section, select Redundancy Enabled. This adds another (Secondary) connection to the Alarm Historian cluster.
-
In Primary NetBIOS name, select or enter the NetBIOS name of the primary server, and then select Primary FrameWorX Connection.
-
In Secondary NetBIOS name, select or enter the NetBIOS name of the secondary server, and then select Secondary FrameWorX Connection.
-
Select Auto Fail-back to switch over to the primary connection as soon as it is available.
-
In the Redundancy Store and Forward Buffer section, configure the desired buffer settings, and then click Apply.
You can also enable and set up the Alarm Historian redundancy in Alarms and Notifications > Alarm Historian > Product Configuration > System Settings.
What's Next?