Importing a Data File to Data Historian
Once you create a .csv file containing the desired data in the required format, you can import the file to Data Historian and merge the data using Data Historian Reader.
To import data to Data Historian:
- Copy the .csv file into the input folder defined in the Data Historian Importer configuration.
- Once the file disappears, open the archive folder defined in the Data Historian Importer configuration and verify that it contains the imported file.
- Open the failed data folder defined in the Data Historian Importer configuration and verify that it is empty.
To verify that the Data Historian contains the imported data:
-
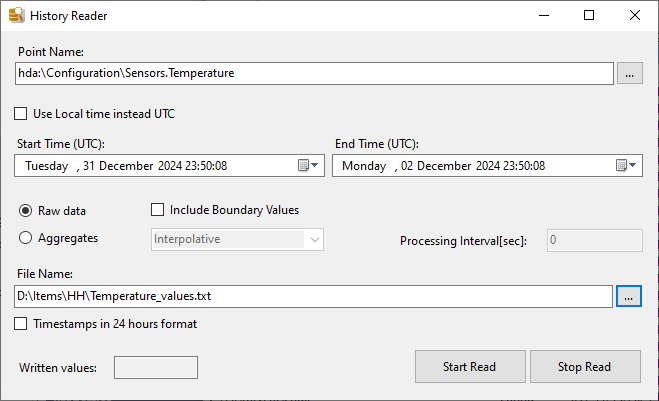
Use the Windows search box to open the Data Historian Reader application with administrator privileges. The History Reader dialog opens.
-
This application can write ranges of Data Historian data to .txt files. Specify the following parameters:
-
In Point Name, select the desired data point.
Example: hda:\Configuration\Sensors.Temperature
- In Start Time, enter the timestamp to use as the start of the time range to access.
- In End Time, enter the timestamp to use as the end of the time range to access.
- In File Name, select the desired file name and location for the text file that will be created.
-
- Click Start Read and wait for a dialog message to appear confirming that the read has completed
- Open the newly created file and verify that all data values are included properly.