Configuring Data Historian Importer
Before importing historical data into GENESIS, you need to configure Data Historian Importer and the related settings in Workbench.
To configure Data Historian Importer and the related historical data import settings:
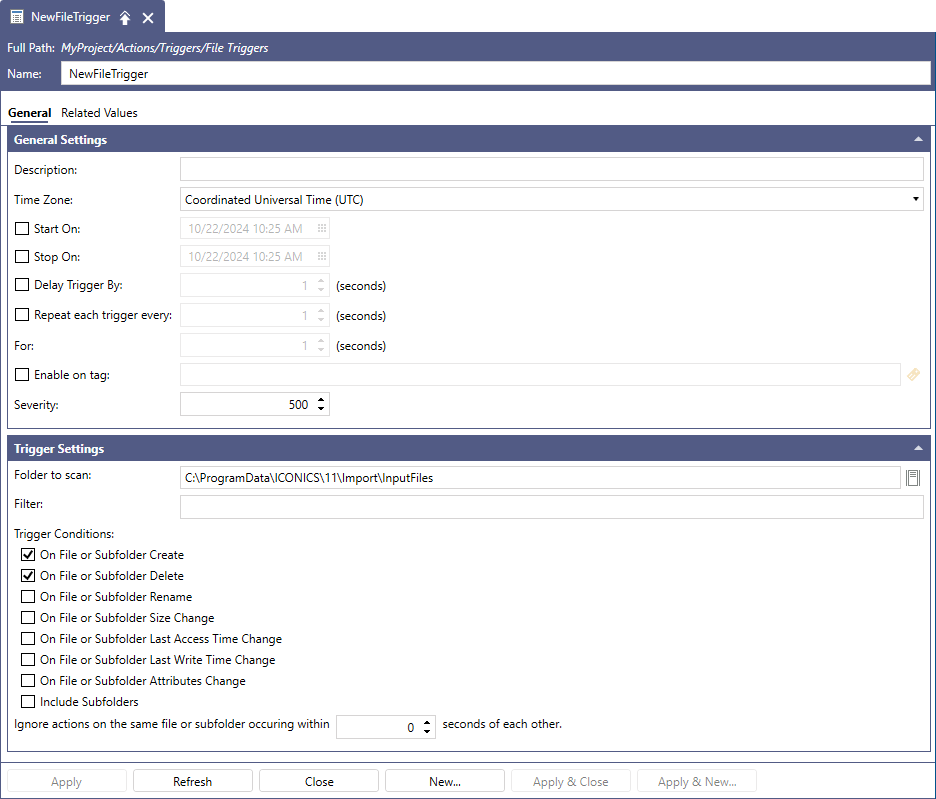
- Open Workbench and in Project Explorer, expand your project > Actions > Triggers, right-click File Trigger, and select Add File Trigger.
-
In the trigger configuration dialog, set up the following parameters, and then click Apply.
- Enter the name of the trigger.
- In the Trigger Settings section in Folder to scan, select the input directory.
- In Trigger Conditions, set the trigger to check for any folder or subfolder changes in the input directory.
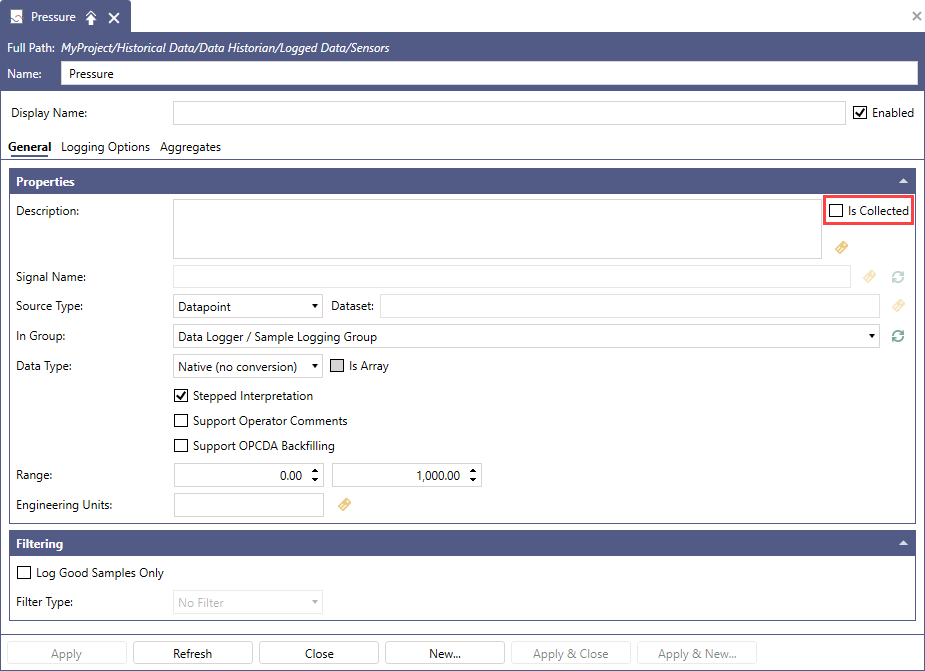
- In Project Explorer, expand Historical Data > Data Historian, right-click Logged Data, and select Add Folder.
- In the folder configuration dialog, enter the folder's name and Display Name, and then click Apply.
- In the Project Explorer panel, right-click the newly added folder and select Add Tag.
-
In the tag configuration dialog, enter the tag's name, clear the Is Collected checkbox, and then click Apply.
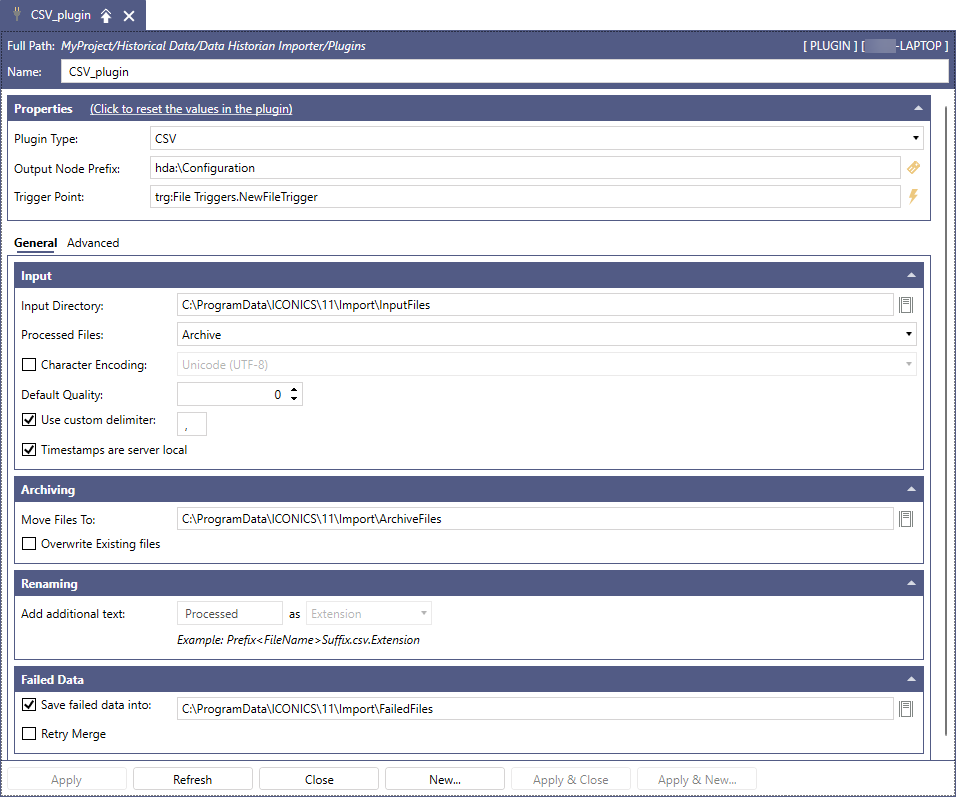
- In Project Explorer, expand Historical Data > Data Historian Importer, right-click Plugins and select Add Plugin.
-
In the trigger configuration dialog, set up the following properties.
- Enter the name of the plugin.
- In Plugin Type, select CSV.
- In Output Node Prefix, enter hda:\Configuration.
- In Trigger Point, select the file trigger that you created in step 2.
-
Select the input, archive, and failed data directory to check the process flow, and then click Apply.
- In the Input section in Input Directory, select or type the path to the folder containing the .csv files with the data to be imported.
- In the Archiving section in Move Files To, select or type the path to the folder where the imported data will be stored.
- In the Failed Data section in Save failed data into, select or type the path to the folder where data that fail the merge will be sent.
What's Next?