Sending a Notification from a Workflow Template
Connected Field Service workflow templates allow you to configure the format of notifications and to whom they are sent. It is configured as a series of activity blocks that can be composed to operate in the sequence you require.
Before you begin, configure the provider that will carry the message under Alert Notifications, and confirm that it can send a test message. Connected Field Service composes the message but hands it to Alert Notifications to deliver, so a template cannot send anything until the provider works. Learn more
The following procedure sends an email to the members of a worker group. The Send Sms, Send Voice Message, and Send WhatsApp activities are configured the same way, against the contact numbers held on the worker rather than the email addresses.
To send a notification from a workflow template:
-
Open Workbench. In Project Explorer, expand your project > Alarms and Notifications > Connected Field Service. Right-click Templates and select Add Template.
-
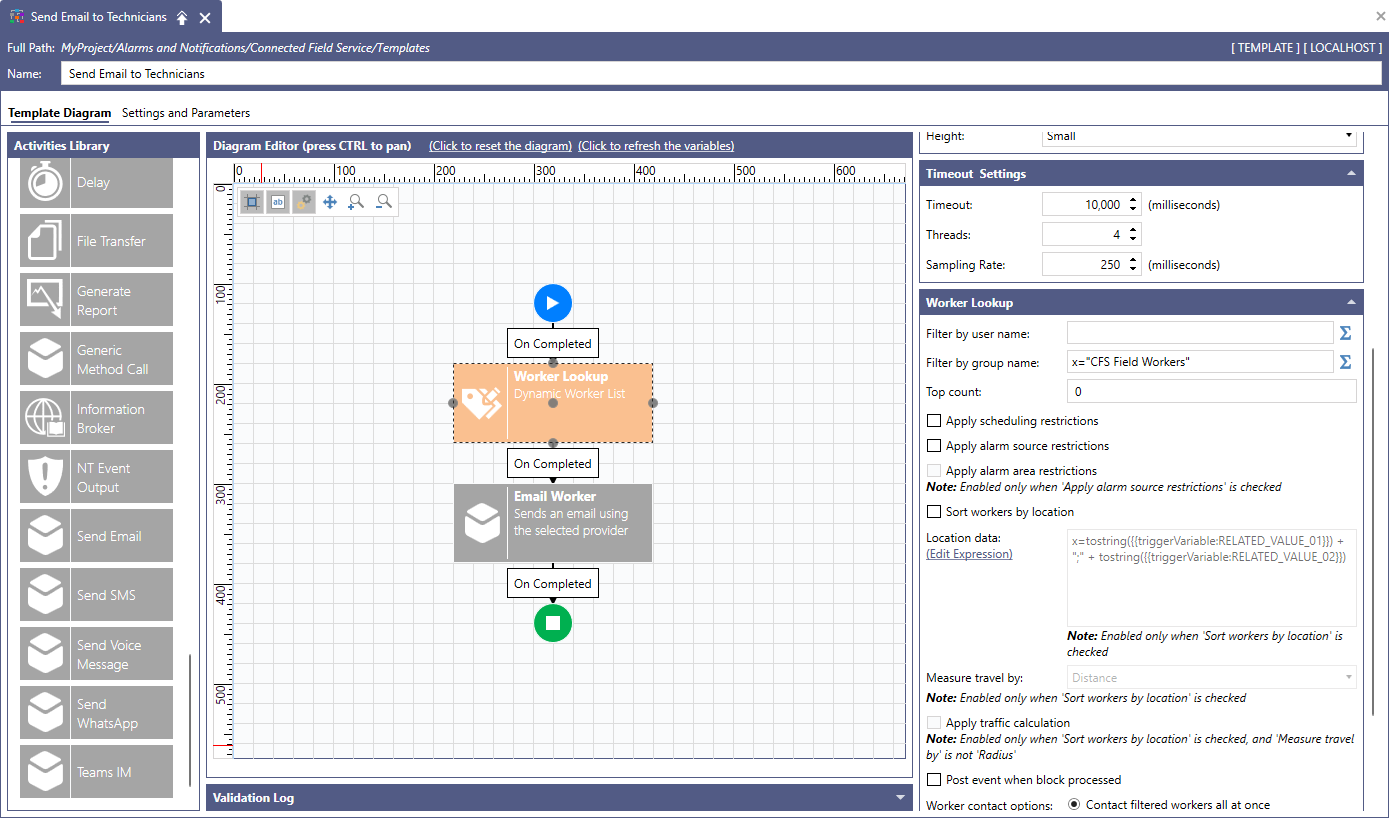
Drag Worker Lookup from the Activities Library onto the Diagram Editor, and configure it in the panel on the right:
-
In Activity Name, enter Worker Lookup.
-
In Filter by group name, enter the name of the group to contact. For example,
CFS Field Workers. Use the group name as it appears in Project Explorer, without the source name in parentheses. -
Under Worker contact options, select Contact filtered workers all at once so that the workflow contacts the entire group of users in a single pass. Learn more
-
-
Drag Send Email onto the diagram and configure it:
-
In Activity Name, enter Email Worker.
-
In Provider Type, select the provider you configured under Alert Notifications.
-
In From, enter sender’s address that the provider is configured to send as.
-
Leave Destination empty for the activity to send to the contact address of the worker supplied by the preceding Worker Lookup. Enter an address only when the message should always go to the same recipient, regardless of the lookup.
-
-
In Subject, enter the subject line, and in Message, click (Edit Expression) and build the body from the alarm fields. For example:
x=concat("Alarm at ", {{triggerVariable:OriginalSource}}, ": ", {{triggerVariable:Message}}, ".."){{triggerVariable:<field>}}reads a field of the alarm that triggered the workflow. Learn more -
Select Post event when block processed on both activities so that each lookup and each message raises an event that can be viewed in an Alarm Viewer or logged by Alarm Historian.
-
Connect the diagram: link the activities together and the final activity to the end block.
-
Confirm that the Validation Log reports no errors and click Apply.
-
Trigger an alarm that matches the workflow filter, and confirm that the workers in the group receive the message.
What's Next?