Viewing and modifying a BACnet Schedule
BACnet schedules allow you to create, manage, and automate time-based control actions for various building systems. They reference BACnet calendars to define weekly or exception schedules for executing specific actions.
Schedules are typically created, and all execution and processing occurs directly on BACnet devices. However, the BACnet viewer offers a user interface to view and modify BACnet schedule objects within GENESIS.
To view and modify a schedule object:
- Open Workbench and in the Project Explorer pane, expand your project > Data Connectivity > BACnet > Channels.
- Expand the desired device and the Schedule object type.
-
Right-click the desired schedule object and select View Property Sheet. In the Show Properties dialog that opens, you can view all properties and their values for the selected schedule instance, ordered alphabetically. To enable editing writable properties, click STOP Monitoring at the top-right corner of the dialog. The button changes to START Monitoring.
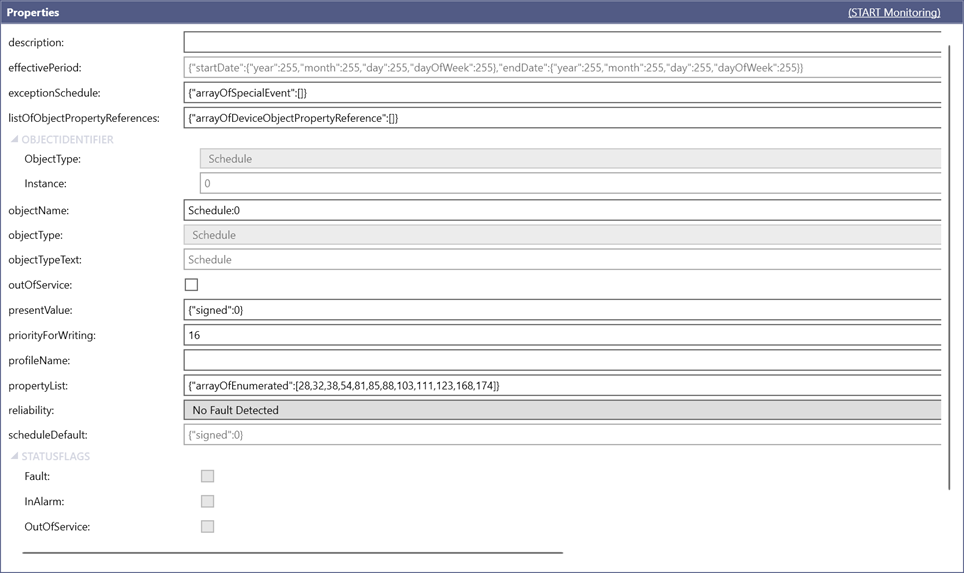
- Scroll down to the weeklySchedule property and click
 on the right of the value. Use the scroll bar to move to the right if necessary. A BACnet Collection dialog opens.
 -
In the Collection Items pane, select the day schedule for the desired day of the week, and then click
in the Properties pane on the right to display the item's settings.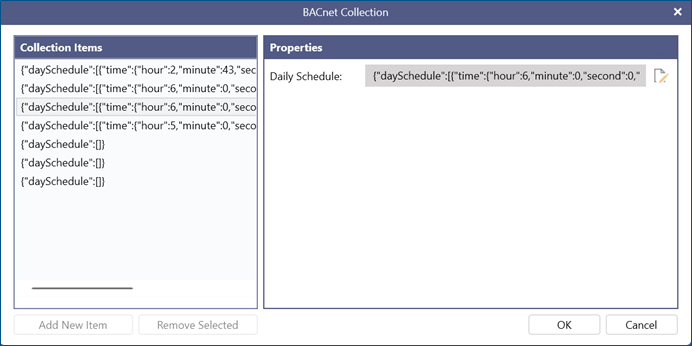
-
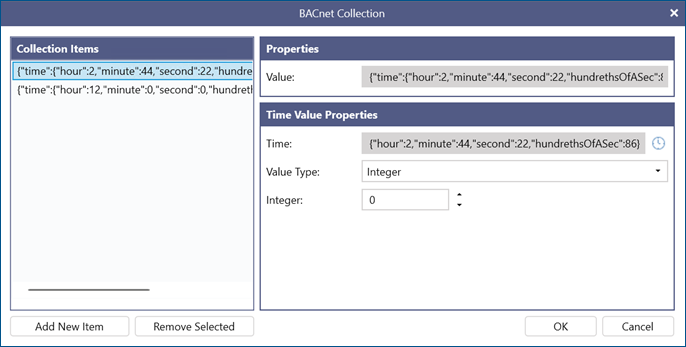
In the left pane of the next dialog, do one of the following:
- Select the desired time value item to display its properties in the right pane.
- Click Add New Item to display the settings in the right pane.
- Select the item to be deleted and click Remove Selected. Continue with step 8.
-
In the Time Value Properties section, set up the item's properties.
- In Time, click
 to set up the hour, minute, second, and hundreth of the second.
 - In Value Type, select the type from the drop-down list, and then configure the corresponding value.
- In Time, click
- When you finish editing, adding, or removing items, click OK to close the dialog.
- At the top-right corner of the Show Properties dialog, click Apply Changes to save your edits, or discard the changes. Either action returns the view to the real-time monitoring mode.