Configuring the Alert Sierra Service
In Workbench, you can configure how GENESIS handles SMS text messages using your Sierra Airlink modem.
To configure the Alert Sierra service:
-
Open Workbench and in Project Explorer, expand your project > Alarms and Notifications > Alert Notifications, and then do one of the following to display the New SMS/Text Node dialog.
-
Right-click SMS/Text Nodes, and then select Add SMS/Text Node.
-
Click SMS/Text Nodes, and then click Add SMS/Text Node on the Home ribbon.
-
-
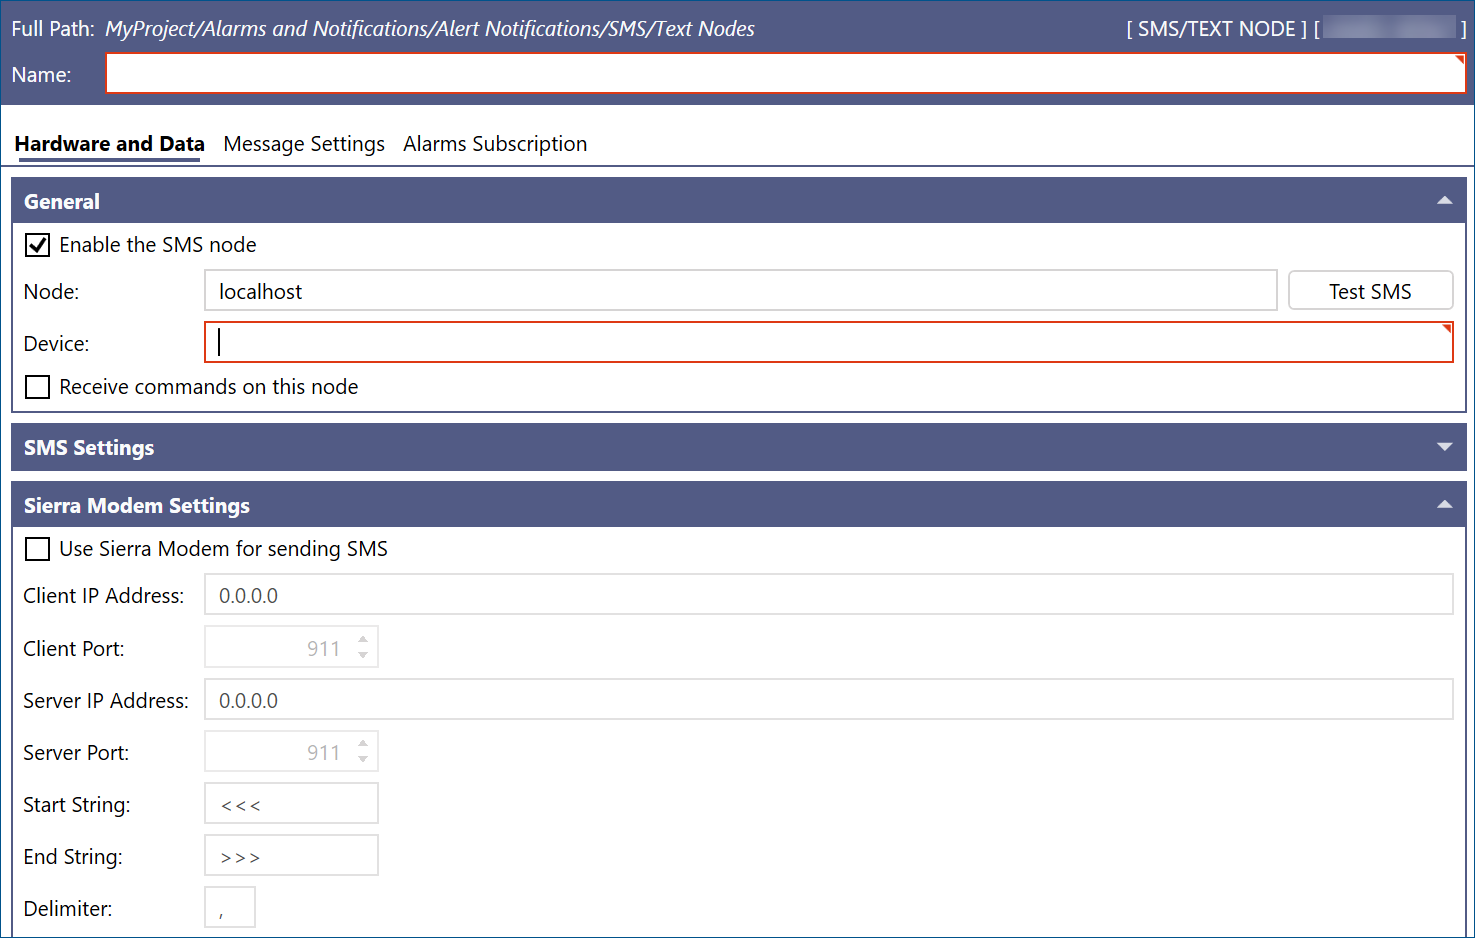
In Name, enter a name for the configuration, and then complete the following fields in the General section of the Hardware and Data tab.
Field
Description
Enable the SMS node
Select this checkbox to enable the Alert Sierra configuration.
Node
Enter the node name.
Device
Enter the name or IP address of the modem.
Receive commands on this node
Select this checkbox to make this configuration the commanding configuration.
- Only one commanding configuration is supported. You use the commanding configuration for clients like Connected Field Service and Bridging.
- The Test SMS button is not supported for Alert Sierra services. To verify Alert Sierra functionality, refer to Creating an Alert Sierra Test Configuration.
- When Received commands on this node is not enabled, a randomly selected configuration is used.
-
In the Sierra Modem Settings section, complete the following fields, and then click Apply & Close.
Field
Description
Use Sierra Modem for sending SMS
Select this checkbox to enable sending SMS messages.
Client IP Address
Enter the modem's IP address, https://127.0.0.1:9443.
Client Port
Enter the modem port number to use to send outgoing User Datagram Protocol (UDP) messages. Do not use the same port for the client port and the server port.
Server IP Address
Enter the IP address of the computer running the Alert Sierra point manager.
Server Port
Enter the port of the computer running the Alert Sierra point manager to use to receive incoming UDP messages. Do not use the same port for the client port and the server port.
Start String
By default, set to <![CDATA[<<<]]>, which converts to <<<.
End String
By default, set to <![CDATA[>>>]]>, which converts to >>>.
Delimiter
Enter the delimiter to use for UDP messages.
-
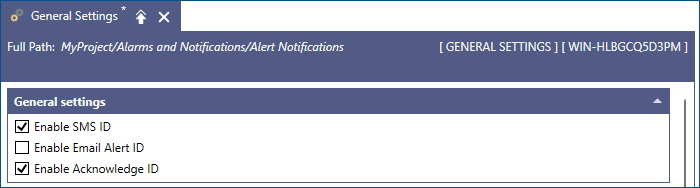
In Project Explorer, expand Alarms and Notifications > Alert Notifications, and then double-click General Settings to open the General Settings dialog.
-
Select the following checkboxes.
Checkbox
Description
Enable SMS ID
Select this checkbox to support acknowledgment using an incrementing SMS Message ID in outgoing messages. To acknowledge receipt, the receiver replies with the SMS Message ID. For example:
Sender: 103 First Message
Receiver (reply): 103
Sender: 104 Second Message
Receiver (reply): 104The SMS Message ID automatically increments with each message sent until the SMS ID maximum value is reached, which is set in the FwxServer.PointManagers.config file. To update the FwxServer.PointManagers.config file, see Updating the FwxServer.PointManagers Configuration File.
Enable Acknowledge ID
Select this checkbox to require an acknowledgment code with reply SMS messages. For example:
Sender: 103 First Message
Receiver (reply): 103 12345
Sender: 104 Second Message
Receiver (reply): 104 12345You must select the Enable SMS ID checkbox first.
What's Next?