Project Tools
The Project Tools section of the Project ribbon in the Workbench allows users to perform a number of project-related actions.
Project Tools Section of the Project Ribbon in the Workbench

New Project
Clicking the New Project button expands the menu, as shown below, to allow for selection of:
New Project Menu Selections
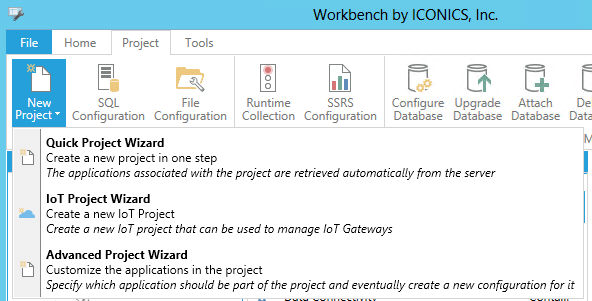
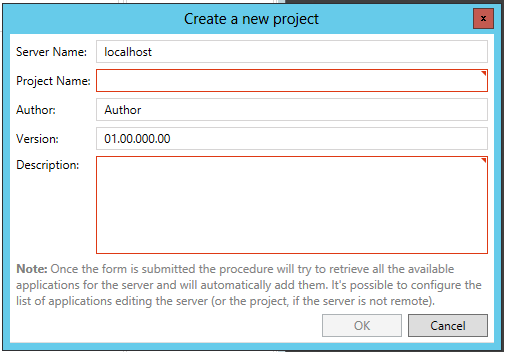
Selecting Quick Project Wizard opens the Create a new project window, shown below.
Create a new project Window
-
Server Name - This field may be prefilled. You can opt to enter a different server name here.
-
Project Name - Enter a project name to differentiate the new project from any existing or potential additional project that will be configured within the Workbench.
-
Author - Enter an author's name in this field. It can be useful to differentiate specific projects by their creator.
-
Version - The Version field is useful for keeping track of projects that may be based on existing projects but can be identified by unique version numbers.
-
Description - You can enter a further description of the new project in order to provide additional information to other users or for sorting purposes.
Note: Once this form is submitted, the procedure involves retrieving all available applications from the specified server and adding them automatically. It is possible to configure the list of applications [that can edit related data on the server (or within the project, if the server is not remote)] later on.
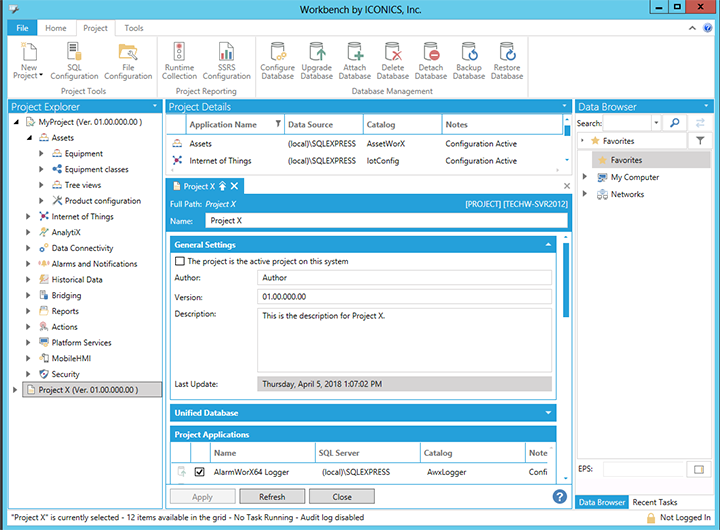
Once your project details are set, click OK to proceed. You will then see the new project added within the Project Explorer, as shown below, along with a window showing the project's General Settings, Unified Database properties and contained Project Applications. See "My Project Settings" for more details about these settings.
New Project Added to the Workbench
Selecting IoT Project Wizard opens the Create Azure project Wizard window, shown below.
Create Azure project Wizard Window
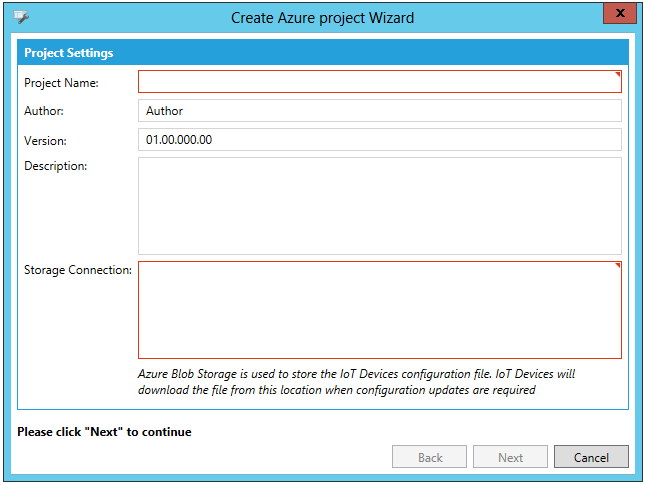
Project Settings
-
Project Name - Enter a project name for the IoT project in the text entry field.
-
Author - Enter the IoT project author's name in the text entry field.
-
Version - Enter the IoT project version number in the text entry field.
-
Description - Enter a description for the IoT project in the text entry field.
-
Storage Connection - Enter the Azure storage connection location in the text entry field.
Note that Azure Blob Storage is used to store the IoT Devices configuration file. IoT devices will download the file from this location when configuration updates are required.
Selecting Advanced Project Wizard opens the Create project Wizard window, shown below.
Create project Wizard Window - Screen 1
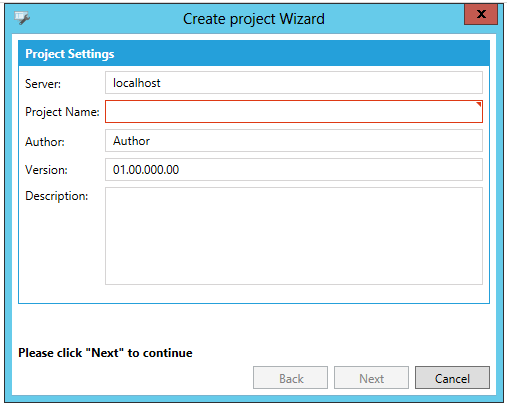
Project Settings
-
Server Name - This field may be prefilled. You can opt to enter a different server name here.
-
Project Name - Enter a project name to differentiate the new project from any existing or potential additional project that will be configured within the Workbench.
-
Author - Enter an author's name in this field. It can be useful to differentiate specific projects by their creator.
-
Version - The Version field is useful for keeping track of projects that may be based on existing projects but can be identified by unique version numbers.
-
Description - You can enter a further description of the new project in order to provide additional information to other users or for sorting purposes.
Click Next to continue. The window advances to the second settings screen, shown below.
Create project Wizard Window - Screen 2
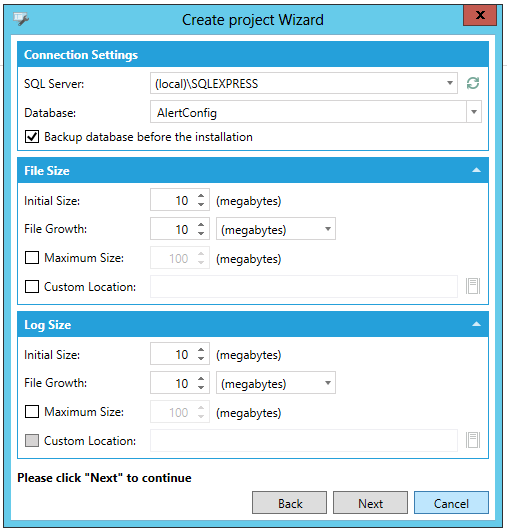
Connection Settings
-
SQL Server - Use the pulldown menu to select the installed version of SQL Server you would like to use.
-
Database - Use the pulldown menu to select a database from the selected SQL Server.
-
Backup database before the installation - Click this checkbox if you want to create a backup of the selected database before the installation procedure.
File Size
-
Initial Size - Set the intended project size by entering a number (in megabytes) in the text entry field (or use the up/down arrows).
-
File Growth - Set the intended project file growth by entering a number in the text entry field (or use the up/down arrows), then use the nearby pulldown menu to select from megabytes or percentage (%).
-
Maximum Size - Click the checkbox if you wish to set a maximum file size for your intended project. Once checked, you will then be able to set the maximum file size (in megabytes) in the now active text entry field (or use the up/down arrows).
-
Custom Location - Click the checkbox if you wish to save the project file in a location other than the default. Once checked, you can enter a preferred file location in the now active text entry field nearby or click on the now active
 button, which opens a 'Browse For Folder'
window, allowing you to navigate to your preferred file location.
button, which opens a 'Browse For Folder'
window, allowing you to navigate to your preferred file location.
Log Size
-
Initial Size -Set the project log file size by entering a number (in megabytes) in the text entry field (or use the up/down arrows).
-
File Growth - Set the intended project log file growth by entering a number in the text entry field (or use the up/down arrows), then use the nearby pulldown menu to select from megabytes or percentage (%).
-
Maximum Size - Click the checkbox if you wish to set a maximum file size for your intended project log file. Once checked, you will then be able to set the maximum log file size (in megabytes) in the now active text entry field (or use the up/down arrows).
-
Custom Location - Click the checkbox if you wish to save the project log file in a location other than the default. Once checked, you can enter a preferred log file location in the now active text entry field nearby or click on the now active
button, which opens a 'Browse
For Folder' window, allowing you to navigate to your preferred log
file location.
Click Next to continue. The window advances to the third settings screen, shown below.
Create project Wizard Window - Screen 3
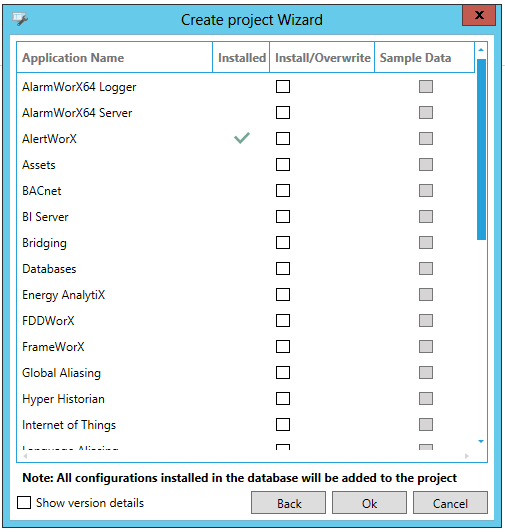
In this screen, you can select the components (providers) that you wish to include in your new project by clicking on the Install/Overwrite checkbox to the right of each item's name. Once any item is selected (checked), you'll then have the option to include Sample Data - similar to the options provided during initial installation of your ICONICS product. A check mark will appear to the right of any item that has already been Installed. In those instances, you can still opt to overwrite the existing item (as well as include Sample Data).
You can also choose to Show version details by clicking on the bottom left checkbox in the window. This provides additional details in the window including Supported Version and Current Version in order to help you decide which items to install or overwrite.
Once your project details are set, click OK to proceed. You will then see the new project added within the Project Explorer along with a window showing the project's General Settings, Unified Database properties and contained Project Applications. See "My Project Settings" for more details about these settings.
Clicking the Update Applications button in the Project Tools section of the Project ribbon in the Workbench opens the Project Update Wizard, which guides the user through the process of updating the project to match the license.
Update Applications Button in the Project Tools Section of the Project Ribbon in the Workbench

The process can be canceled at any time. If canceled, no changes will be made, and the user will not be prompted for any further changes unless the license changes again. Changes can still be made manually in the "Configure Application Setting(s)" dialog.
Project Update Wizard
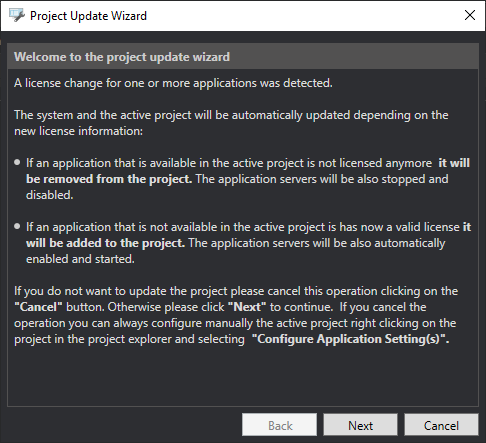
If the Project Update Wizard needs to remove an application, it will hide the provider in the Workbench tree and disable the associated services or in-process point managers. No configuration databases will be removed, so no work will be lost if an application is mistakenly removed. (Configuration tables or databases must be removed manually if the user desires.)
If the Project Update Wizard needs to add an application, it will prompt the user for SQL Server credentials used for the configuration database. The user will have the option to overwrite existing configuration data or keep the configuration already present. The providers will be added to the Workbench tree and any associated services or in-process point managers will be enabled.
Changes will be made once the user selects Update on the last page of the wizard. They may take a few minutes. Depending on the changes, the wizard may notify the user that a restart of FrameWorX is to be required.
If the user canceled a project update prompt and later decides they would like to finish the process, they can use the Update Applications button on the Project ribbon to launch the Project Update Wizard.
SQL Configuration
The SQL Configuration button allows you to set the connection between your selected SQL Server installation and the Workbench. Clicking on the button brings up the Configure available SQL servers window, shown below.
Configure available SQL servers Window
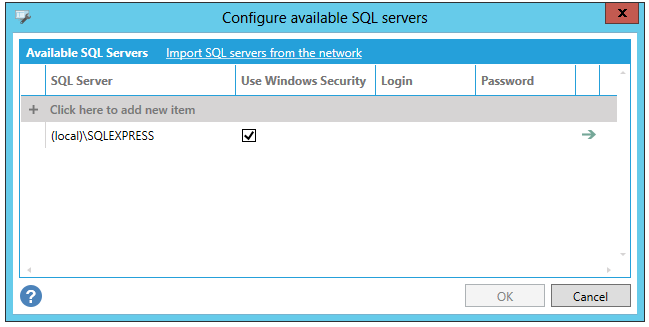
The Available SQL Servers may already be listed within the window. You can click on the Import SQL servers from the network link to refresh the window and add any other SQL Server installations.
Click on "+ Click here to add item" if you need to add a new SQL Server connection.
For any SQL Server that is listed, you can opt to Use Windows Security. Once this option is selected, you can enter the appropriate Login and Password.
Once you have completed making your settings, click OK to return to the Workbench.
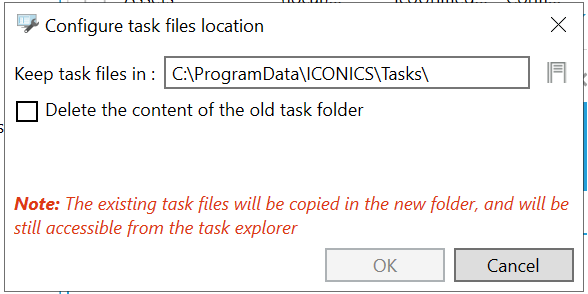
Clicking the Task Folder Configuration button opens the Configure task files location window, shown below, which will allow you to set the location of the task files as well as optionally delete content of an older task folder. Note that the existing task files will be copied in the new folder, and will still be accessible from the task explorer.
Configure task files location window
File Configuration
The File Configuration button allows you to set available file paths to data that can be browsed remotely. Clicking on the button brings up the Configure the file paths that can be browsed remotely window, as shown below.
Configure the file paths that can be browsed remotely Window
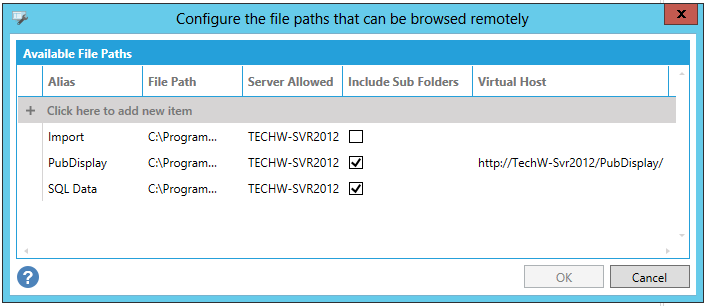
The window may be pre-filled with existing Available File Paths. Click on "+ Click here to add new item" to add an additional file path.
Settings include:
-
Alias - A name to correspond to the File Path
-
File Path - The location of the required data or files
-
Server Allowed - The server that will contain the File Path
-
Include Sub Folders - Click this if you wish to include any subfolders that your listed file path may contain
-
Virtual Host - You can set a URL for use with a Web browser to connect to the same File Path location using the Server Allowed. See the example in the image above.
See Also: