My Project Settings
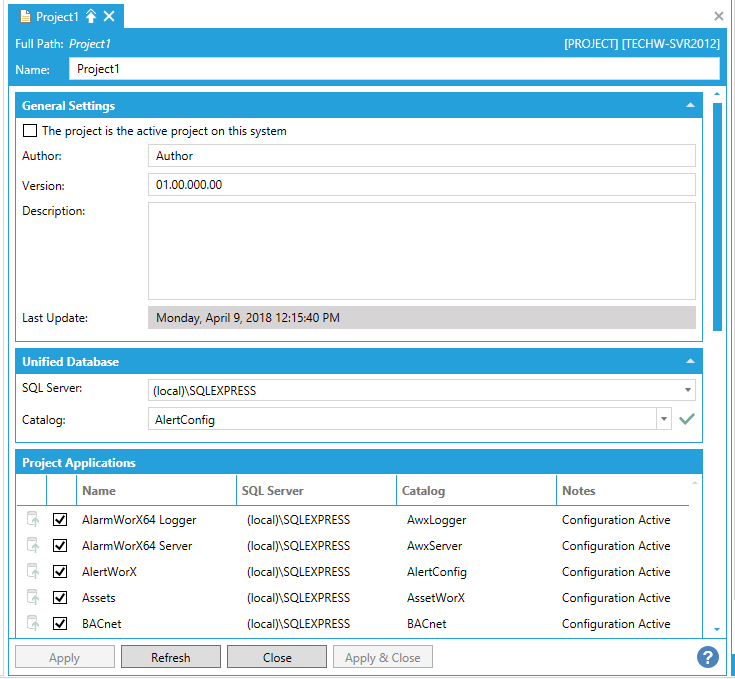
Double-clicking on a project within the Workbench's Project Explorer opens a properties window, as shown below.
My Project Settings
-
Project Name - You can change the name of the project via the text entry field here.
General Settings
-
The project is the active project on this system -This may be automatically checked if you are editing the initial default project. As you create additional projects, you can use this checkbox to designate the active project on a specific system.
-
Author - Enter an author for the project in the text entry field here.
-
Version - Enter a project version number in the text entry field here. Version numbers can help differentiate projects.
-
Description - Describe the project using the text entry field here.
-
Last Update - Provides the day, date and time of the last edit to the project settings. This is pre-filled and cannot be edited directly.
Unified Database
This section allows you to set an optional Unified Database for centralized configuration settings rather than spread within multiple separate component (provider) databases. Using a Unified Database is not mandatory, but is a provided options for users who wish to use this feature. If you wish to continue with your project settings "as is", you do not need to make any further changes to this section.
-
SQL Server - Use the pulldown menu to select from any currently installed version of SQL Server.
-
Catalog - Use the pulldown menu to select the provider database (catalog) to use as the unified database. You can click on the
 button in order to apply your recently made changes to the settings to all applications.
You will see any changes made in this section reflected in the Catalog column in the Project Applications section below.
Project Applications
This section allows you to update settings for specific providers within the Workbench.
-
A checked checkbox
 signifies that the provider will appear in the Project Explorer for the currently selected project.
-
Clicking in the SQL Server column, next to your intended provider, allows you to select the SQL Server, via pulldown menu, where that provider's database is located.
-
Clicking in the Catalog column, next to your intended provider, allows you to select the database (located in the previously selected SQL Server) associated with that provider.
-
The Notes field will provide information regarding the provider, including configuration status or any error associated with its inclusion in the project.
Click Apply to save your settings. Any change in these settings will then occur in the Project Explorer.
See Also: