Publishing Options Dialog Box
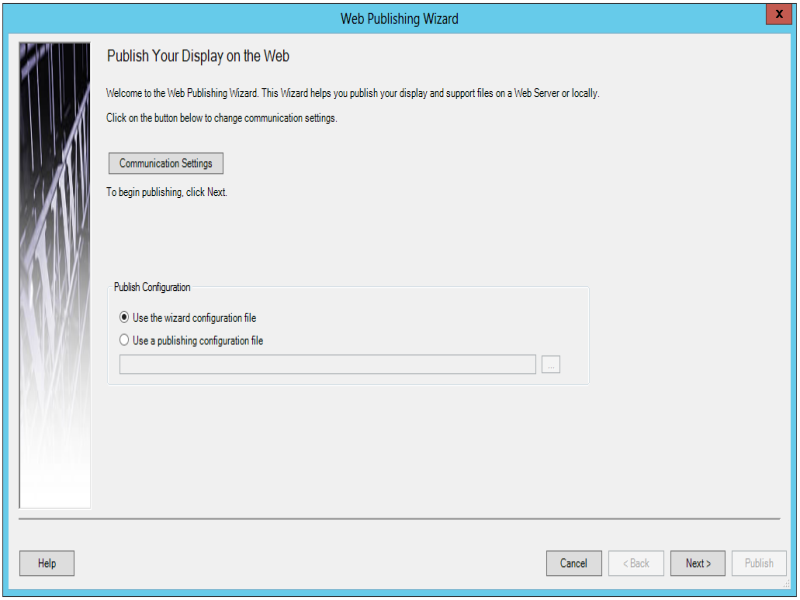
The Web Publishing Wizard contains options for publishing display files. This topic describes the options to supplement the discussion in Publishing Display Files to a Web Server. To view these options, click the Communication Settings button in the first step of the Web Publishing Wizard dialog, as shown in the figure below.
Web Publishing Wizard Step 1
Publishing Preferences
The Publishing Preferences tab of the Publishing Options dialog box is shown in the figure below.
Publishing Preferences Tab
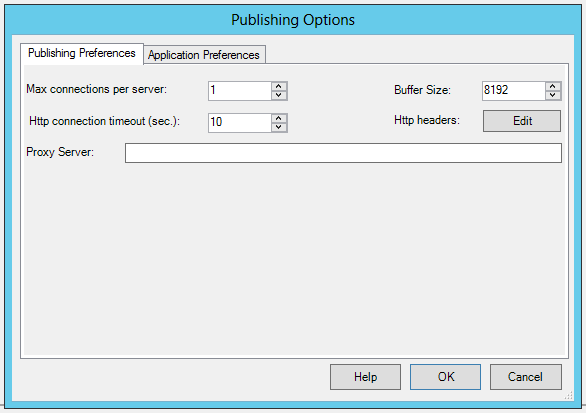
On the Publishing Preference tab you can set the following Web publishing properties :
- Max Connections per server: Specifies the maximum number of files to publish.
- HTTP connection timeout (sec): Specifies the amount of time (in seconds) to wait for the Web server to respond.
- Proxy Server: Specifies the gateway between the local machine and the target Web server where the display will be published. Where a high level of security is required, a proxy server may be used as a "mediator node" to provide a gateway between a local area network (LAN) and the Web server. The LAN is protected by a firewall on the proxy server. All outgoing HTTP requests from a client computer on the LAN must pass through the proxy server, and similarly all information downloaded from the Web server comes back through the proxy server and is then relayed back to the client.
- Buffer Size: The publishing process breaks each file into smaller chunks of data. The Buffer Size represents the size of these data chunks. You will need to modify the default value only if the destination Web server or the underlying network imposes restrictions on the size of the data packets. The default value for this field is 8192.
- HTTP headers: When a Web server sends HTML to a client browser, the server also sends other program information that is not displayed. One of these objects is called the HTTP header, which can contain information about the content that is being delivered to the browser. The header can be programmed by configuring the server or by a programming language such as ASP. Clicking the Edit button opens the HTTP Headers Editor dialog box, shown in the figure below, which enables you to specify the Names and Values for HTTP headers in the published display.
The HTTP Headers Editor

Application Preferences
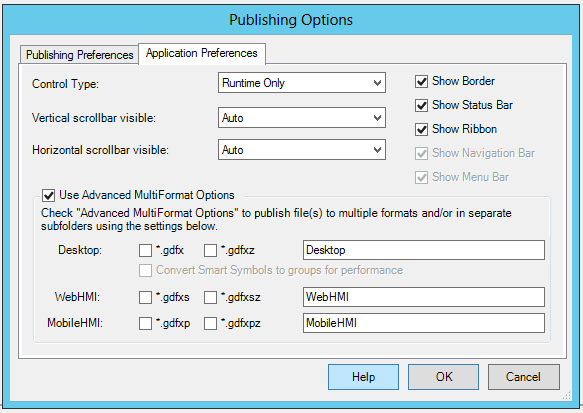
The Application Preferences tab of the Publishing Options dialog box, shown in the figure below, enables you to specify which features will be available in the published display file.
Application Preferences Tab
A display that is published to a Web server can be configured by a user who downloads the display from a remote client machine.
- The Control Type dropdown list allows you to determine the level of configuration in the published display file that will be available to client-side users. Choose one of the following options from the drop-down list:
- Runtime Only: The published display can be viewed only in Runtime mode. Users may not configure the display.
- Configuration: The published display can be viewed in either runtime mode or configuration mode, and all configuration tools are available. A Configuration Control Type disables all options in the dialog box above.
When Runtime Only is selected from the Control Type drop-down list, the Vertical scrollbar visible and Horizontal scrollbar visible dropdown menus are enabled. Options for each include:
- Disabled: No scrollbar is used in the published display.
- Auto: A scrollbar appears in the published display, as needed when the display is re-sized.
- Hidden: A scrollbar is included in the published display, but is initially hidden.
- Visible: A scroll bar always appears in the published display.
When Runtime Only is selected from the Control Type drop-down list, the following options are also enabled.
- Show Border: Click this checkbox to ensure that the border is used in the published display.
- Show Status Bar: Click this checkbox to ensure that the status bar is used in the published display.
- Show Ribbon: Click this checkbox to ensure that the ribbon is used in the published display. If Show Ribbon is deselected, the Show Navigation Bar and Show Menu Bar options are enabled.
- Use Advanced Multiformat Options - Click this checkbox to publish files to multiple format and/or in separate subfolders.
Once this box is checked, you have the option to save the following file types:
Desktop - Publish files in .gdfx or .gdfxz formats. Use the text entry field to name the folder location for these file types. If you select either of these formats, you can also choose to Convert Smart Symbols to groups for performance. When checked, any Smart Aymbols associated with the published displays in desktop format (gdfx, gdfxz) are converted to normal objects during the publishing process. The Smart Symbol conversion is only possible with displays in the desktop (GDFX and GDFXZ) formats.
WebHMI - Publish files in .gdfxs or .gdfxsz formats. Use the text entry field to name the folder location for these file types.
MobileHMI - Publish files in .gdfxp or .gdfxpz formats. Use the text entry field to name the folder location for these file types.
Once you have completed your changes to the Publishing Options, click onOKto return to the main Web Publishing Wizard dialog.
See also:
Publishing Display Files to a Web Server