Animating an Object Over a Path
Using a location dynamic is the key to animating an object over a path of that you define. The location dynamic is easy to create and control, and it offers a great deal of flexibility. The Location Dynamic Properties topic explains how to use the location dynamic to create a slider that changes a value as it moves. In addition to creating instrumentation, a location dynamic can show:
-
An automobile moving along an assembly line
-
The location of a train in a rail system
-
Where the automated cleaning and sensing robot is located in a pipeline
-
Other applications where location or status can be represented by the progress along a path. In a 2D display, it is even possible to create locations in three dimensions using two different path assignments, one in the X-axis and the other in the Y-axis.
|
|
Warning. If you are working on a display that will be saved as a Silverlight display and deployed on clients running Silverlight, make sure your location dynamic does not have curved path. Curved paths are not saved in the Silverlight version of the display. For more information, refer to Silverlight Files in GENESIS64. |
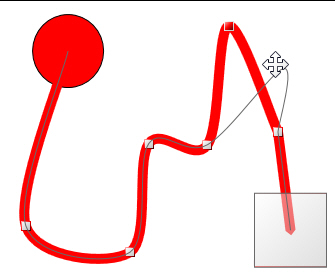
As an example of animation along a 2D path the following is done:
-
Click the
 Ellipse (Oval) button
 in the Shapes section of the 2D Home ribbon, hold the Shift key, click and drag a circle; set the fill property to red.
 -
Select the red circle, then click the
Location button , either on the Dynamics ribbon or the Dynamics tab's toolbar
 , to add a path.
 -
To create an additional node in the path double click the path and drag the
red selection handle where you want the node to appear. If you make a mistake, with the node point selected press the Delete button. -
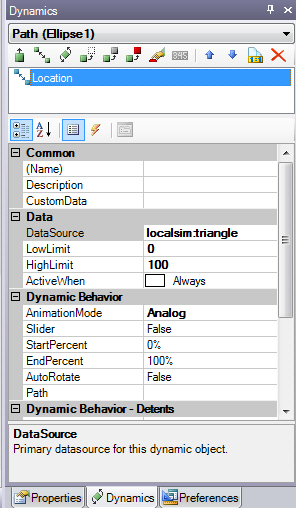
Set the
Location dynamic properties so that: DataSource is localsim:triangle; LowLimit is 0; HighLimit is 100; ActiveWhen is Always; and Animation mode is Analog. The localsim:triangle is a rampup/ -
Click the
Runtime button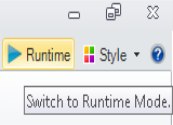 to see the animation along the path.
|
|
Tip: Alternatively, you can use a 2D pipe control to create a pipe along which the object is to move. For instructions, refer to the Pipe Control topic. |
In a 2D display, see:
Location Dynamic Properties for 2D
Creating a Slider using the Location and Size Dynamics
Using a 2D Pipe Control as the Path for a Moving Object
In a 3D viewport, see: