Creating a Reverse FrameWorX Connection
A reverse FrameWorX connection must be configured on both the source server (the one providing data) and the receiving server (the one reading the data).
To create a reverse connection:
 On the source server, perform the following steps:
-
Open Workbench and in Project Explorer, expand your project > Servers and Redundancy, and double-click Server Connections.
-
In the Connections panel, select Click here to add new item.
-
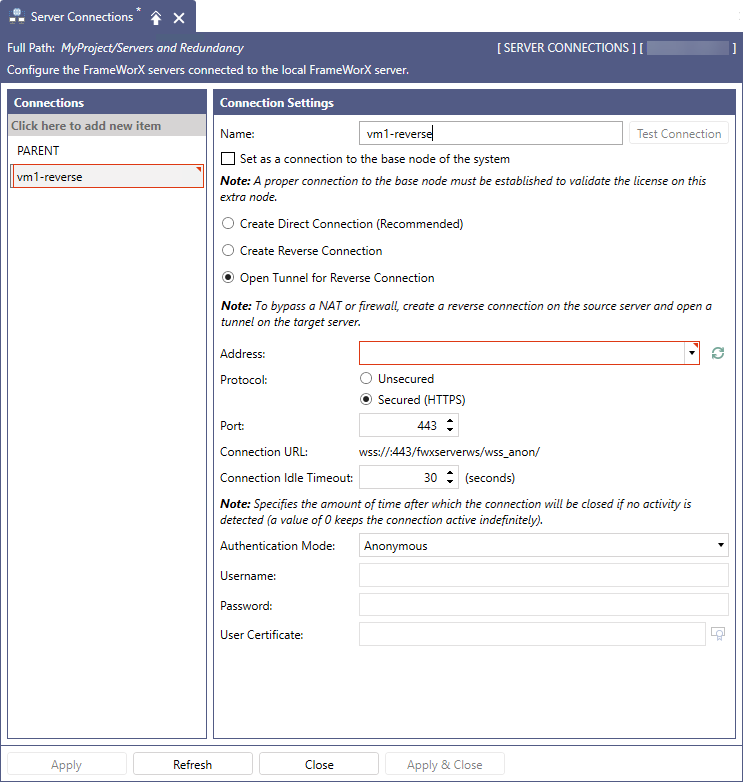
In the Connection Settings form, enter the name of the connection and select Open Tunnel for Reverse Connection.
-
Configure the required settings as follows.
-
In Address, enter the IP address, computer name, or DNS name of the receiving server.
-
In Protocol, select the preferred option. We recommend selecting the Secured (HTTPS) connection, which requires a valid certificate on the receiving server.
-
In Port, enter the desired port number. If you change the default port number, take note of the address in Connection URL.
-
In Authentication Mode, select one of the following options.
-
Anonymous: There is no user support, or no user should be logged in. Use mainly for testing purposes with GENESIS Security on the receiving server inactive or in testing mode. If the Security is active, an Anonymous user gets the rights of the default group.
-
Integrated Windows Authentication: The connection is authenticated by a Windows user credentials. Both the source and the target servers must be in the same Active Directory domain.
-
Username and Password: Only available for secured (HTTPS) protocol. The connection is authenticated by credentials of a GENESIS Security user (the Security must be active). Use when the source and the target servers are in different Active Directory domains.
-
Certificate: Only available for secured (HTTPS) protocol. The connection is authenticated by a user (client) certificate.
The client certificate is different from the server certificate used for communication encryption. This certificate identifies the actual user.
-
-
If you have selected an authentication mode for a secured connection, enter the required credentials.
-
For the Username and Password mode, enter the credentials of a user existing in the GENESIS Security database on the receiving server.
-
For the Certificate mode, click
 next to the User Certificate field to select the desired certificate, or enter it manually in the text box. You can use any certificate that has a private key.
-
-
-
When finished, click Test Connection next to the Name field.
-
When creating a secure (HTTPS) connection, the server certificate will initially be rejected. This is expected, since an administrator's approval is required to establish the connection. In the warning message, click Yes to confirm that the certificate should be trusted.
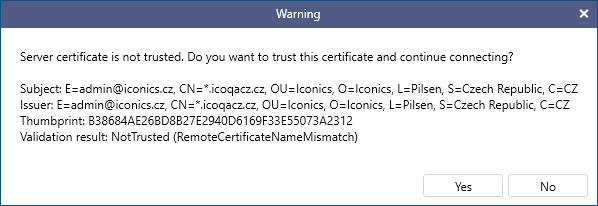
When you get the Success message, click OK to close it, and then click Apply & Close.
-
When a certificate is used for authentication, it also gets initially rejected, and you must manually move it to the trusted store on the receiving server. See step 6 of the receiving server configuration below.
On the receiving server, perform the following steps:
-
Open Workbench and in Project Explorer, expand your project > Servers and Redundancy and double-click Server Connections.
-
In the Connections panel, select Click here to add new item.
-
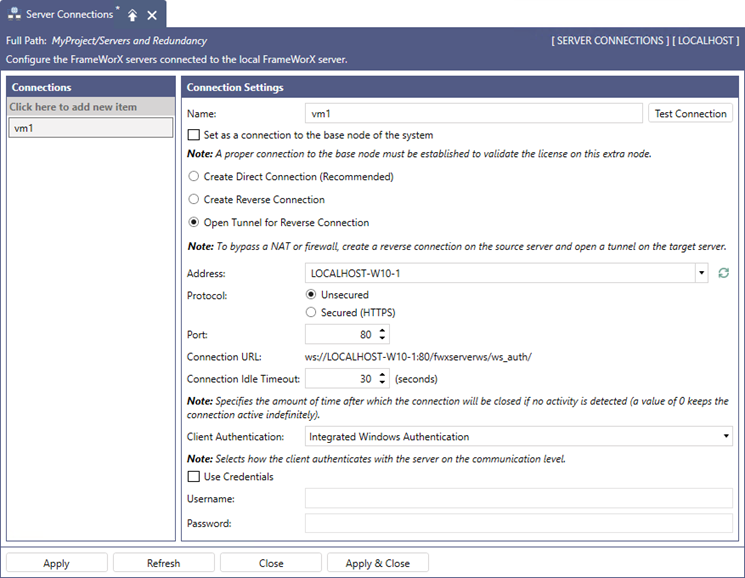
In the Connection Settings form, enter the name of the connection and select Create Reverse Connection.
-
Configure the required settings as follows.
-
In Computer Name, enter the computer name of the source server.
-
In Authentication Mode, select one of the following options.
-
Anonymous: There is no user support, or no user should be logged in. Use for testing; not recommended for use in production.
-
Username and Password: The connection is authenticated by GENESIS Security user credentials.
Integrated Windows Authentication and Certificate are not supported modes for a reverse connection.
-
-
For the Username and Password mode, enter the credentials of a user configured in GENESIS Security on the source server. The Security must be active.
-
-
When finished, click Apply, and then click Test Connection next to the Name field. If the connection has been successfully established on the source server, you should get a success message.
-
In you have used a certificate for authentication in the source server settings, open the authentication certificate store in C:\ProgramData\ICONICS\11\pki\auth and move the certificate from the rejected folder to the trusted folder.
-
If you change the port number in the source server configuration, edit C:\ProgramData\ICONICS\11\Servers\FwxServer.config.json as follows:
-
Find the WebSocketEndpoint line that matches your connection URL from the source server configuration. For example, if the connection URL is wss://:7443/fwxserverws/wss_anon/, find the line that contains https://+/fwxserverws/Wss_Anon/.
-
Update the address to include the custom port number. Using the port number 7443 from the example above, the new line looks like this:
<WebSocketEndpoint Address="https://+:7443/fwxserverws/Wss_Anon/" AuthenticationSchemes="Anonymous" /> -
Save the file and restart the FrameWorX Server.
-
Changes to the credentials used in a tunneled connection require a restart of the FrameWorX server to take effect.