Connecting to the Mitsubishi Electric FA
These instructions provide an alternative option, allowing you to directly connect GENESIS to a MELSEC PLC, bypassing the OPC UA server. This is not meant as a comprehensive introduction to the Mitsubishi Electric FA connector, but rather as a brief overview of another method of connectivity. The Start-Up Guide assumes you will be using the OPC UA Server simulation procedure.
To connect to the MELSEC PLC:
- Open Workbench.
-
In the Project Explorer, expand Data Connectivity, right-click Mitsubishi Electric FA and then select Network Discovery.
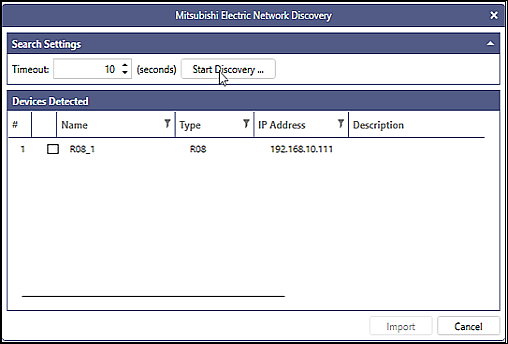
- Click Start Discovery to search the network for available devices.
- In the list of Mitsubishi devices, enable the desired device, including MELSEC PLC, FREQROL Inverter, MELFA Robot, and GOT, and then click Import to add the device.
-
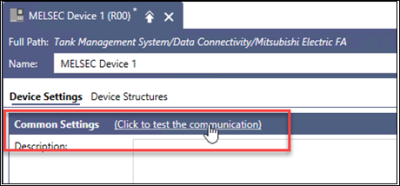
Double-click the MELSEC device to open the Device Settings pane.
-
In the Common Settings section, select Click to test the communication, and then click OK to close the message stating that the communication test succeeded.
If the communication test fails, see Troubleshooting for Mitsubishi Electric FA. -
Right-click the MELSEC device again and select Add Tag Group to add tag properties.
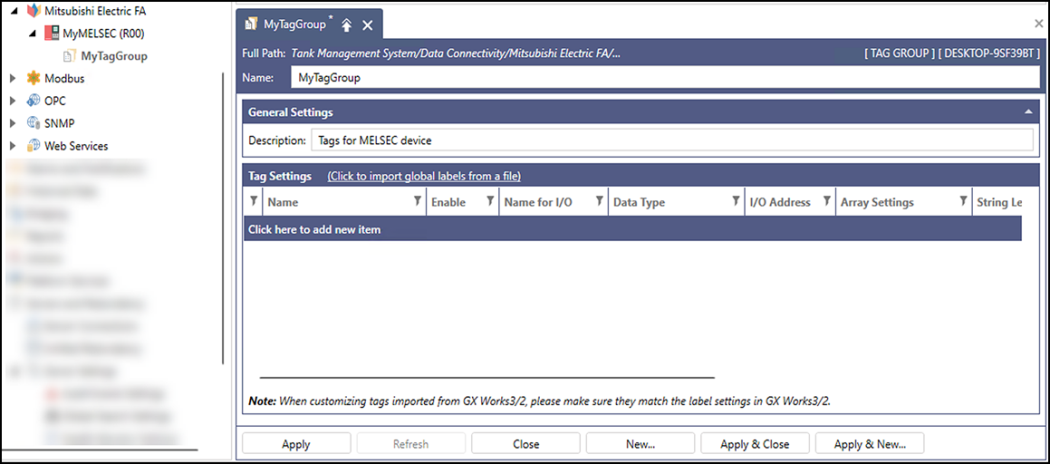
Set the following parameters.
- Name: Enter a name for your tag group (for example, enter MyTagGroup).
- Description: Enter a unique description for the tag group to differentiate it from other tag groups, and then click Apply.
- In the Tag Settings section, select Click here to add new item.
- Complete the following fields, and then click Apply & Close.
In this field...
Do this...
Name
Enter the tag name.
Enable
Select the checkbox to enable the tag.
Name for I/O
Select the checkbox to use the tag name as the I/O address.
I/O Address
Enter the unique numeric identifier to communicate with the peripheral device.
For additional tag settings or configuring other Mitsubishi Electric devices, see Adding Tag Groups.