Configuring Data Historian Collector Redundancy
Data Historian contains a default collector that you can see in the pre-configured Data Historian Collectors redundancy box. It copies the Data Historian Logger setting; if the logger connection is redundant, the default collector becomes redundant as well, using the same secondary node.
You can create multiple Data Historian collectors and make each of them redundant. You can do that in Historical Data > Data Historian > Collectors or directly in Servers and Redundancy > Unified Redundancy.
If the Data Historian logger is redundant, the Primary and Secondary node is automatically added to the Data Historian Collectors redundancy box for each new collector. However, you still need to configure the redundancy.
To configure a redundant Data Historian collector in Unified Redundancy:
-
Open Workbench and in Project Explorer, expand your project > Servers and Redundancy > Unified Redundancy and in the Unified Redundancy Graph panel, locate the Data Historian Collectors redundancy box.
-
In the Data Historian Collectors box heading, click
 to add a new collector, and then click the new item to open the configuration dialog in the right panel.
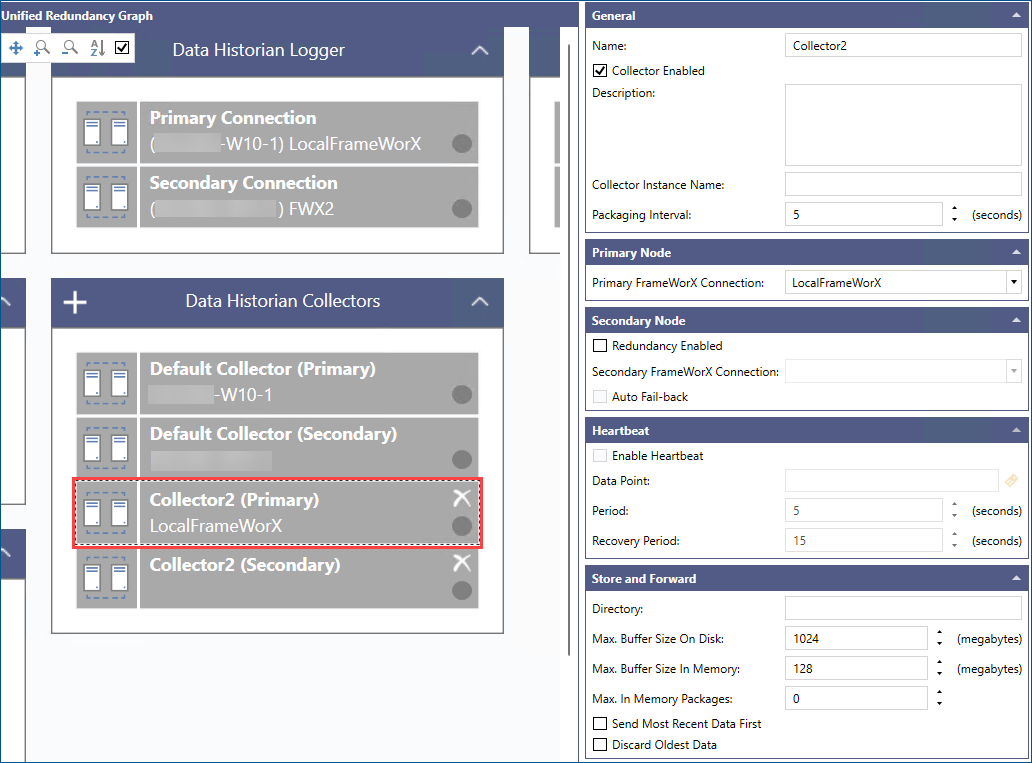
-
In the General section, enter the collector's name.
-
In the Primary Node section, select or enter Primary FrameWorX Connection.
-
In the Secondary Node, select Redundancy Enabled, and then select or enter Secondary FrameWorX Connection.
-
Select Auto Fail-back to switch over to the primary connection as soon as it is available.
-
(Optional) In the Heartbeat section, select Enable Heartbeat to use heartbeat for monitoring the availability of the connection, and then configure the settings.
-
Click
 next to the Data Point text box to select the data point that will be used as the heartbeat.
 -
In Period, specify the time period for receiving the heartbeat (for example, every 5 seconds).
-
In Recovery Period, specify how long after receiving no heartbeat from the active server the connection switches over, and the server is considered offline.
-
-
In the Store and Forward section, configure the remaining settings, and then click Apply.