Installing the WebHMI Helm Chart Using the Command Line
After successfully installing the K3s Kubernetes cluster, you can use Helm to deploy WebHMI. Before installing the WebHMI Helm chart, it is recommended to create the Docker Hub and TLS secrets for secure access. Learn more
To install the WebHMI Helm chart using the command line:
-
Add the Helm repository:
helm repo add ico https://download.iconics.com/helm-charts/ helm repo update -
Create a values.yaml file to configure the deployment of WebHMI. You can place it anywhere on your system. This example shows a minimum configuration.
# values.yaml # Not necessary for a public image. Uncomment the following line if needed. # imagePullSecret: dockerhub-secret frameworx: servers: - genesis-vm # Change to the DNS name of the Genesis machine replicaCount: 3 logging: level: notice # Possible values: all, debug, info, notice, warning, error, fatal ingress: host: webhmi.example.com # Change to the DNS name of the cluster useHttps: true tlsSecretName: webhmi-tls metallb: enabled: true address: 1.2.3.4 # Change to the IP of the cluster # CoreDNS will be installed if 'coredns.enabled' is set to 'true'. # If CoreDNS is already installed in your cluster, set this to 'false' or remove this section. coredns: enabled: trueUpdate the following values in the example according to your setup:
-
dockerhub-secret : Docker Hub secret name, if used.
-
genesis-vm : Hostname of the GENESIS machine.
-
replicaCount : Number of WebHMI pods. You can leave 3 for the first deployment and increase the number later.
-
webhmi.example.com : Hostname of your Kubernetes cluster.
-
webhmi-tls : TLS secret name.
-
1.2.3.4 : Unused IP address that MetalLB assigns to a live node.
-
coredns : If you installed K3s using the steps in Installation of the Kubernetes Cluster) , CoreDNS is currently disabled by the --disable coredns flag during setup. In this case, keep coredns.enabled: true to install CoreDNS now. If your Kubernetes distribution already includes CoreDNS, set this to false . Run
kubectl get deployment -Ato check.
-
-
In the directory with the values.yaml file, execute the following command:
helm upgrade -i ico ico/webhmi -f values.yamlDescription:
-
helm upgrade -i : This command installs the chart if a release with the given name does not exist. If it exists, it is upgraded.
-
ico : This is the Helm release name. You can choose any unique, descriptive name for your deployment.
-
ico/webhmi : This is the chart reference, where ico is the name of the Helm repository that you added in step 1, and webhmi is the name of the chart within that repository.
-
-f values.yaml : This flag specifies your custom values.yaml file that contains the configuration settings for the deployment.
-
-
Verify the status of the Helm releases:
helm status icoThe status should show as deployed.
-
Verify that the pods are starting up:
kubectl get podsYou should see the following:
-
WebHMI pods (
ico-webhmi-...) -
HAProxy ingress controller pods (
ico-ingress-haproxy-...) -
MetalLB pods (
ico-metallb-...), if enabled -
CoreDNS pods (
ico-coredns-...), if enabled
-
-
Open a web browser and enter the URL containing the Kubernetes ingress hostname—for example, https://webhmi.example.com.
-
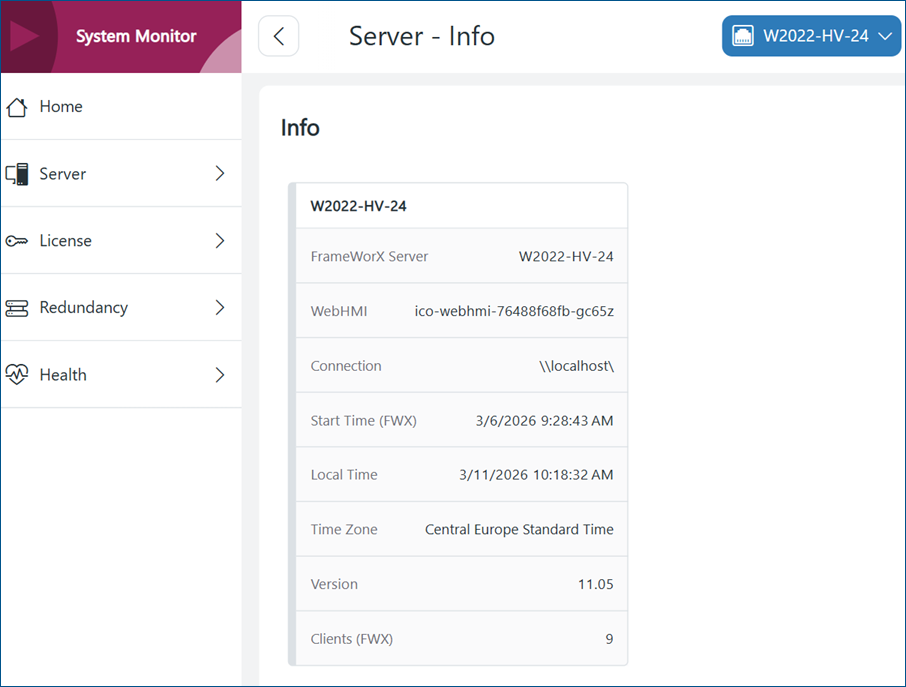
On the welcome page, click System Monitor to open the System Monitor display, and then click Server/Info to view general information about the server. The WebHMI row displays the name of the WebHMI pod to which you are connected.