Using Global Aliases with Smart Symbols
Global aliases enable you to create placeholders or aliases for data points. These aliases can be referenced throughout your project, making it easier to manage and update data connections without the need to manually change each instance where the data point is used.
In this section, you will use global aliasing to reuse objects in the displays for all three tanks. You could create three different displays, one for each tank (Tank 01, Tank 02, and Tank 03), or you could create one display with the three tanks on it, copying the work you have done for Tank 01 and updating the settings for Tank 02 and Tank 03.
To simplify the naming for different tanks, you can create an alias for the changing part of the name. For example, objects associated with Tank 01 could be named assets: TNK_01, PMP_01_IN, VLV_01_IN, PMP_01_OUT, and VLV_01_OUT. The only distinction between Tank 01 and Tank 02 is the number, so we can use that as the alias for both tanks.
For each object in the display, you must replace the Tank 01 currently written into every reference with the alias <#SelectedTank#>.
To add aliases to all named assets:
- Click and update the data source for each object on the canvas, replacing each 01 with <#SelectedTank#>.
- Temperature process point: In the Dynamics panel, update Data > DataSource.
- All Pump and Valve buttons: In the Dynamics panel, update Data > DataSource for the Color action and the Pick action.
- DepthDataSource group: In the Properties panel, update Smart Properties > DepthDataSource.
For example, In the Temperature process point, change Data > DataSource from ac:TFMS/TNK/TNK_01/TEMP to ac:TFMS/TNK/TNK_<#SelectedTank#>/TEMP.
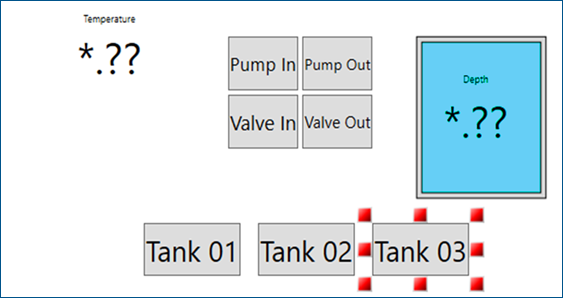
To add a Tank 01 control button:
Beneath the control process points and controls, you can add the Tank 01 control button, which displays all process points and enables all Pump and Valve buttons for Tank 01.
- On the Dynamics ribbon, click
 .
. -
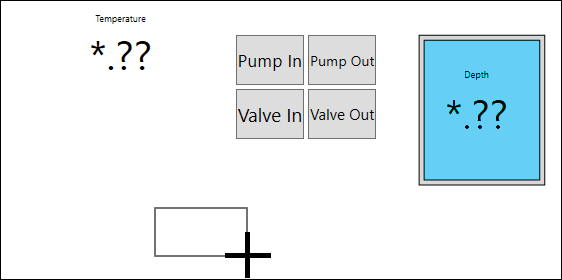
On the canvas, do the following:
-
Click and drag to add and size the button beneath the control process points and controls.
-
Double-click the new button and enter Tank 01.
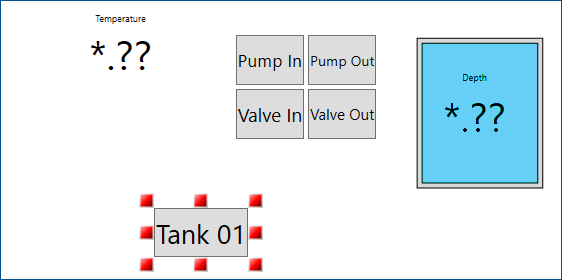
-
-
In the Dynamics panel, do the following:
- In Dynamic Behavior > Command, select Load Display.
-
Expand the drop-down list and select Local Commands > Set Global Aliases.
Make sure to select Set Global Aliases under Local Commands, and not under Global Commands. - In Dynamic Behavior > CommandParameters > GlobalAliases, enter #SelectedTank=01;.
-
Locate the predefined dynamic actions section and select
 to add the Color action.
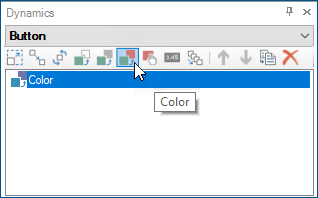
- In Data > DataSource, enter <#SelectedTank#>.
- In Data > ActiveWhen, select data != 0, expand the drop-down list, and select data == low.
- In Data > LowLimit, enter 01.
- In Dynamic Behavior > TargetPropertyName, select Foreground, expand the drop-down list, and select Background.
- In Dynamic Behavior > EndColor, click the ellipsis, select a blue color from the Solid Color tab, and click OK.
To add a Tank 02 control button:
To the right of the Tank 01 button, you can add the Tank 02 control button, which will display all process points and enable all Pump and Valve buttons for Tank 02.
- On the canvas, click the Tank 01 button.
- Using your keyboard, press Ctrl+D to duplicate the button, and then do the following:
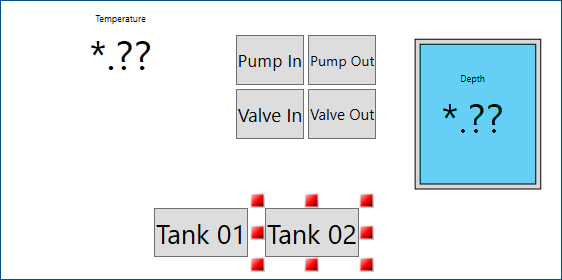
- Click and drag the duplicated button to the right of the Tank 01 button.
- Double-click the duplicated button and enter Tank 02.
-
In the Dynamics panel, do the following:
- In Data > LowLimit, enter 02.
- In the predefined dynamic actions section, click the existing Pick action.
- In Dynamic Behavior > CommandParameters > GlobalAliases, enter #SelectedTank=02;.
To add a Tank 03 control button:
To the right of the Tank 02 button, you can add the Tank 03 control button, which will display all process points and enable all Pump and Valve buttons for Tank 03.
- On the canvas, click the Tank 02 button.
-
Using your keyboard, press Ctrl+D to duplicate the button, and then do the following:
- Click and drag the duplicated button to the right of the Tank 02 button.
- Double-click the duplicated button and enter Tank 03.
-
In the Dynamics panel, do the following:
- In Data > LowLimit, enter 03.
- In the predefined dynamic actions section, click the existing Pick action.
- In Dynamic Behavior > CommandParameters > GlobalAliases, enter #SelectedTank=03;.
-
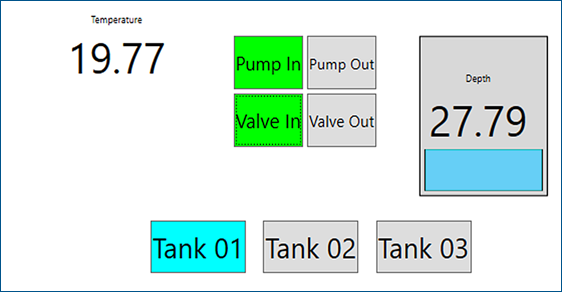
To view the values and the animated graphic for all three tanks, click Runtime in the upper right corner, and then do the following:
-
Press the Tank 01 button, and activate and deactivate the Pump In and Valve In buttons and the Pump Out and Valve Out buttons.
-
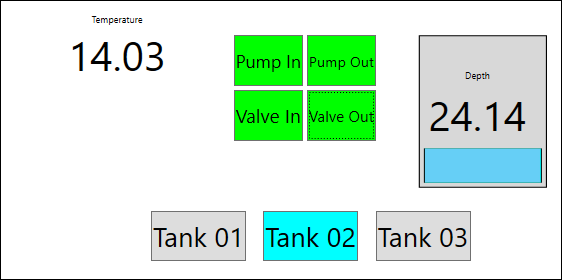
Press the Tank 02 button, and activate and deactivate the Pump In and Valve In buttons and the Pump Out and Valve Out buttons.
-
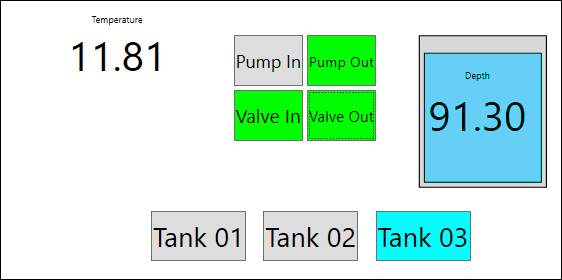
Press the Tank 03 button, and activate and deactivate the Pump In and Valve In buttons and the Pump Out and Valve Out buttons.
-
-
When finished, click Configure in the upper right corner to return to the configuration mode.
- In the toolbar, click File > Save.