Converting Objects to Smart Symbols
When you create a smart symbol, you essentially take two or more objects, group them together, and convert the grouped object to a smart symbol. A smart symbol saves the group's dynamic properties that can be stored in the Symbols Library in GraphWorX for reuse.
To convert the Depth process point to a smart symbol:
 The Explorer panel shows all the objects listed in the order they were created on the canvas. You can move the order of items to the top or bottom of the pane.
-
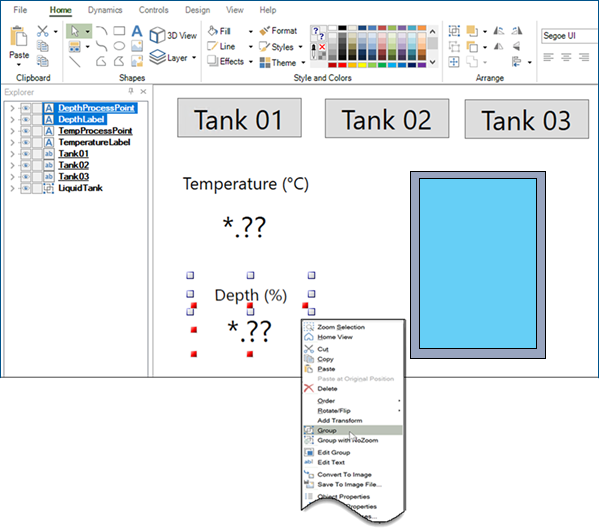
On the canvas, select the Depth process point, then press and hold the Shift key to select the Depth (%) label.
-
Drag the selected Depth label and process point to the center and middle of the smaller rectangle.
- Shift click to also select the smaller rectangle, so you now have selected the Depth label and process point and the smaller rectangle.
- Right-click the Depth process point and select Group, which converts the Depth label and process point and the smaller rectangle into a single object.
-
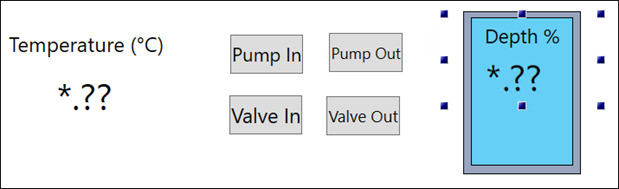
To convert the grouped object to a smart symbol, do the following:
- Right-click the grouped object and click Convert to Smart Symbol.
- In the Automatic Smart Binding Options prompt, click OK.
- In Name, enter DepthDataSource and click OK. By naming the group, you can configure properties to all parts within the DepthDataSource grouped object in one place.
In the Properties panel, examine the setting of Smart Properties > DepthDataSource. You have set the process point for all parts of the DepthDataSource grouped object to ac:TFMS/TNK/TNK_01/DEPT, so you can easily click the ellipsis and select a new process point for the Depth value and graphic.
-
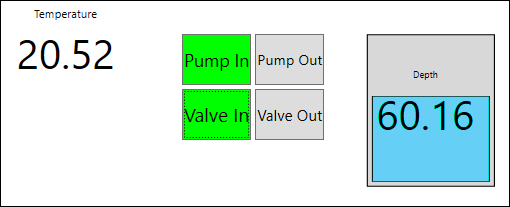
To view the values and the animated graphic, click Runtime in the upper right corner, and then do the following:
- Activate and deactivate the Pump In and Valve In buttons. When activated, the buttons turn green. You may notice a slight delay after turning on the pump and opening the valve, which is designed.
- Activate and deactivate the Pump Out and Valve Out buttons. When activated, the buttons turn green. You may notice a slight delay after turning on the pump and opening the valve, which is designed.
When finished, click Configure in the upper right corner to return to the configuration mode.
- In the toolbar, click File > Save.