Authenticating with OAuth 2.0 and Client Credentials Grant
This topic describes how to connect to a REST API that requires OAuth 2.0 authentication using the client credentials grant.
Before starting the configuration in GENESIS, you need to register the desired application on the REST API that you want to access. Learn more
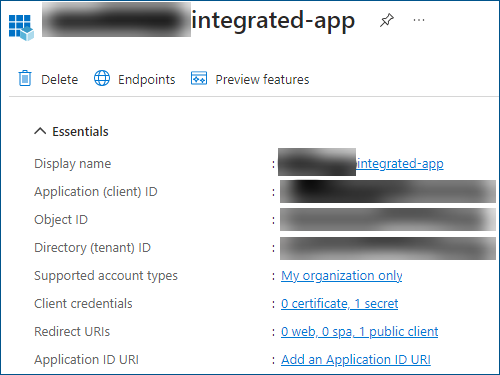
The following procedure uses the Microsoft Dataverse REST API as an example. To access Dataverse data, you have to create an app registration in Microsoft Entra ID. The following image shows the application page on Microsoft Azure.
To connect to a REST API using OAuth 2.0 with the client credentials grant:
-
Open Workbench and in Project Explorer, expand your project > Data Connectivity.
-
Right-click Web Services and select Create a new Folder. Give the folder a name and click Apply.
You can skip this step and use an existing folder, like the default Sample Web Services folder. -
In Project Explorer, right-click the desired folder and select Add REST Service. The REST service configuration dialog is displayed.
-
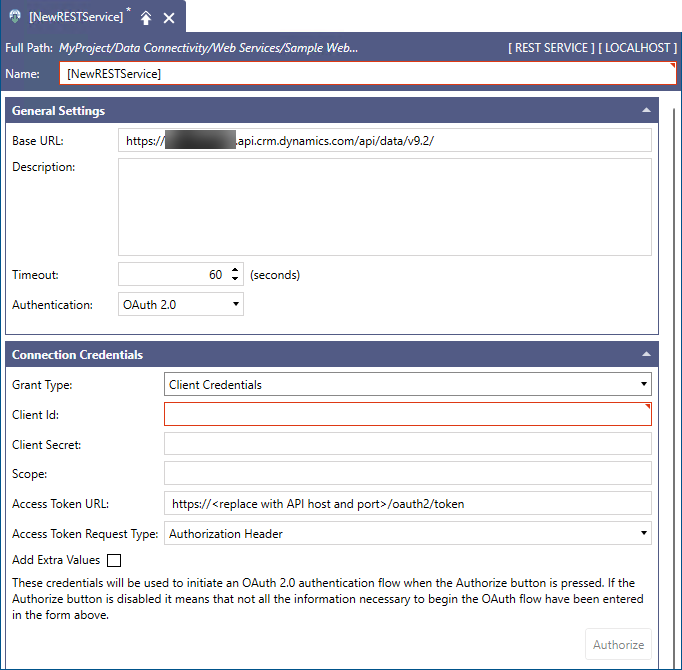
Give the service a name and in the General Settings section in Base URL, enter the URL for the desired REST API. This information is typically available in the API documentation.
-
In General Settings in Authentication, select OAuth 2.0.
-
In the Connection Credentials section in Grant Type, select Client Credentials. The authentication options for client credentials are displayed.
-
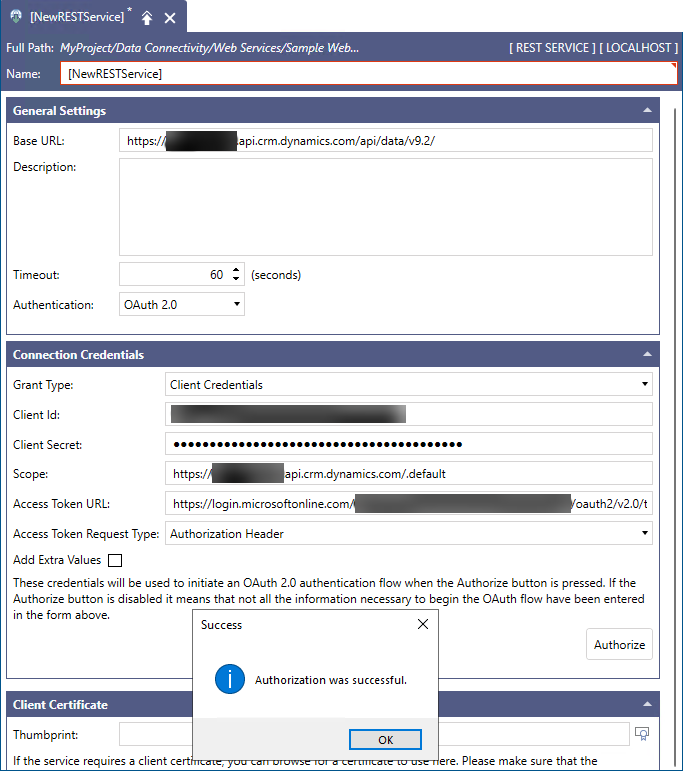
Configure the authentication options as needed. See the table for more information.
Authentication Option
Description
Client Id
The OAuth 2.0 Client ID that you received when you registered the application on the REST API.
Client Secret
The Client Secret code that you received when you registered the application on the REST API.
Scope
The desired scope of data that you want to access. You can typically enter multiple values separated by a space. This is an API-dependent parameter, and usually can be found in the API's documentation.
Access Token URL
The URL on the REST API that is used to obtain the access token. This URL is usually contained in the API's documentation.
Access Token Request Type
The way to pass the parameters to the REST API when requesting the access token. Select one of the following options.
- Authorization Header: all parameters are passed as HTTP header values
- POST Body: all parameters are passed in the request body as application/www-url-form-encoded values.
This setting is API-dependent. Most APIs work with either value, but you can try Post Body in case that Authorization Header does not work.Add Extra Values
When selected, it allows to add custom values to the request for the access token if the API requires them.
-
When finished, click Authorize to start the authentication process. If the information was entered correctly, a success message is displayed in Workbench.
If the REST API sends back a set of scopes allowed for the current credentials that is different from the requested scopes, GENESIS updates the Scope field with the values received from the REST API.