Verifying an OPC UA Connection in GraphWorX
When you establish a new OPC UA connection, you can verify its functionality with GraphWorX. You can add the selected OPC UA tag to a GraphWorX display and view its value in runtime.
To verify an OPC UA connection in GraphWorX:
- Open GraphWorX in the configuration mode (default).
-
On the Home ribbon in the Shapes section, click
 , and then draw a rectangle on the canvas to add a descriptive label.
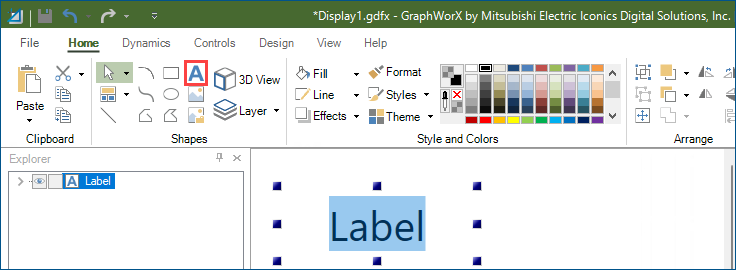
- Write the desired text inside the label box. For example, My OPC UA Tag.
- On the Dynamics ribbon, select Process Point, and then add the process point element next to the label.
-
In the right panel on the Dynamics tab, select DataSource and click
 to open Data Browser.
 -
Expand Data Connectivity > OPC UA > My OPC UA Connection > SYSTEM, select the desired tag (MyTag), and then click OK to confirm and close Data Browser.

The tag is added to the DataSource property field.
-
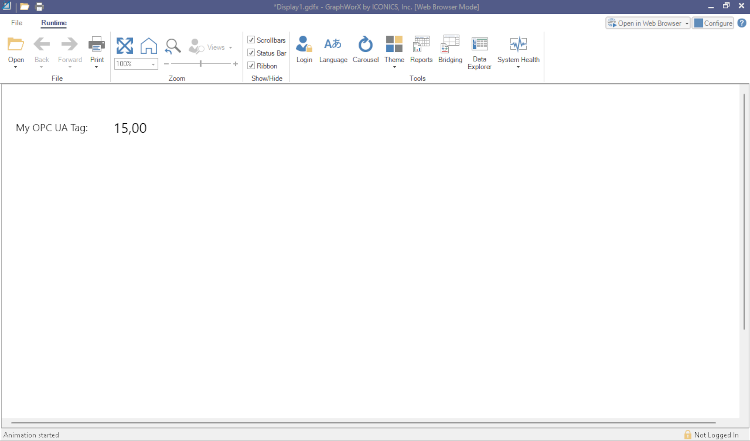
Use the options on the upper right of the GraphWorX screen to switch to the runtime mode
 or to open the display in a web browser
  . The runtime screen displays the current value for the OPC UA tag mapped in the previous steps.If the selected OPC UA tag is an enumerated property, GraphWorX can display the resolved enumeration name instead of the underlying numeric value.