Configuring OPC UA Server on Takebishi
For security reasons, OPC UA provides integration with a number of authentication mechanisms as described in OPC Introduction. Among the most usual setups, we have the X.509 certificates, either provided by a Certificate Authority (CA) (paid and emitted by an external entity) or self-signed (usually created locally for tests).
This section describes how to set up an OPC UA connection between GENESIS (through Workbench configuration) and Takebishi Device Explorer with self-signed certificates.
To set up the Takebishi Device Explorer as an OPC UA Server with self-signed certificates:
-
Open Takebishi Device Explorer.
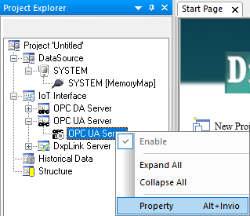
- In Project Explorer, expand your project > IoT Interface > OPC UA Server.
-
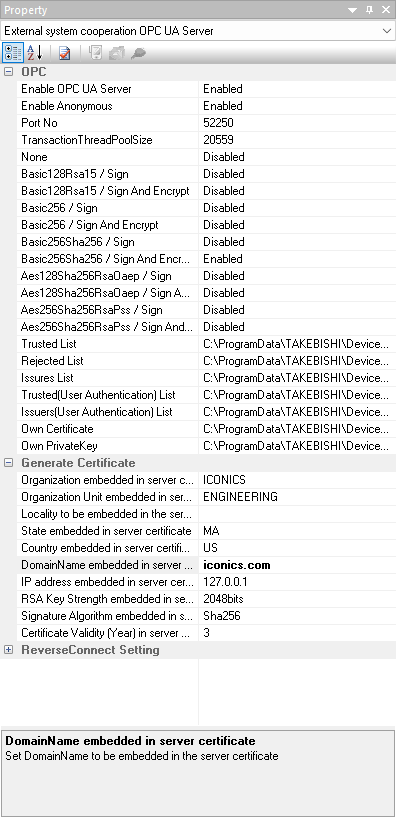
In the OPC UA Server node, right-click OPC UA Server and select Property.
-
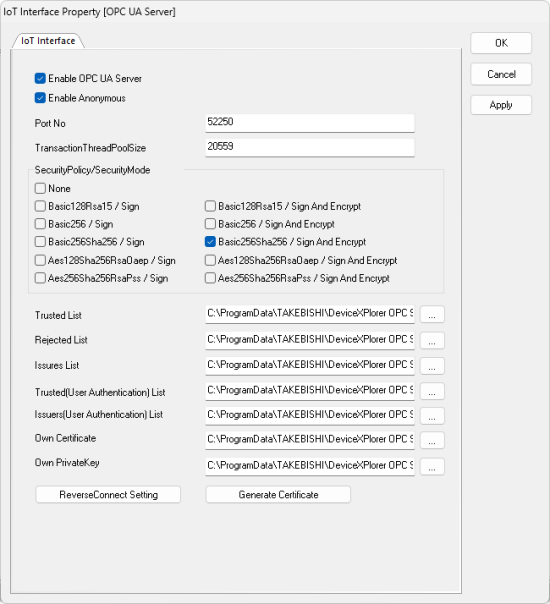
Select Enable OPC UA Server, Enable Anonymous, and Basic256Sha256 / Sign And Encrypt.
-
Click Generate Certificate and enter the desired data in the fields.
 Signature Algorithm must be Sha256,
and IP Address is 127.0.0.1 because we are running Takebishi Device Explorer in the same environment as GENESIS.
Signature Algorithm must be Sha256,
and IP Address is 127.0.0.1 because we are running Takebishi Device Explorer in the same environment as GENESIS.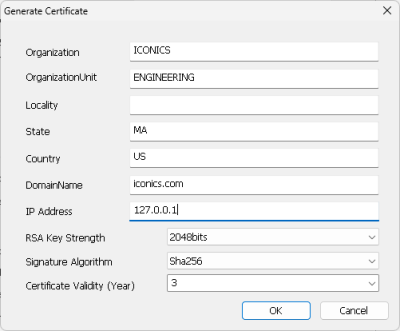
-
Click OK to close the Generate Certificate dialog, and then click OK in the IoT Interface Property [OPC UA Server] dialog.
-
Check the configurations in the Property panel on the right.
What's Next?