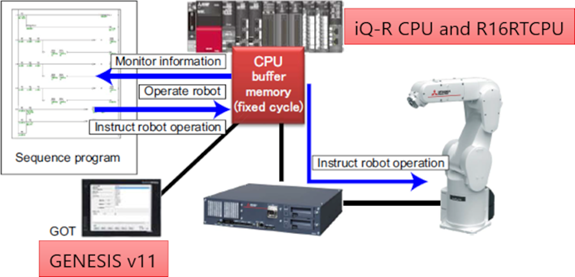
Connect to Robots via the iQ-R CPU+R16RT Robot CPU
The Workbench, in companion with Gx Works3 and RT Toolbox, provides the means to integrate Industrial Robots (MELFA) and Programmable Logic Controllers (MELSEC). This guide provides the instructions to configure an industrial robot and PLC with Gx Works3, RT Toolbox, and Workbench based on a typical scenario (demonstrated below) where industrial robots and PLCs interact with each other. It assumes your environment has an updated Windows with Gx Works3 and GENESIS installed.
Configure the Industrial Robot (MELFA) on RT Toolbox
-
Open RT Toolbox
-
Configure your industrial robot according to your needs and make sure the parameter IQMEM has the bit Use the CPU buffer memory extended function enabled.
If it is not enabled, please, turn on bit 0 of the parameter to 1 to enable it.
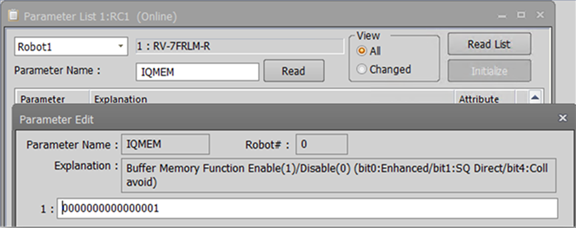
For more details, please refer to the official documentation iQ Platform Supporting Extended Function Instruction Manual, chapter "2.1.3 Set up Parameter for Selecting CPU buffer Memory Extended Function".
Configure the PLC (MELSEC) on Gx Works3
-
Open Gx Works3
-
Configure your PLC according to your needs
-
Check if theMonitor_current_and_aimed_positions parameter in Sequencer output data is enabled.
Reference
Procedure
3.1.1 Select Monitoring Items
Set the following bits in the sequencer output data, Function selection(Sequencer Addr: 512), to Valid(1).
-
bit2: Monitor operation control settings
-
bit3: Monitor activities
-
bit4: Monitor current and aimed positions
-
bit5: Monitor position and joint information
-
bit6: Monitor maintenance information
3.1.2 Select Target Mecha Set the sequencer output, Specify a mecha number(Sequencer Addr: 841), to 1. 3.2.4 Monitor Position and Joint Information Set the sequencer output, Joint data selection-1(Sequencer Addr: 851), to Current feedback(8). 3.2.4 Monitor Position and Joint Information Set the sequencer output, Joint data selection-2(Sequencer Addr: 852), to Axis load level(12). 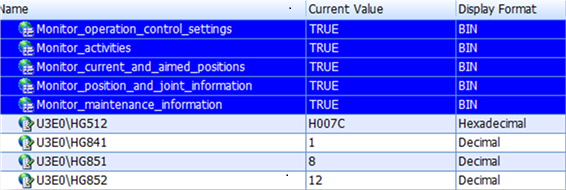
-
After having completed the steps described on RT Toolbox and on GX Works3, you are ready to setup industrial robots (MELFA) in the Workbench.
To manage and display robot information on GraphWorX, it is necessary to expose the robot configuration to Assets and publish it to GraphWorX or HTML5 as follows.
Configure the Industrial Robot (MELFA) on Workbench
-
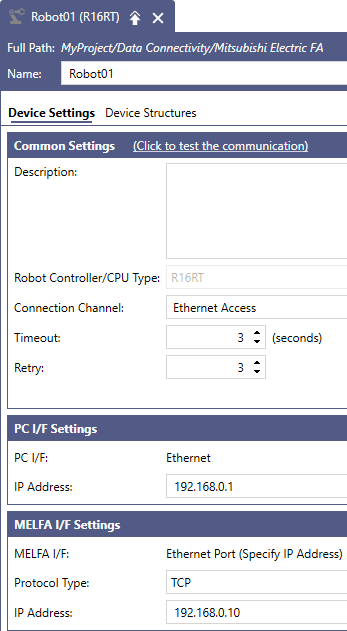
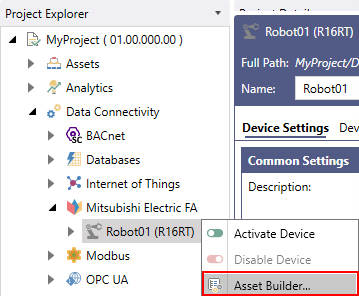
Right-click the robot name, in this example Robot01, and select Asset Builder.
-
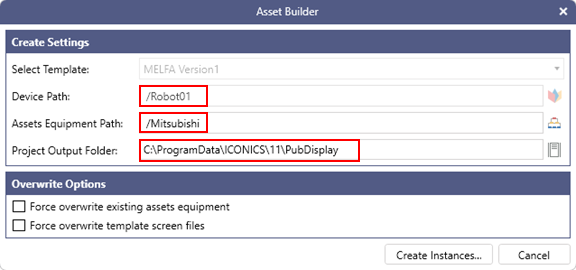
2. Fill the fields Device Path, Assets Equipment Path, Project Output Folder accordingly.
-
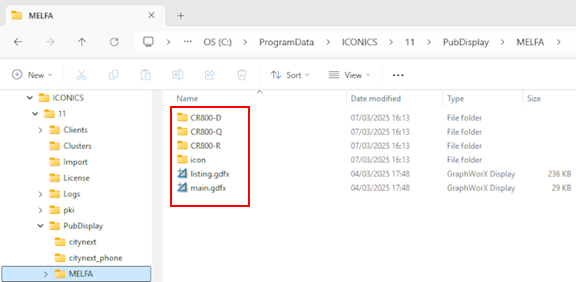
3. Check that a MELFA folder is created in the Project Output Folder (usually C:\ProgramData\ICONICS\11\PubDisplay)
Display robot details on GraphWorX
After the publication of MELFA files on GraphWorX or HTML5, a number of panels are available to check and interact with the robot:
Basic Information
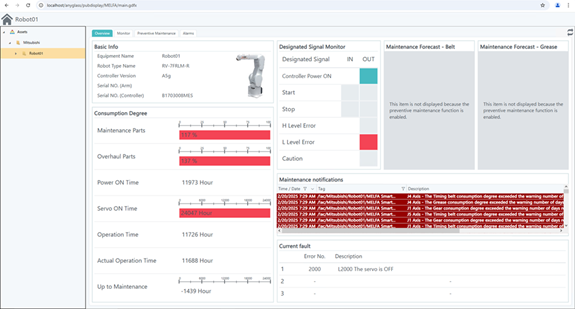
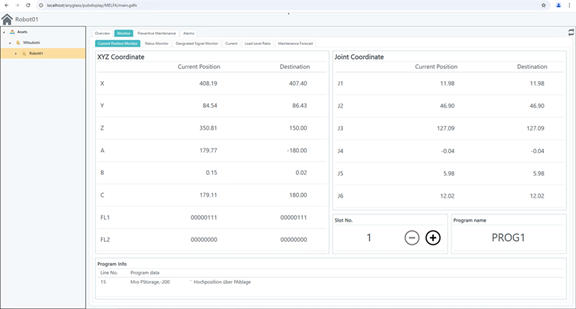
Monitor
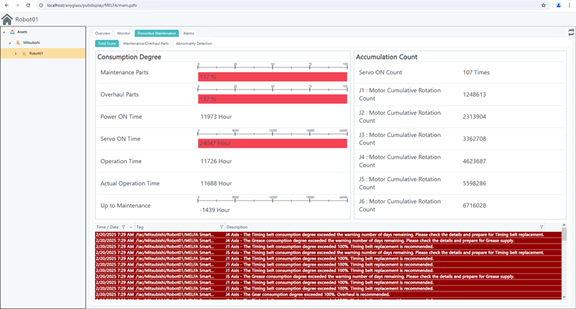
Consumption Office
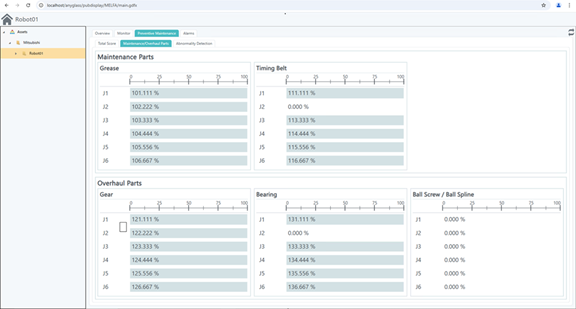
Maintenance / Overhaul Parts
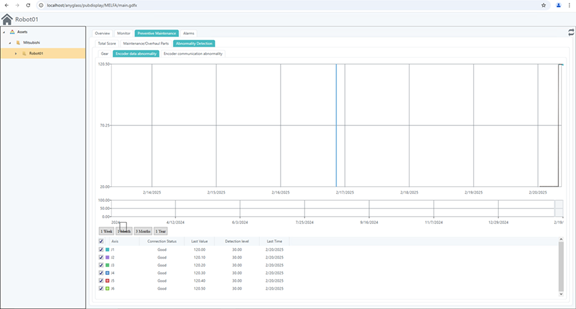
Abnormality Detection
Alarms

For more details, please refer to the CR800-R/CR800-Q series controller iQ Platform Supporting Extended Function Instruction Manual in Mitsubishi Electric FA Web page: