Setting Up the Device Time Synchronization
In the channel settings, you can configure the options for periodic synchronization of selected devices with either UTC time or local time. By default, the time synchronization uses the time zone of the local server. You can change that on the General tab in General Settings. Learn more
To set the periodic time synchronization:
- Open Workbench and in Project Explorer, expand your project > Data Connectivity > BACnet > Channels.
-
On the Time Synchronization tab in Time Synchronization Interval, set the synchronization period within the range of 1 - 65,535 minutes.
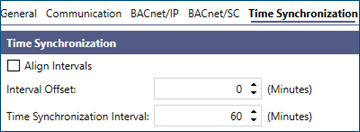 Setting the interval to 0 disables the feature so the devices are not synchronized.
 -
(Optional) Select Align Intervals to align the time synchronization to the top of an hour, or to the factor of an hour that is set as the Time Synchronization Interval.
Example: Time Synchronization Interval = 30 minutes, Align Intervals = TRUE. The settings were applied at 2.10 pm. The first synchronization will be initiated at 2.30, the next at 3.00, 3.30, and so on. If Align Intervals = FALSE, the first synchronization will start at 2.40, the next at 3.10.
-
(Optional) Select Interval Offset to postpone sending the time synchronization request by the difference between the values of the Time Synchronization Interval and the Interval Offset.
Example: Time Synchronization Interval = 60 minutes, Interval Offset = 65 minutes. The first synchronization request will be sent 5 minutes after the next full hour.
The Interval Offset only applies when Align Intervals is selected. -
Use the Recipients grid to add the devices (recipients) that will be synchronized by the local time, and the UTC Recipients grid to add the devices that will be synchronized by UTC time. Do one of the following, and then click Apply.
-
Add multiple recipients from the list of available devices:
-
Use the link Click here to add multiple recipients in the section heading.
-
Select the recipients from the Available Devices list, and then click Import.
To select or unselect all devices, right-click anywhere in the list.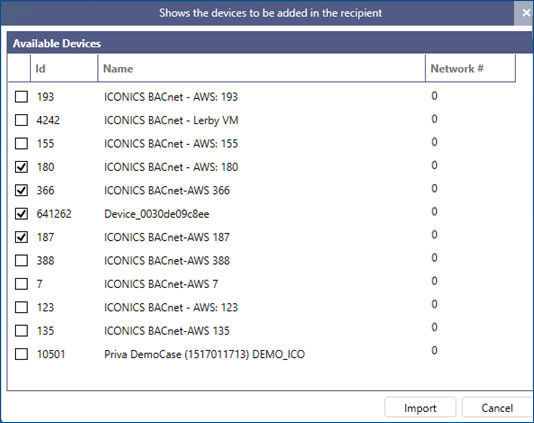
-
-
Add the devices individually:
-
At the top of the grid, select Click here to add new item.
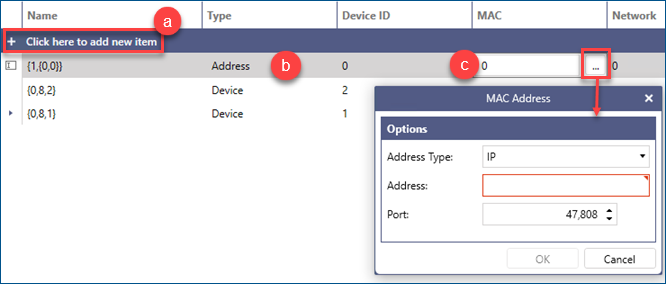
- In the Type column, select Address or Device.
-
If you have selected Device, click the Device ID field and enter the ID number. If you have selected Address, click the MAC field and then click
 to display the settings.
  View details:
 - Edit the Network Number if the recipient is located in a different network.
Right-click the item to display the delete options. -
-