Setting Up Object Scan Options
After running the network discovery and editing the network discovery results that will be stored in the database, you can use the Advanced Filter to display the object scan options.
To set up the object scan options:
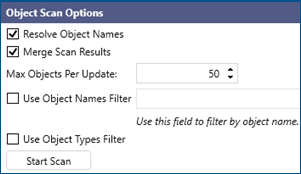
- In the Object Scan Options dialog, select Resolve Object Names to include the names of the objects. When unresolved, the format of the object names is {[ObjectType]: [DeviceInstance]}.
- Select Merge Scan Results if you are repeating the object scan and want to add the new results to the data that is already displayed in the Object Scan Results section. If this option is not selected, the new scan overwrites the previous results.
- Set the filtering options using the checkboxes Use Object Names Filter and Use Object Types Filter.
- After selecting the object names filter, specify the name in the text entry field.
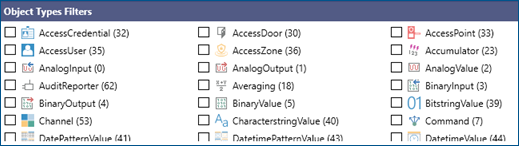
After selecting the object types filter, proceed with selecting the types from the list of available object types that appears below the Object Scan Options. Right-click any object type to select or unselect all.
- In Max Objects Per Update, set the maximum number of objects that are sent to the client in one message. If the scan discovers more objects, it sends more than one message to the same device.
-
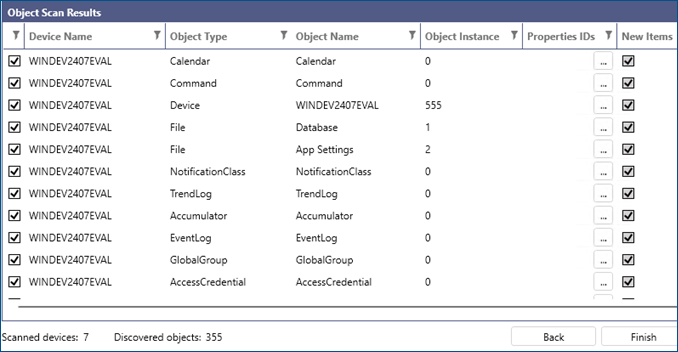
Click Start Scan. The results will be displayed in the Object Scan Results section.
-
Use the checkboxes in the first column of the grid to select the objects that you want to keep stored in the configuration database. You can filter and sort the results by each column.
Click in the Properties IDs column to view the properties' names and IDs.
 -
Click Finish to add the selected data from the Object Scan Results to the configuration database.
This action also adds the previously selected data from the Network Discovery Results grid.