Upgrading the Configuration from AlarmWorX64 Server
The Alarm Server as a replacement for the legacy AlarmWorX64 Server is using a different functional concept and simplified configuration. It introduces the Alarm type to define an alarm source behavior and structure. The alarm source is directly placed inside the alarm area(s). It is associated with the alarm type and you can configure type-specific properties only. In general, this concept allows you to design alarms based on actual project needs.
As the AlarmWorX64 Server is no longer available in Workbench for desktop, the update needs to be done on the legacy system or manually executing SQL upgrade scripts. The default location is Program Files\ICONICS\GENESIS64\Utilities\ConverterWorX\SqlScripts\AwxServer_Upgrade.
Prerequisite requirement
To be able to convert the AlarmWorX64 Server configuration to the Alarm Server, you need to use the AlarmWorX64 Server configuration database upgraded to the latest available version (10.97.3). The conversion process may complain if the difference(s) is mandatory.
To convert the AlarmWorX64 Server to the Alarm Server:
-
Open the Data Migration Utility. In the ribbon you see all the available plugins.
-
Select the AlarmWorX64 Server to Alarm Server Configuration plugin from the ribbon. The plugin dialog appears. There is a project panel on the left, settings panel on the right, and ribbon with available actions.

-
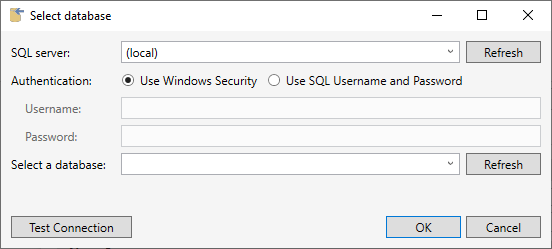
In the settings panel under the AlarmWorX64 Server section, specify the Connection string to your AlarmWorX64 database. Click the ellipsis button to open the database connection window.
-
Select the SQL server and the authentication method. For SQL authentication, you may need to specify a Username and Password. At the end, Select a database with your AlarmWorX64 Server configuration. This database has to exist and contain the mandatory tables.
-
In the Alarm Server section, specify the Connection string to the new database. The database selection window is the same as for the legacy server. The Alarm Server database doesn't have to exist, the Data Migration Utility creates it.
-
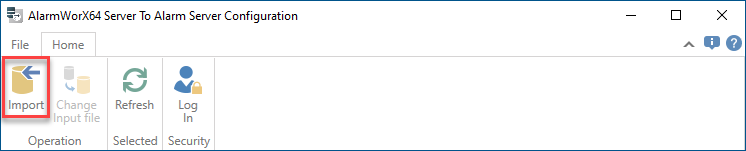
Make sure that the Import checkbox is selected (default value), and then click Import on the ribbon.
-
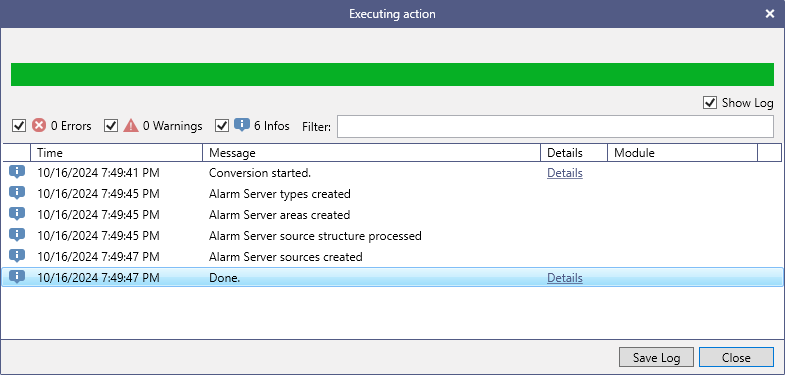
In process window check the conversion status for potential errors/warnings. You can unselect Show Log checkbox if you want to let the import process run in silent mode. You can also select level of messages you would like to see(Errors/Warnings/Info).
-
Data Migration Utility always creates a new project in Workbench. You can reuse this project or change the active databases in your existing project in Workbench.
-
Once the conversion finishes, check the system to ensure that all functions are operating correctly. Test alarms, performance, and any integrations with other systems. If needed, manually adjust via the Alarm Server point manager in Workbench.