Configuring a Collector
Collectors connect to various alarm sources such as OPC AE, OPC UA, or BACnet, and gather alarm event notifications. There is always only one automatically created in-process collector called Default Collector. You cannot delete the default collector but you can configure other remote or stand-alone collectors as needed.
To configure a new collector:
-
Open Workbench and in Project Explorer, expand your project > Alarms and Notifications > Alarm Historian, and then right-click Collectors and select Add Collector. The Collector Configuration window is displayed.
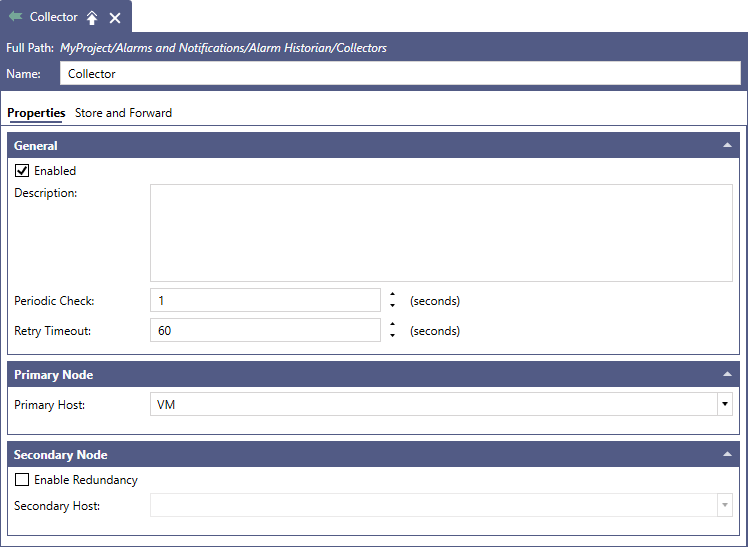
- In the Name field of the configuration dialog, enter a name for the collector.
- In the General section, make sure that the Enabled checkbox is selected (checked).
-
In the Primary Node section, enter the name of the primary server in Primary Host.
You cannot specify a primary and secondary host for the Default Collector. It copies the Alarm Historian setting. - In the Secondary Node section, select Enable Redundancy and specify the Secondary Host name to create a redundant connection.
- On the Store and Forward tab in the Directory field, enter the path to the folder for storing the data. Click
 to browse for the desired directory.
 - Edit the remaining Store and Forward settings, and then click Apply to save your changes.