Create Azure template Wizard
Create Azure template Wizard Window
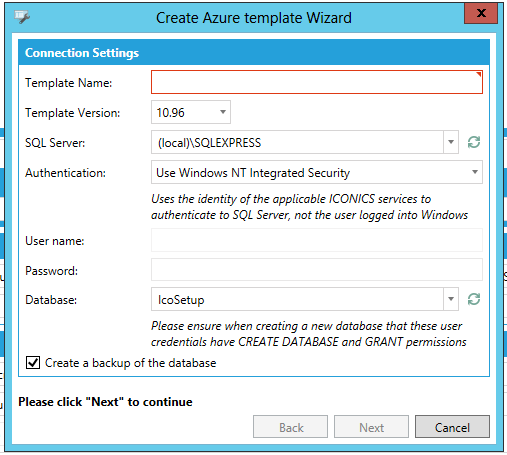
Connection Settings
-
Template Name -Enter a name for the template in the text entry field.
-
Template Version -Use the pulldown menu to select the version of the ICONICS software.
-
SQL Server -Use the pulldown menu to select a connected SQL Server. Click on the
 button to refresh the list.
 -
Authentication -Use the pulldown menu to select an available authentication method. Choose between the following:
-
Use Windows NT Integrated Security - Uses the identity of the applicable ICONICS services to authenticate to SQL Server, not the user logged into Windows.
-
Use SQL Security - Uses explicit username and password to authenticate to SQL Server.
-
Use SQL Security (contained) - Uses explicit username and password to authenticate to an existing contained database.
-
User name -Enter the user name based on the authentication method selected.
-
Password -Enter the password based on the authentication method selected.
-
Database -Use the pulldown menu to select a database from the available list. Click on the
button to refresh the list. Note:
Please ensure when creating a new database that these user credentials
have CREATE DATABASE and GRANT permissions. -
Create a backup of the database -Click this checkbox in order to create a backup of the selected database.
Once you have completed your settings, click Next to proceed. The 'Create Azure template Wizard' window progresses to the next step.
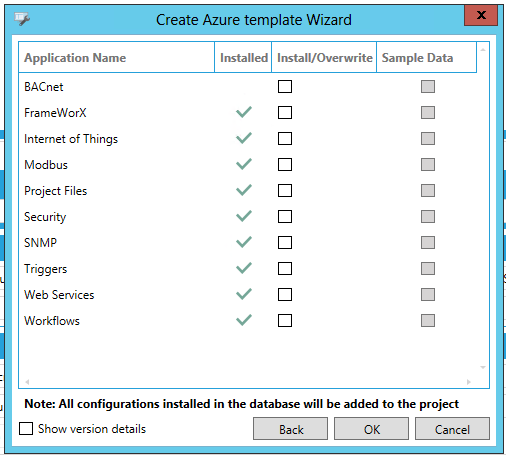
Create Azure template Wizard - Additional Properties
-
Application Name - Displays the name of the application. This field may not be editable.
-
Installed - Displays if the application is currently installed. This field may not be editable.
-
Install/Overwrite - Click the checkbox if you wish to install the application, if it has not yet been installed, or overwrite it, if it already exists.
-
Sample Data - Click this checkbox, if enabled, to include sample data within the application when it is installed (or overwritten).
-
Show version details - Show the application version details in an added column.
Click the OK button to proceed. The selected applications and data will be installed. A separate status window will then appear. Click OK to close out of both windows and return to the Workbench.
See Also: