Creating a New Schedule Configuration
In AlarmWorX Multimedia there are group schedules and personal schedules. You must set up a group schedule first, then you can add personal schedules to it. Some example schedules are provided for you by default.
You use the following steps to configure a new schedule in AlarmWorX Multimedia. The example below creates a personal schedule.
-
In Workbench64, expand the AlarmWorX64 Multimedia configuration, and then expand System Tools.
-
Right-click the Schedules folder and select
 Personal Schedule from the shortcut menu. The Calendar displays in the right pane and a New Item tab appears.
 -
Type a name for the new schedule in the Schedule Name box.
-
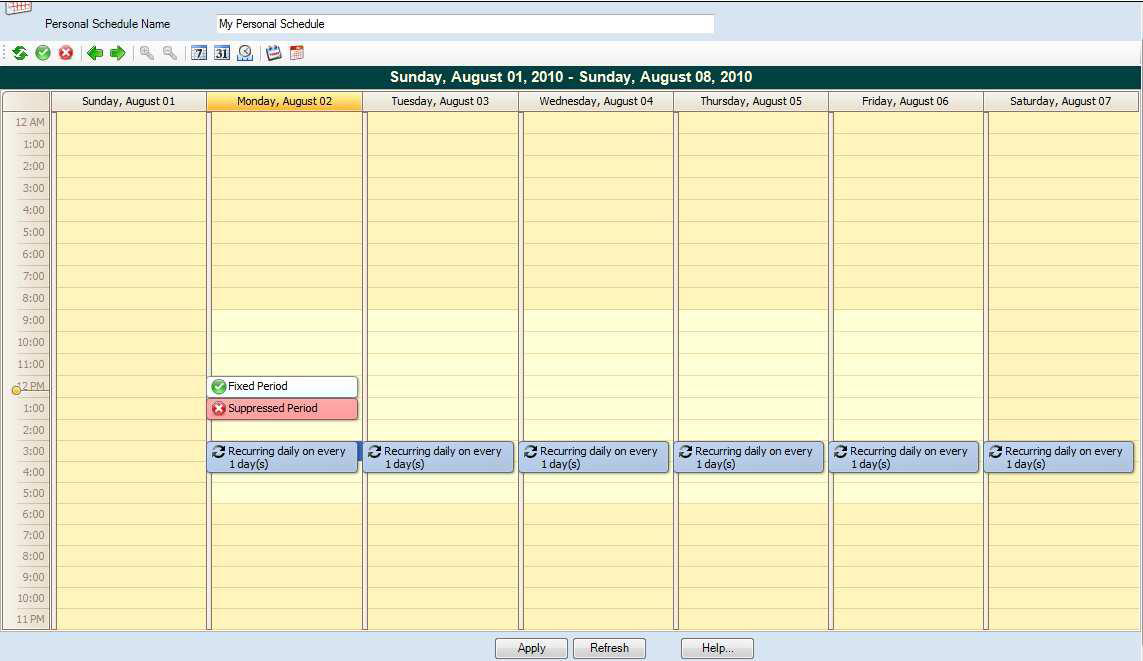
Double-click into the calendar and select one of the three options on the toolbar to create the schedule. You create the schedule by adding recurringperiods, fixedperiods, and suppressed time periods. To see a calendar with examples, .
-
Define the following information, depending on the type of period, for the schedule:
- Recurrent Period:The schedule repeats itself Daily, Weekly, Monthly, and Yearly. Define the recurrence pattern by using the following options (options vary depending on the pattern):
-
- Enter aStart Datefrom the drop-down calendar.
- For aStart Time, type in the start time (followed by AM or PM) if your system is set up for 12-hour time, or just the time if your system is set up for 24-hour time.
- Enter the Duration on the Periods Setup tab to choose the number of days, hours and/or minutes you wish to have the time block last.
- Recurrence Pattern:
If the recurrence is daily, choose whether the period recurs on every weekday or on every certain number of days.
If the recurrence is weekly, choose the number of weeks over which you wish have the time block recur. Check the day(s) on which you wish to have the time block recur.
If the recurrence is monthly, select the day of month for the number of months, or select the option from the drop-down list of every number of months.
If the recurrence is yearly, choose the month and day, or choose from the drop-down options and the number of months you wish to have the time block recur.
- Fixed Period: Select the Start day and time along with the End day and time for the schedule.
- Suppressed Period: Choose the start and end day and time when you do not want agents to send an alarm message.
-
To add a new time block, click on a new row.
-
To delete a time block, click inside the far left gray cell for that block to highlight the entire row, and then press the Delete key.
-
Click the Apply button to save your changes.
|
|
Note: If you set up a time calendar in a group schedule and in a personal schedule, then the personal schedule will include all scheduled times from both the group schedule and the personal schedules. |
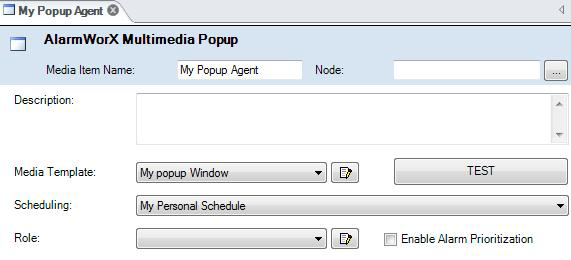
- You can now use the schedule for any Multimedia Agent by selecting it from the Scheduling drop-down list, as shown below.
Applying a Schedule to a Multimedia Popup Agent

- In the tree control, expand Default and select your action sets. For each, make sure the Ignore Schedule option is not checked. Then click Apply.
Action Set's Ignore Schedule Checkbox (circled, on the right)

- Make sure that UAC is turned off on your computer. Then start your Multimedia Server and test out this scheduled item.
See also:
