 Language Support
The language/locale setting in Windows is based on an ISO standard. A locale is similar to a culture, differentiating English (United States) from English (United Kingdom), and there are multiple defined settings available in Windows. When you select a language in Windows, the user interface retrieves the translations for the language aliases and caches the information locally on the client displaying the translations in your display. That language applies to a user account in Windows.
GENESIS64 uses the language/locale setting to determine the properties it should set at runtime. When you change the current language, GENESIS64 returns the language setting for that language from the alias object needed for the language translation, or reads the unit binding for the current language to obtain the correct unit conversion function to use. Although GENESIS64 uses the language setting to determine the program action, it doesn't use any other Windows features or dictionaries to supply the appropriate conversions. In order for your displays to have the correct language alias support you need to specify the translations or conversions in the different languages within the LAS configurator.
Language aliases are applied to the client based on the active SQL database. There is one and only one SQL database that is active at any one time, and that database can use one and only one language setting to determine that data displayed on the client. There is no mixing of languages allowed on the same display at the same time. That means that when you use a button pick action to change to another language/locale all of the aliases defined in that display change to the currently defined language.
|
|
Note. Each Language Aliasing server supports one and only one language setting at a time. If you switch languages at the SQL server, then all language aliases that reference that server change to that new language. |
When you install GENESIS64, it creates the LAS SQL database and creates within it nine (9) default languages: English (United States), Dutch (Netherlands), Czech (Czech Republic), French (France), German (Germany), Italian (Italy), Russian (Russia) Spanish (Spain), and Chinese (People's Republic of China). You can add additional languages to the list, or delete the ones you don't need. There is no defined Language Group object, so all Language objects appear in view when you open the Language node in the LAS tree control.
To Start the Language Aliasing Configurator:
-
From the Workbench, expand your Project in the Tree Explorer, then expand Platform Services.
-
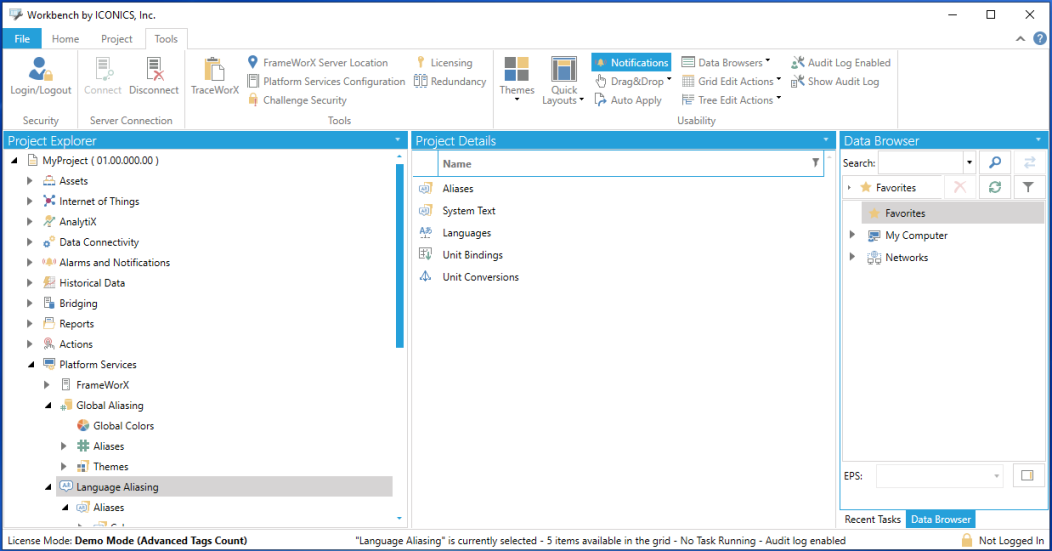
You'll see the Language Aliasing node of the Tree Explorer
The screen consists of a split window with a tree control in the left-hand pane and the configurator in the right-hand pane.
Language Aliasing in the Workbench

To Add a New Language to the LAS:
-
Open the Language Alias provider.
-
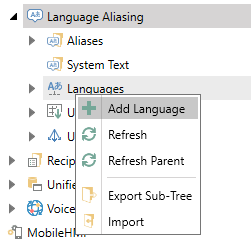
Right click on the Languages node and select Add Language.
Add Language

-OR-
Select the Languages node, then click on the Add Languages button in the Edit section of the Home ribbon in the Workbench.
Add Language Button

-
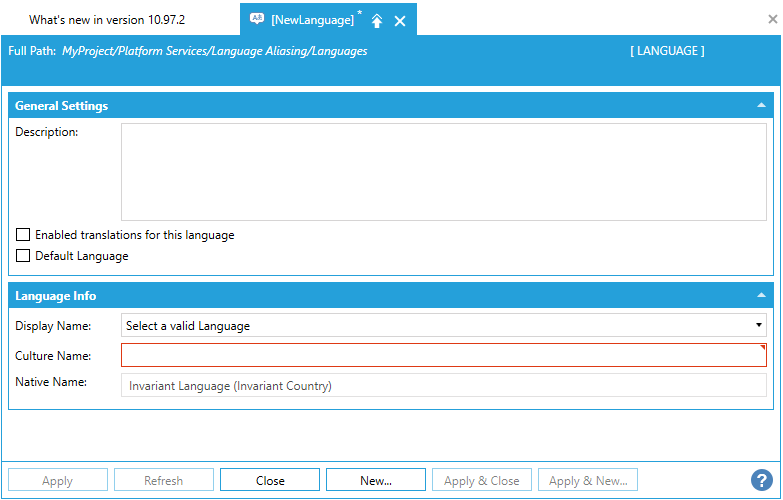
This opens the Language properties window in the right side of the Workbench, as shown below. Enter a Description of the language in the text entry field (optional).
New Language Properties Window

-
You can click the Enabled translations for this language check box to enable the language (the default), or disable the check box if you want to define the language but not use it.
-
To set this as the default language used by LAS, enable the Default Language check box.
For any language field that you don't define, the default language setting is used. This shows up in the Alias and UnitBinding forms in the Alias Translations and Language Unit Conversions sections, respectively.
-
Click on the Apply button to save your settings.
See Also: